Adjusting the height of the carriage, Adjusting the height of the carriage -12 – Yokogawa µR20000 User Manual
Page 43

4-12
SM 04P02B01-01E
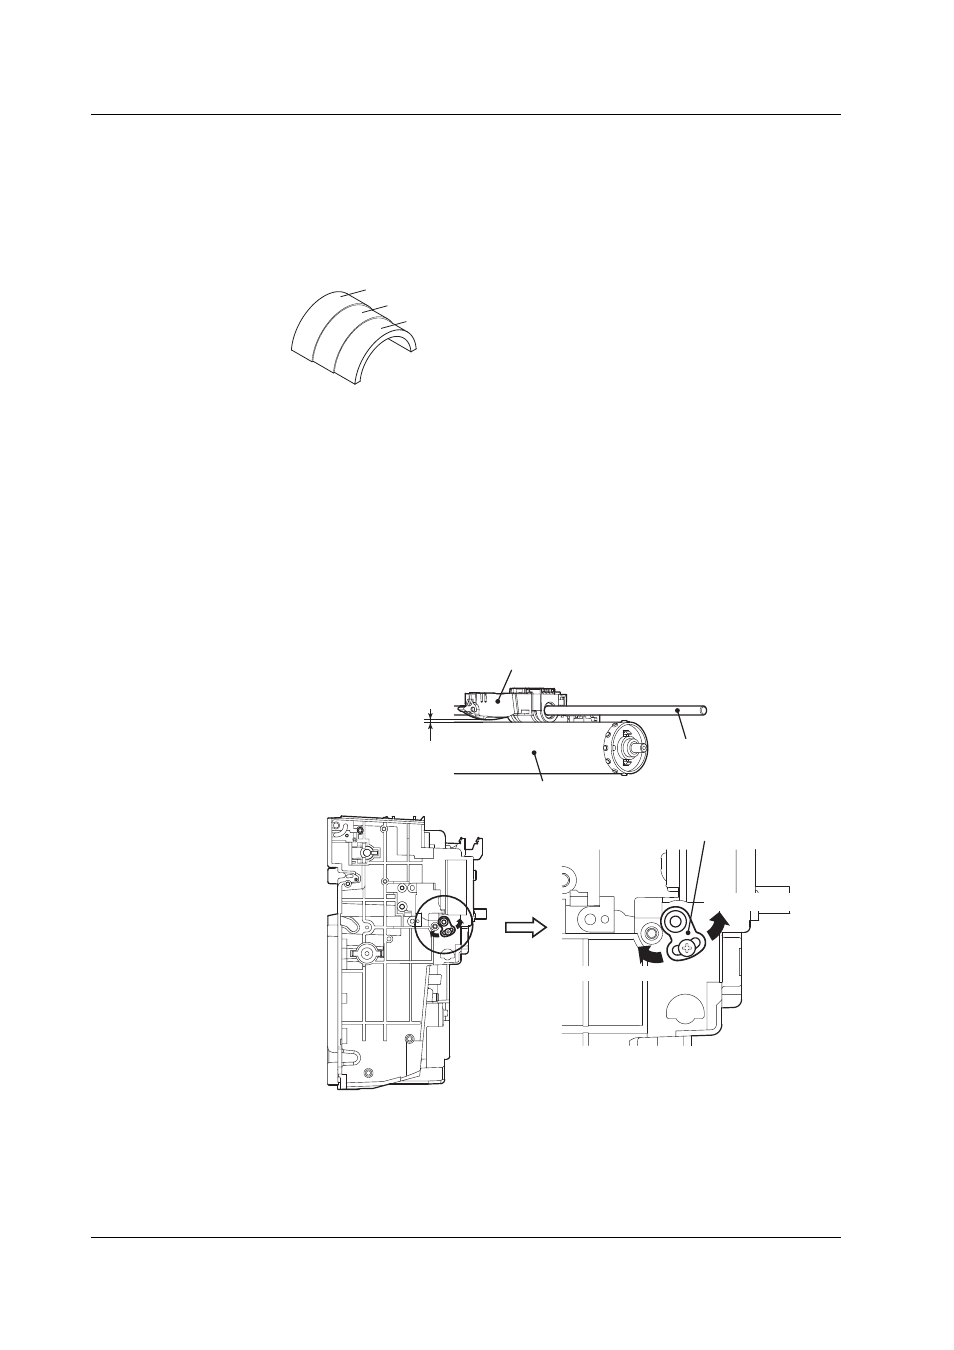
Adjusting the Height of the Carriage
● Overview
This is an adjustment of the clearance between the carriage and the platen. The
adjustment is performed when the Adjust Shaft Assembly is replaced.
● Tools Used
Gauge (B9901JZ: Carriage height adjustment clearance gauge)
1.1 mm thick (tolerance: −0.005 to −0.03 mm)
1.2 mm thick (tolerance: −0.01 to −0.035 mm)
1.3 mm thick (tolerance: −0.005 to −0.03 mm)
● Reference Value
Adjustment reference value: 1.2 mm ±0.1 mm
● Procedure
1.
Pass the Main Shaft and Adjust Shaft Assembly through the hole in the carriage
assembly while inserting them into the internal unit.
2.
Move the carriage near the center.
3.
Remove any chart from the Chart Cassette Assembly and install the assembly.
4.
Align the Gauge with the Platen, then adjust the angle of the Adjust Shaft
Assembly so that the clearance between the Carriage Assembly and the Platen
is within the reference value range, and secure with a screw.
Screw tightening torque: 0.59 to 0.69 N·m
1.2 mm
±0.1 mm
Left (carriage lowers)
Right (carriage rises)
Carriage Assembly
Adjust Shaft Assembly
Platen
Main Shaft
4.3 Adjustments to the Dot Model
