3 bus address setup, Bus address setup -4 – Yokogawa AXFA14G/C User Manual
Page 28
IM 01E20F12-01E
5-4
5. EXPLANATION OF BASIC ITEMS
5.3 Bus Address Setup
This section describes how to set the bus address by
FieldMate R1.03. The AXF also has a hardware slide
switch. If the bus address is set by FieldMate R1.03,
the No. 8 switch of the hardware slide switch must be
set OFF beforehand. Refer to section 3.4 for its detail.
(1) Bus Address change for AXF
In the DTM Works window, click [Device]
→ [Param-
eter]
→ [Configuration].
Figure 5.3.1
DTM Works window
The DTM Works shows the following window.
Figure 5.3.2
Query Device window
Click [Query Device PB] at the Navigator tree.
The DTM Works shows parameters for [Query Device
PB] in the Parameter set application.
Firstly, the [Target Mode] on this application must be
changed from [AUTO] to [Out of Service (O/S)], and
press the [Enter] key after this change. The DTM
Works starts to communicate with the AXF, and
[Mode Block: Actual] parameter is changed to [Out of
Service] after finish this communication.
In the meantime, the AXF starts to generate its alarm
message and is displayed to its LCD at the same time.
Figure 5.3.3
Target Mode change
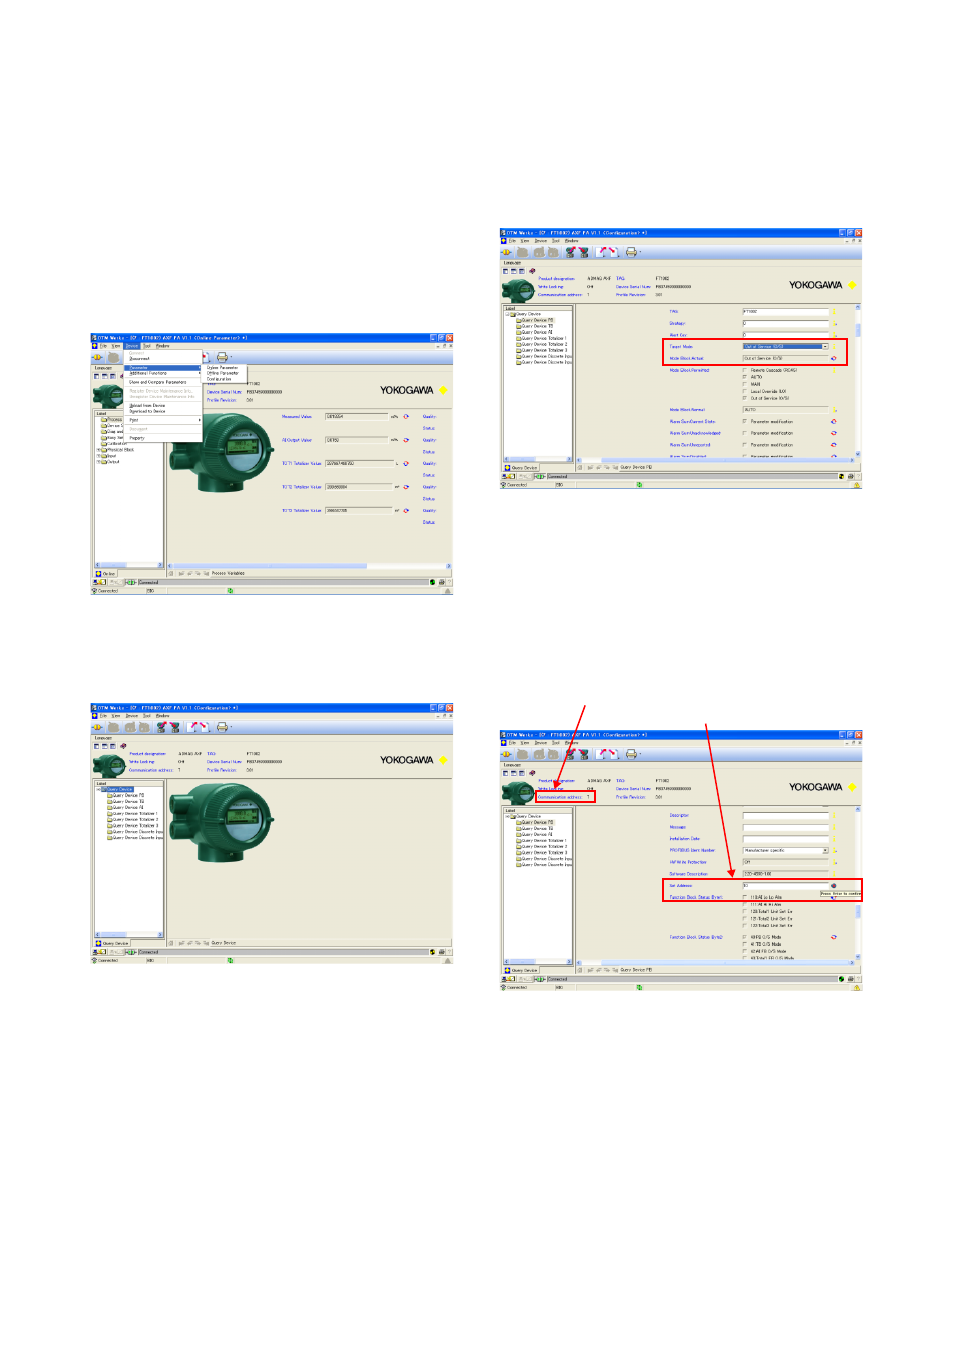
The bus address setting function is located down below
in the [Query Device PB] menu.
Entry the adequate bus address at [Set Address] and
press [Enter] key. The following figure is a case of
changing from 7 to 10.
New Bus Address setup for AXF
Current Bus Address for AXF
Figure 5.3.4
Bus Address change for AXF