E-Mon E-PS-S-HV-RTU User Manual
Page 158
Chapter 8 Retrieving and Storing Files
Using the Upload Scheduler
158
PowerSmart Socket Power Quality Meter
2. Click Add Site, point to the site database for which you
want to organize the schedule, and then click OK.
3. Click Browse and select a database for storing
retrieved data, or type the name for a new database,
select a directory where you want to save it, and then
click OK.
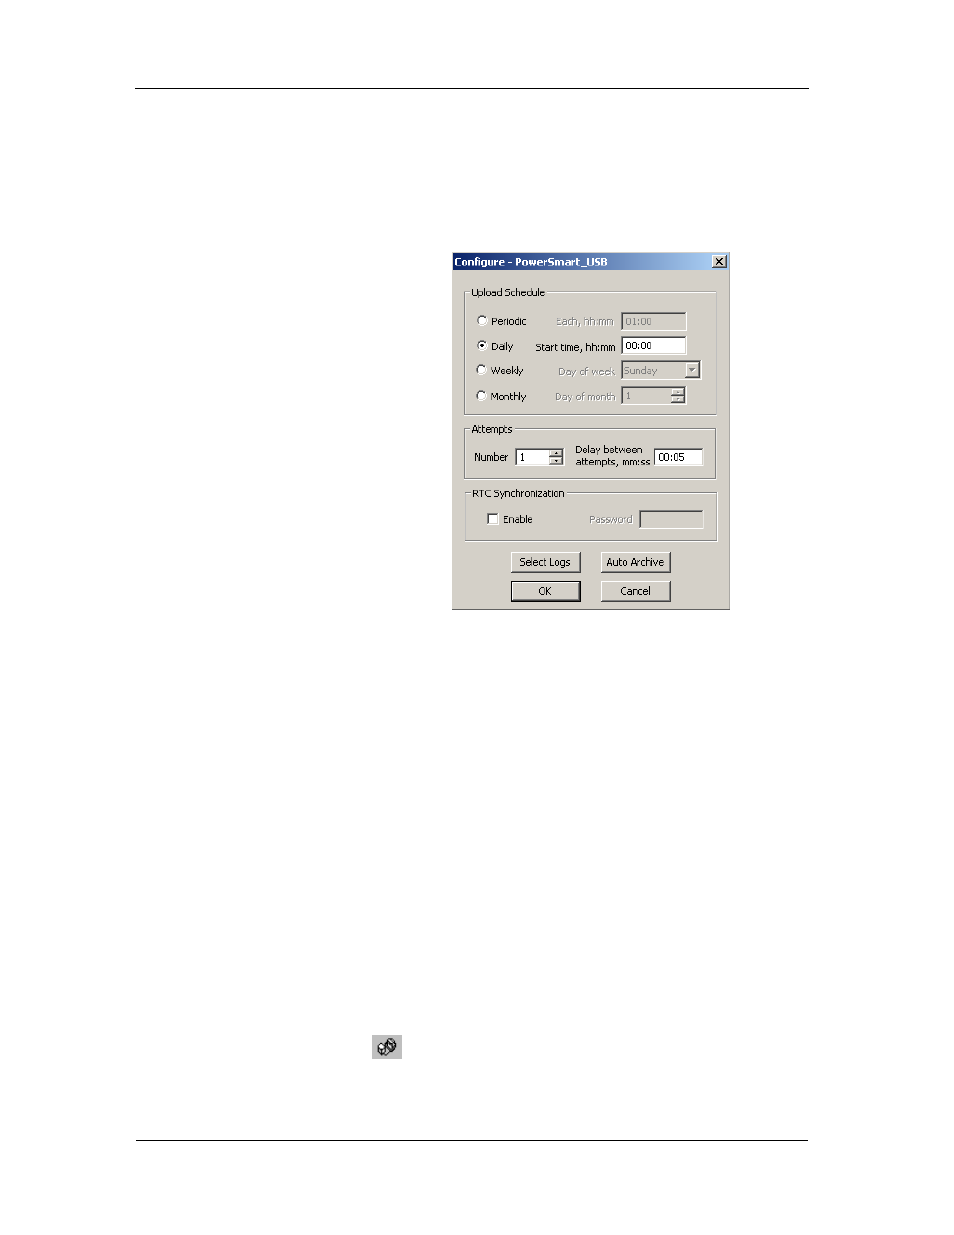
4. Click Configure or double click on the site row.
5. Select a daily, weekly or monthly schedule, and adjust
the start time. If you wish to upload data periodically
in predefined intervals, click on “Periodic” and define
the time period in hours and minutes.
6. Select the number of attempts to upload data in the
event of temporary communication problems or
unavailability of your device, and the delay between
attempts in minutes and seconds.
7. If you wish to use the schedule to synchronize the
device clock with your PC, check the “RTC
Synchronization Enable” box. If your device is
password protected by a communications password,
type in the password you set in the device to allow
Power Software to update the clock.
8. Click on the Select Logs button, check the boxes for
logs you want to upload on a schedule, and then click
OK.
9. Check the Enabled box at left to activate a schedule for
the device.
10. Click Close to store your schedule.
To keep the Upload Scheduler running, the On-line button
on the Power Software toolbar must be checked all the
time. If you uncheck it, the scheduler stops operations. This