Magnum Venus Plastech HIS INSTRUCTION MANUAL User Manual
Page 9
- 9 - H.I.S. Instruction Manual
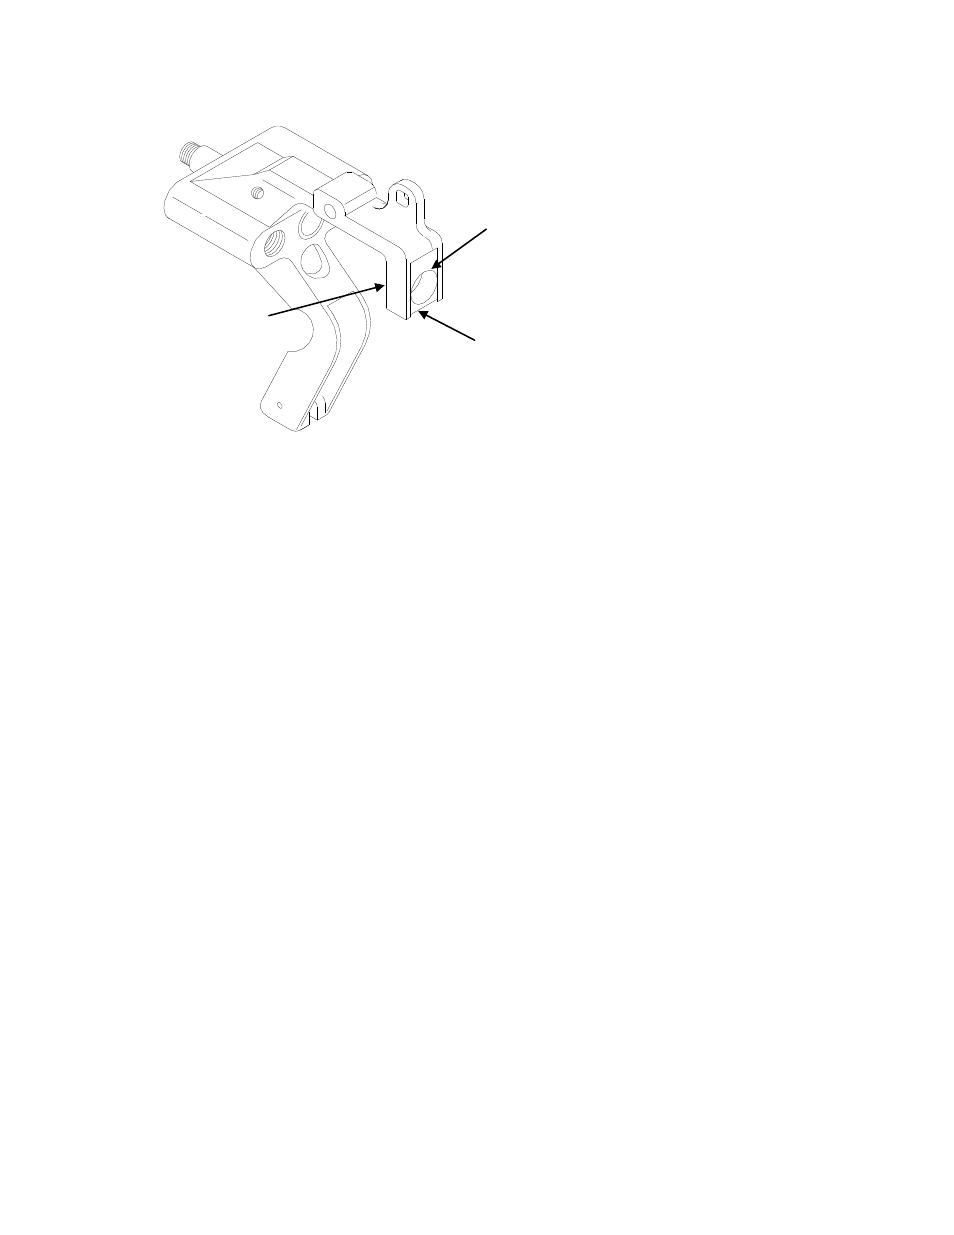
The re-work shown here is required to convert old handles to fit current flush fitting.
FLUSH HOSE FITTING CHANGE
– HANDLE CHANDES
DETAIL Vl
2. If flush h
ose in ¼” diameter white hose, attach to center elbow on gun head.
Tighten fittings at this time.
3. Blue catalyst hose with red rubber shield attaches to catalyst hose nipple on left
side of gun head (catalyst side is marked). Tighten firmly.
4. Black resin hose attaches to right side of gun head. Tighten firmly.
5. Attach Red air hose to threaded fitting on back of gun handle. It may be necessary
to twist air hose circularly, left or right, before tightening to place gun and chopper
in line with boom.
Fasten chopper cable hanging from boom end using bolt common to chopper base plate
and gun handle. Attach nipple of pick-up hose into 90-degree elbow at tip of standpipe
and tighten elbow with a large wrench.
Attach flush tank bracket to cart platform and place flush tank in. Attach nipple on end or
¼” red air hose from air control valve on manifold to the fitting marked “in” on flush tank
and tighten.
Oiler screws into the air inlet on resin pump cylinder head, with arrow on top of oiler
pointing to pump. Attach ½” red air hose from manifold to nipple on side of oiler and
tighten fitting.
From back of boom, route red air hose through top ring of pump column and fasten tight
to nipple on upper right hand regulator of manifold block (Chopper only).
Pass solvent hose down through both rings on column
and fasten to nipple marked “out”
on flush tank and tighten. Run the black resin hose through top two rings on pump
FILE OR MACHINE THIS
SURFACE FLAT
REMOVE .062 (1/16) INCH FROM
BOTTOM OF THE GUN FLANGE
TO ALLOW CLEARANCE FOR
FLUSH FITTING.
REMOVE DRAFT ANGLE
FROM BACK SIDE OF GUN
HEAD FLANGE. (FILE OR
MACHINE FLAT)