Burkert Type 8791 User Manual
Page 23
23
Attachment and assembly
→
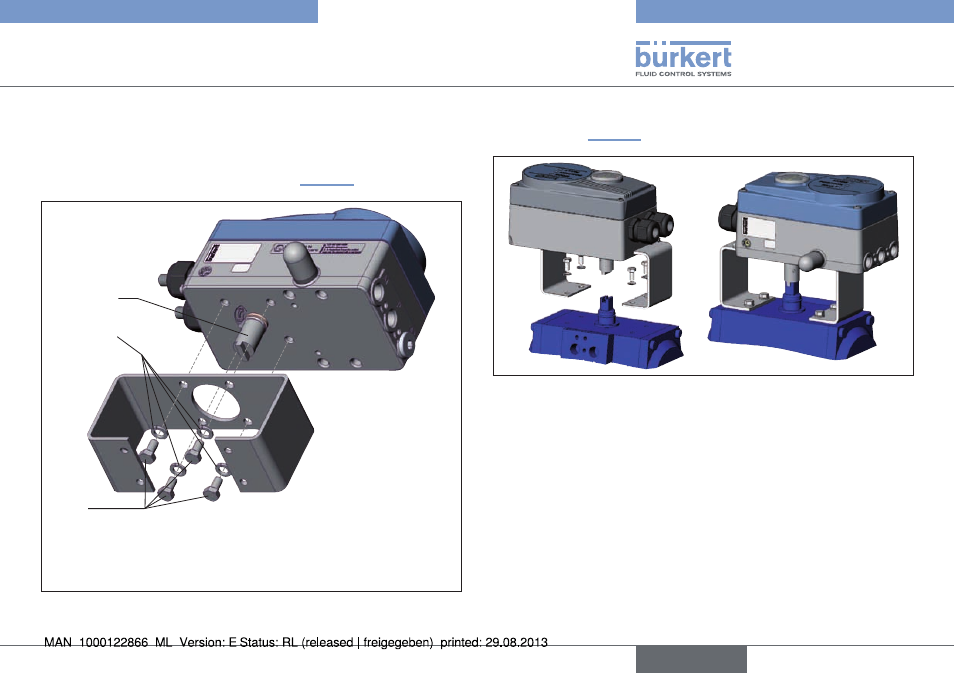
Assemble the multi-part assembly bridge* suitable for the
actuator.
→
Attach the assembly bridge to the positioner using 4 cheese-
head screws
③
and circlips
④
③
④
*
The assembly bridge consists of 4 parts
which can be adjusted to the actuator by
varying the arrangement.
①
Fig. 13: Attach assembly bridge (schematic representation)
→
Place positioner with assembly bridge on the rotary actuator and
attach (see “Fig. 14”).
Fig. 14: Rotary actuator attachment
english
Type 8791
See also other documents in the category Burkert Sensors:
- Type 1062 (112 pages)
- Type 8750 (82 pages)
- Type 1050 (4 pages)
- Type 8750 (64 pages)
- Type 8681 (40 pages)
- Type 8681 (90 pages)
- Type 8791 (4 pages)
- Type 8798 (106 pages)
- Type 8798 (2 pages)
- Type 8792 (252 pages)
- Type 8718 (34 pages)
- Type 8792 (118 pages)
- Type 8791 (15 pages)
- Type 8792 (136 pages)
- Type 8791 (184 pages)
- Type 8791 (28 pages)
- Type 8791 (21 pages)
- Type 8791 (154 pages)
- Type 0911 (76 pages)
- Type 0911 (46 pages)
- Type 0911 (64 pages)
- Type 0911 (84 pages)
- Type 1058 (31 pages)
- Type 1060 (4 pages)
- Type 1066 (112 pages)
- Type 1067 (158 pages)
- Type 1077-2 (33 pages)
- Type 1094 (12 pages)
- Type 1094 (41 pages)
- Type 1094 (82 pages)
- Type 1094 (126 pages)
- Type 1115 (25 pages)
- Type 1150 (99 pages)
- Type 1541 (2 pages)
- Type 5142 (6 pages)
- Type 8619 (40 pages)
- Type 8619 (134 pages)
- Type 8620 (177 pages)
- Type 8622 (4 pages)
- Type 8623 (130 pages)
- Type 8623 (90 pages)
- Type 8625 (118 pages)
- Type 8624 (124 pages)
- Type 8718 (254 pages)