Burkert Type 3236 User Manual
Page 24
24
Assembly
Type 2035 / 3236
8.2.1. installation position
• The piston-controlled diaphragm valve can be installed in any
position, preferably with connection B / muffler downwards.
• Installation for self-drainage of the body:
see chapter "5.3. Valve self-draining"
8.2.2. preparatory work
→
Clean pipelines (sealing material, swarf, etc.).
→
Support and align pipelines.
devices with welded body
note!
damage to diaphragm or actuator.
▶ Before welding in the body disassemble the actuator and
diaphragm.
Remove the actuator from the valve body:
→
Move the actuator to the upper actuator position (CFA, NC: by
applying pilot pressure; CFB, NO: by removing the pilot pressure).
→
Mark the position of the actuator in relation to the valve body.
→
Unscrew the four body screws / nuts that connect the valve body
with the actuator. Remove the actuator and the diaphragm.
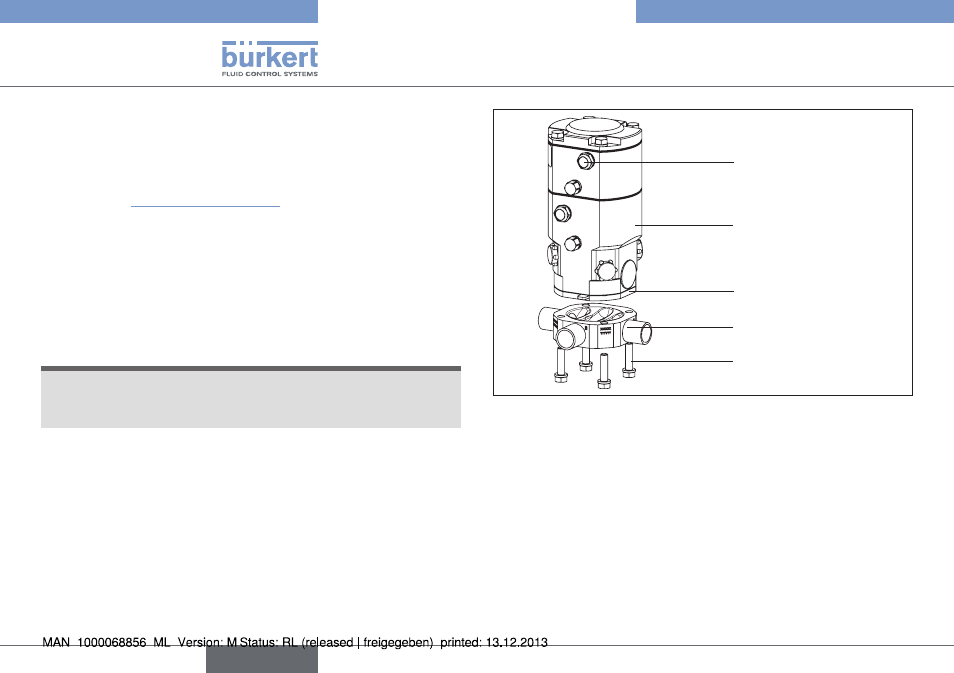
Actuator
Body screws and
washers
Diaphragm
Valve body
Silencer
Fig. 23: Assembly
8.3.
installation
8.3.1. installing the body
Welded body
→
Weld valve body in pipeline system.
Other body designs
→
Connect body to pipeline.
english