Wall mounting the tlp 1000mv – Extron Electronics TLP 1000TV User Guide User Manual
Page 48
Wall Mounting the TLP 1000MV
The TLP 1000MV can be mounted in the wall or through furniture.
To mount the TLP 1000MV directly into a wall, follow these steps.
1.
Determine the best location for the TLP 1000MV.
2.
Use the template provided to mark the wall and then cut a hole 10.22 inches
(25.96 cm) wide x 7.16 inches (18.2 cm) high.
3.
Unpack the TLP 1000MV and remove the faceplate.
4.
Ensure all the locking arms are flush with the unit and check that the TLP 1000MV can
fit into the hole. If necessary, use a rasp or a coarse file to enlarge the hole.
5.
Run the network cable and video connectors inside the wall to the hole, leaving
enough slack in the cables to connect them to the back of the TLP 1000MV.
6.
Plug the cables into the
(see pages 6 - 8).
•
to the network with a straight-through cable, providing
both a network connection and power from a Power over Ethernet power supply.
•
source to the RJ-45 MTP input.
•
Optional: Extron recommends using the Power over Ethernet power supply
provided. However, you may use the LAN port only as a network connection and
connect a 12 VDC, 1.0 A power supply (not provided) to the 2-pole captive screw
on page 7 for very important information about
power supplies.
7.
Push excess cables into the wall cavity.
8.
Ensure the five locking arms (three at the top and two at the bottom) are flush with
top and bottom of the TLP 1000MV and fit the touchpanel into the hole.
9.
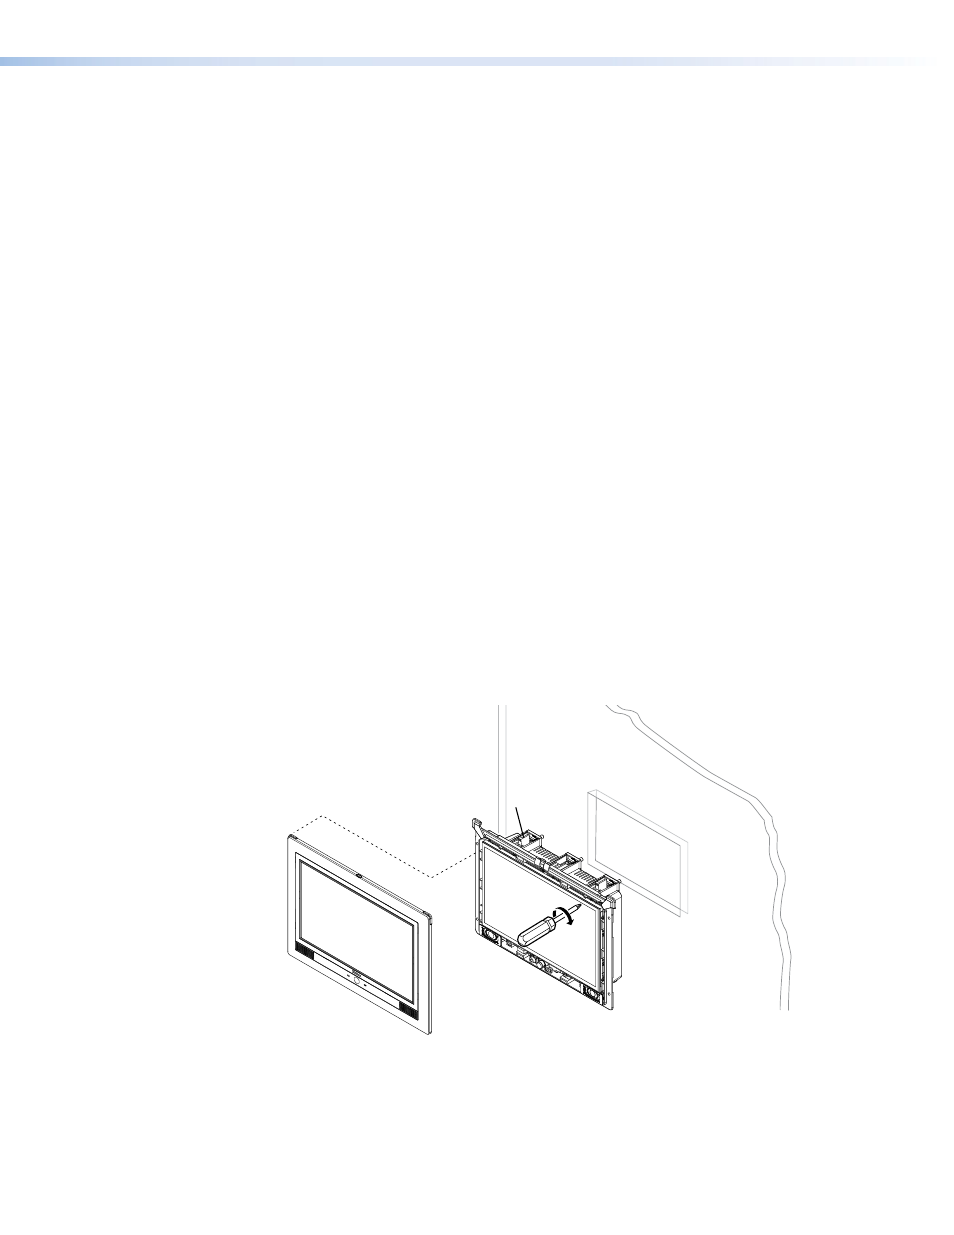
Using a Phillips head screwdriver, tighten the screws for the locking arms. As the
screws tighten, the locking arms rotate behind the wall and hold the unit in place. Do
not overtighten the screws as this can damage the locking arms or the wall.
Faceplate snaps to unit
(4 places on each side).
Tighten screws to
rotate locking arms.
Locking Arms
(3 on top edge,
2 on bottom edge)
Figure 41.
Securing the TLP 1000MV to a Wall with Locking Arms
10.
If required, perform the
(see page 14).
11.
Replace the faceplate by pressing the catches on the faceplate into the corresponding
holes on the front of the panel (four places on each side).
TLP 1000MV and TLP 1000TV • Mounting
42