Replacement procedures, continued, Turn ac circuit breaker off, Place rectifier power switch in stby – GE Industrial Solutions GPS 4848_100 Users Guide (dual rectifier shelf) User Manual
Page 76
Galaxy Power System 4848/100 with Dual Rectifier Shelf
11 - 4 Maintenance and Replacement
Issue 5 September 2011
Replacement Procedures, continued
!
Installing or Replacing a Rectifier, continued
Step
Action
3
Turn ac circuit breaker OFF.
4
Place rectifier power switch in STBY.
5
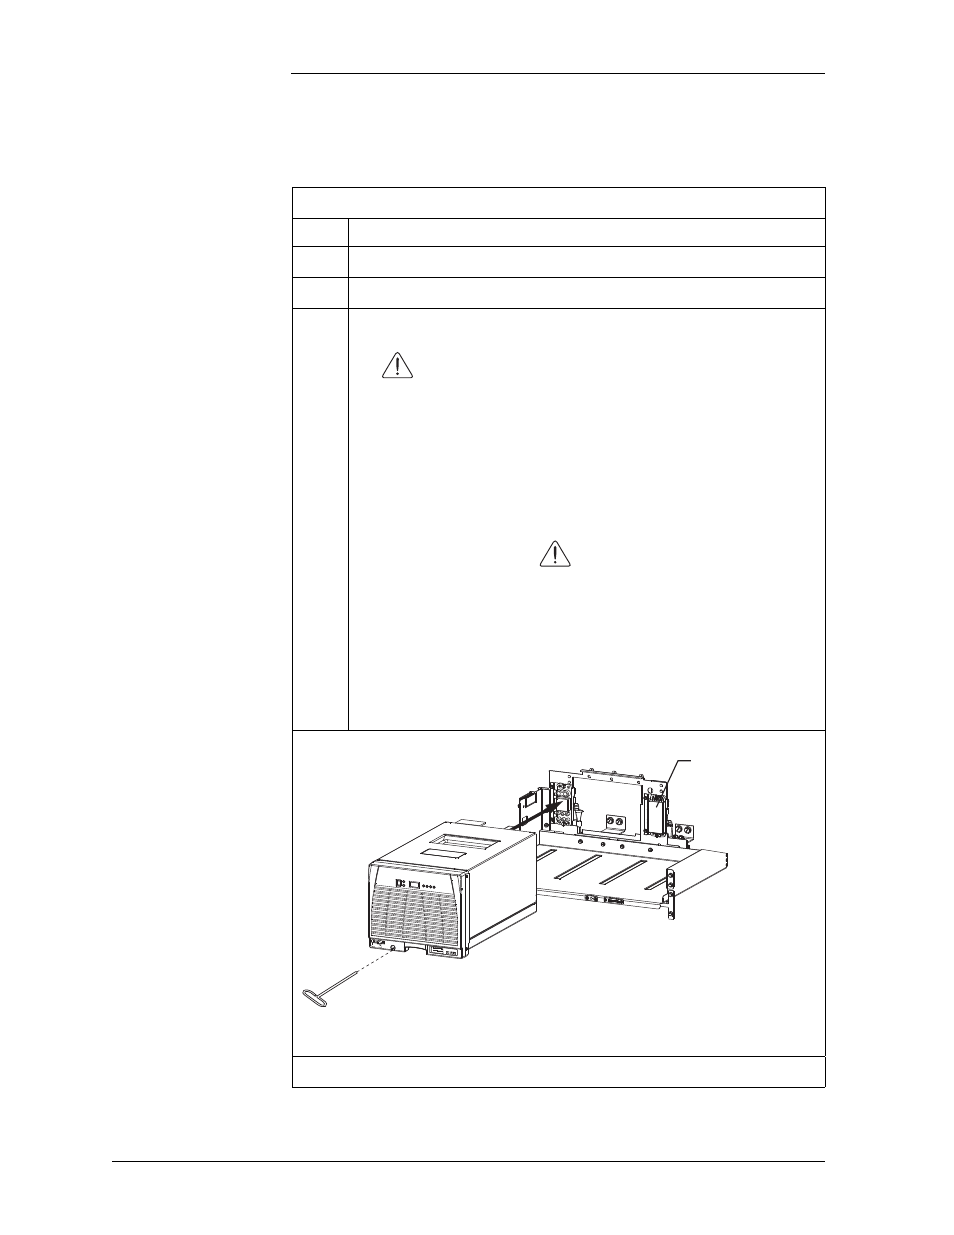
Install the rectifier. See Figure 11-1.
a.
Verify that the output circuit breaker is OFF and that
the rectifier power switch is in the “Standby” position.
b. Slide the unit slowly onto the shelf until it contacts the rear
connector.
Note: Install rectifiers, starting at the bottom left position
and working to the right, and then upward.
Caution
Verify that the rectifier chassis slides rearward evenly on
the left and right sides as the locking screw is turned. DO
NOT USE EXCESSIVE FORCE DURING THIS
PROCEDURE! If the rectifier-to-shelf mating process
appears to bind, back the unit out and start over. Avoid
stripping the threads of the locking screw by stopping
when the rearward progress of the rectifier ceases.
REMOVE
BEFORE
ADDING
SECOND
RECTIFIER
REMOVE
BEFORE
ADDING
SECOND
RECTIFIER
ABC12345678
Model: 595LTA
480V
48V
RECTIFIER
KZO41234567
SX:X
DC
220A/48V
ON
STBY
ALM
LIM
FAN
ALM
FAN
ALM
BST
Rectifier Shelf
in Cabinet
Remove connector
cover to install a
rectifier into position 2
Rectifier
Position 1
Insertion Tool
Figure 11-1: Installing a Rectifier in a Rectifier Shelf
Continued on next page.