EVS Xedio Dispatcher Version 4.35 - October 2013 User Manual User Manual
Page 23
a. Specify the same information for the low resolution files as for the high-resolution
file.
b. If you want the AutoFileImporter application (AFI) to scan the generated files and
reference them in the Xedio database, select the Reference Hi/Lo files to Xedio
option and specify the folder that AFI will have to scan to find the jobs to perform.
c. If you select an Avid OPAtom format, the Export to Avid (Interplay or AAF)
option appears. Select it if you want to export to Avid. Further configuration will be
done in steps 10 and 11.
d. Click Next.
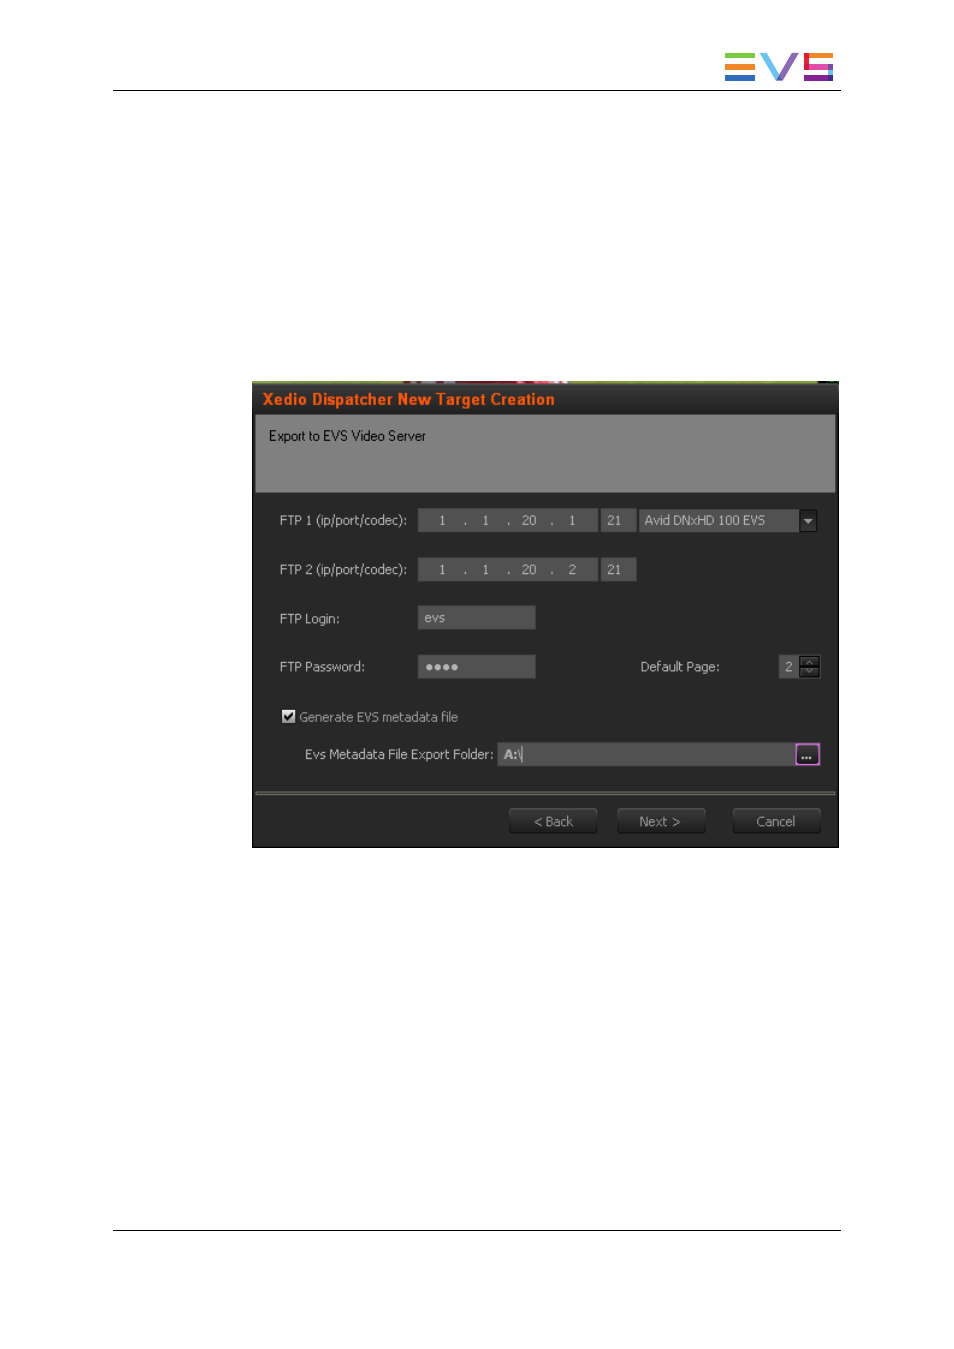
5. The Export to EVS Video Server dialog box displays if you have asked to generate
clips.
a. Specify both IP addresses of the EVS video server, the codec used on the server,
the FTP login and password, the default page on which the generated clip will be
stored.
b. If you want to generate an EVS metadata file (XML file), that will contain the file
definition, select the Generate EVS metadata file option, and specify the folder
where the file should be stored.
c. Click Next.
6. If you have asked to use a second EVS server as backup, the Export to 2
nd
EVS
Video Server dialog displays.
a. Provide the same information as for the main EVS server.
b. Click Next.
USER MANUAL Xedio Dispatcher 4.35
3. Configuration and Customization
13