Route ip setup, Tcp/ip ethernet setup and dhcp, 3 route ip setup – ZyXEL Communications Prestige 645R User Manual
Page 47: 4 tcp/ip ethernet setup and dhcp
Prestige 645 ADSL Internet Access Router
Internet Access
3-5
3.3 Route IP Setup
The first step is to enable IP routing in Menu 1 - General Setup.
To edit menu 1, enter 1 in the main menu to select General Setup and press [ENTER]. Set the Route IP
field to Yes by pressing the [SPACE BAR].
Figure 3-3 Menu 1 – General Setup
3.4 TCP/IP Ethernet Setup and DHCP
You will now use menu 3.2 to configure your Prestige for TCP/IP.
To edit menu 3.2, enter 3 in the main menu to open Menu 3 - Ethernet Setup. In menu 3, select 2 and press
[ENTER]
.
The screen now displays Menu 3.2 - TCP/IP and DHCP Ethernet Setup, as shown next
Figure 3-4 Menu 3.2 – TCP/IP and DHCP Ethernet Setup
Menu 1 - General Setup
System Name= P645
Location= location
Contact Person's Name= name
Route IP= Yes
Route IPX= No
Bridge= No
Press ENTER to Confirm or ESC to Cancel:
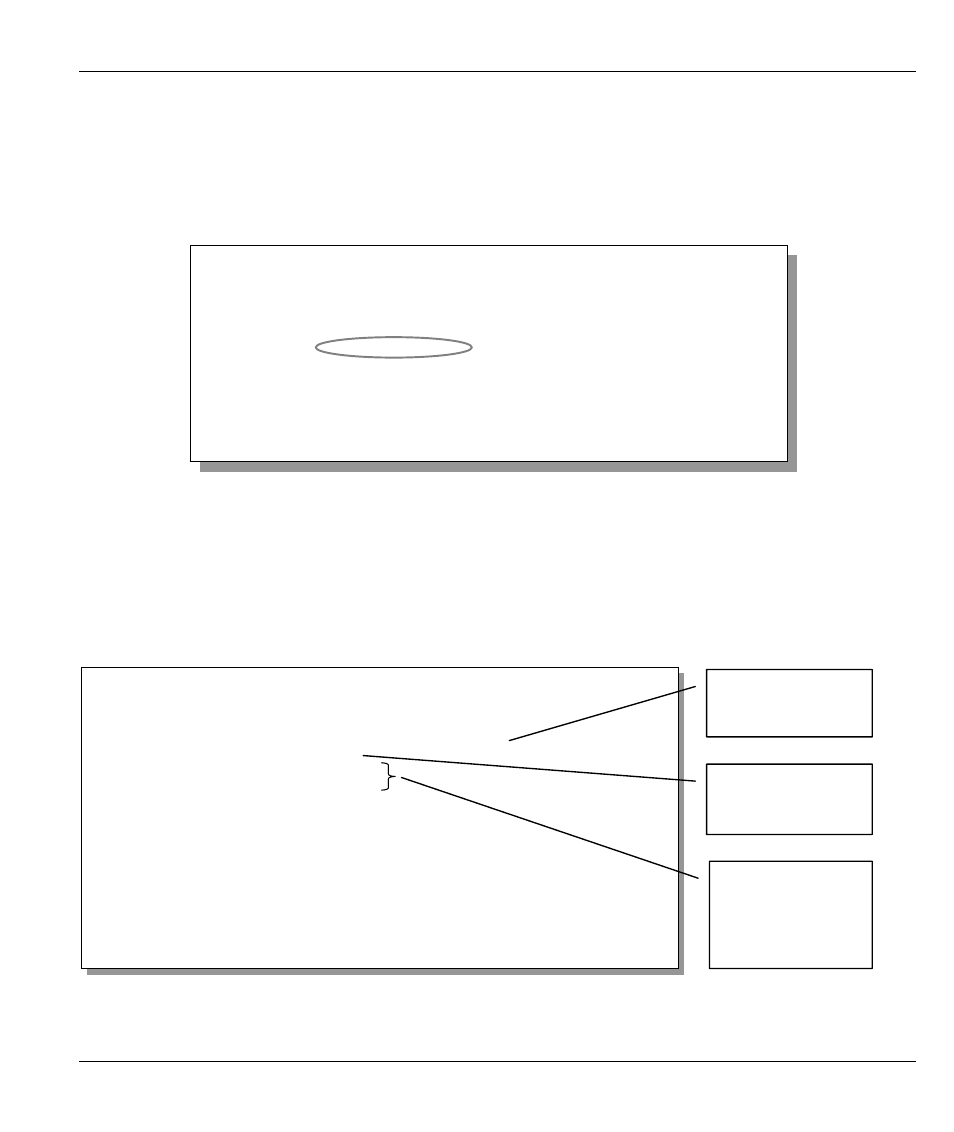
Menu 3.2 - TCP/IP and DHCP Ethernet Setup
DHCP Setup:
DHCP= Server
Client IP Pool Starting Address= 192.168.1.33
Size of Client IP Pool= 32
Primary DNS Server= 0.0.0.0
Secondary DNS Server= 0.0.0.0
Remote DHCP Server= N/A
TCP/IP Setup:
IP Address= 192.68.1.1
IP Subnet Mask= 255.255.255.0
RIP Direction= Both
Version= RIP-1
Multicast= None
IP Policies=1,2,7,8
Edit IP Alias= No
Enter here to CONFIRM or ESC to CANCEL:
First address in
the IP Pool
Size of the IP
Pool
If set to 0.0.0.0
the Prestige acts
as a proxy DNS
Server