Setting up ez routing for a bounce – Roland VS-2480 User Manual
Page 198
14—Working with Track Channels
198
www.rolandus.com
Roland VS-2480 Owner’s Manual
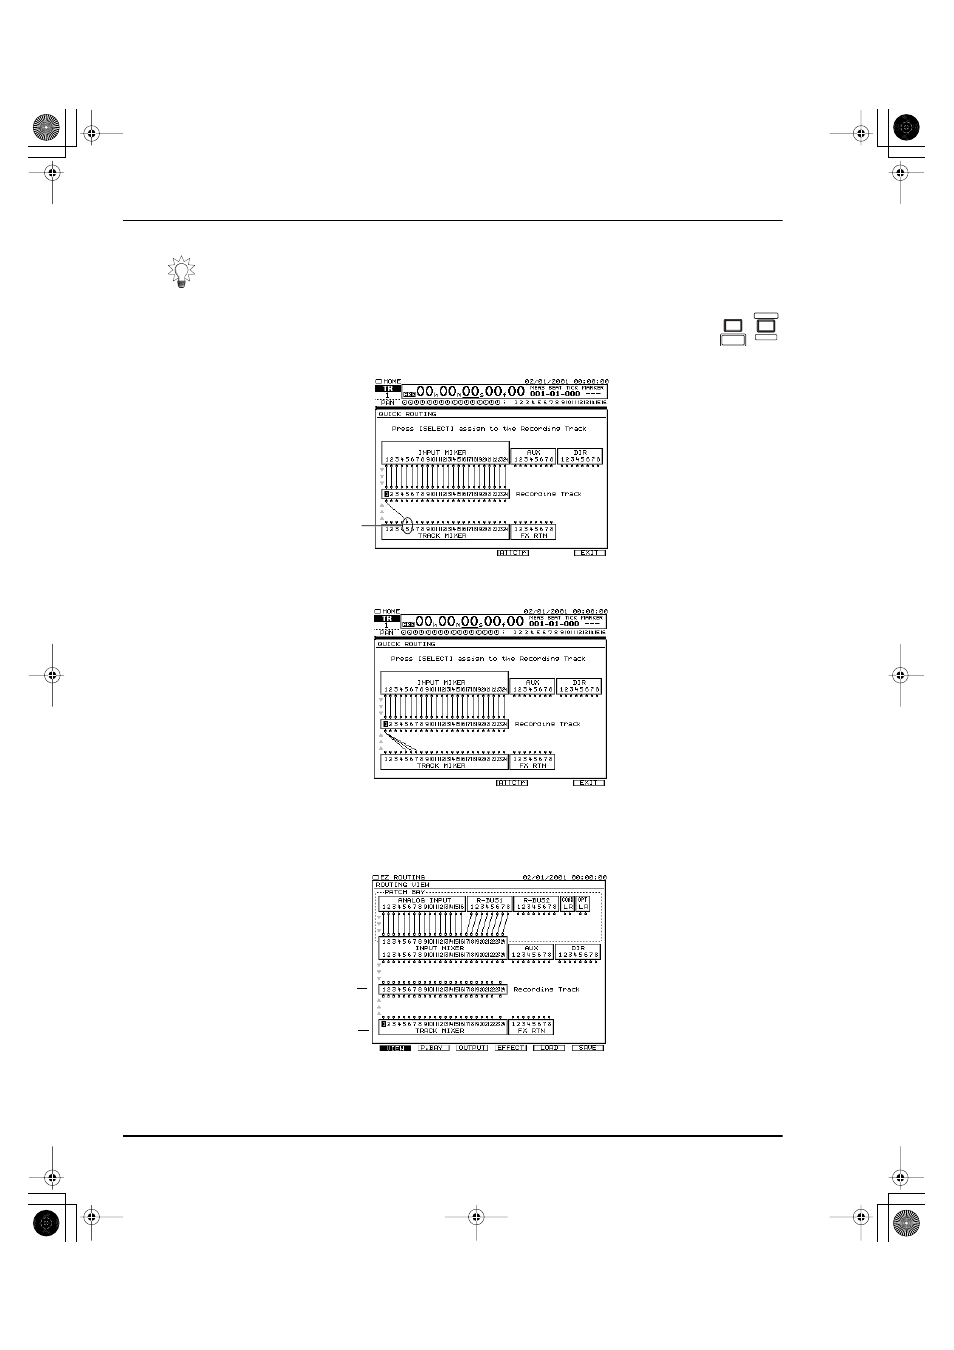
3.
Press the FADER button for the set of track channels that contains a
source track channel.
4.
Press the source track channel’s SELECT button—a virtual wire
appears on the screen to show the connection you’ve made.
If you want to break the connection, press SELECT again.
5.
Repeat Step 3, if necessary, and Step 4 for any other tracks you want to bounce.
6.
When you’re done, press F6 (EXIT) to confirm the routing and leave Quick Routing.
Setting Up EZ Routing for a Bounce
1.
Press EZ ROUTING.
2.
If the ROUTING VIEW screen doesn’t appear, and you see “VIEW” above F1, press
F1 (VIEW). If you don’t see “VIEW” above F1, press PAGE and then F1 (VIEW).
To clear all of the current connections to a destination track, hold down its TRACK
STATUS button and press CLEAR. To quickly clear all of the QUICK ROUTING
screen’s connections, press F4 (AllClr).
TR 1-16
MASTER
EDIT
FX RTN
TR 17-24
V.FADER
The gray arrows at the
left edge of the screen
show the direction in
which signal flows.
When you’re bouncing
tracks, signal flows up
from the track
channels to the hard
disk recorder tracks.
We pressed
Track Channel
5’s SELECT
button
The gray arrows at the
left edge of the screen
show the direction in
which signal flows.
When you’re bouncing
tracks, signal flows up
from the track
channels to the hard
disk recorder tracks.
We pressed the
SELECT buttons
for Track Channels
6 and 7—we’re
now bouncing
Track Channels 5-7
to Track 1 on the
hard disk recorder
Track
channels
1-24
Hard Disk
Recorder
Tracks 1-24
The gray arrows at the
left edge of the screen
show the direction in
which signal flows.
When you’re bouncing
tracks, signal flows up
from the track
channels to the hard
disk recorder tracks.
VS2480OMUS.book 198 ページ 2006年2月7日 火曜日 午後4時16分