Creating and editing samples (sample mode), Sampling, Settings before you sample (what is a template?) – Roland V-Synth User Manual
Page 55: Applications of each template, Factory settings of each template
55
Creating and Editing Samples (Sample Mode)
Creating and Editing Samples (Sample Mode)
In this chapter, we will explain the procedures for:
• Converting samples so the VariPhrase function can be used
For details on loading samples, refer to (p. 85).
Sampling
Settings Before You Sample (What
Is a Template?)
A sampling template is something that holds a collection of settings
for sampling (the setup settings, pre-effect settings, and metronome
settings described below).
You can store eight different sampling templates. When you sample,
you will always select one of these eight templates.
With the factory settings, eight sampling templates are preset.
For details on modifying the settings, refer to
Sampling templates are system settings (with the exception of
some metronome parameters). They are remembered even when
you turn off the power. If you wish to restore all eight sampling
templates to the factory settings, perform the Factory Reset
operation (p. 98).
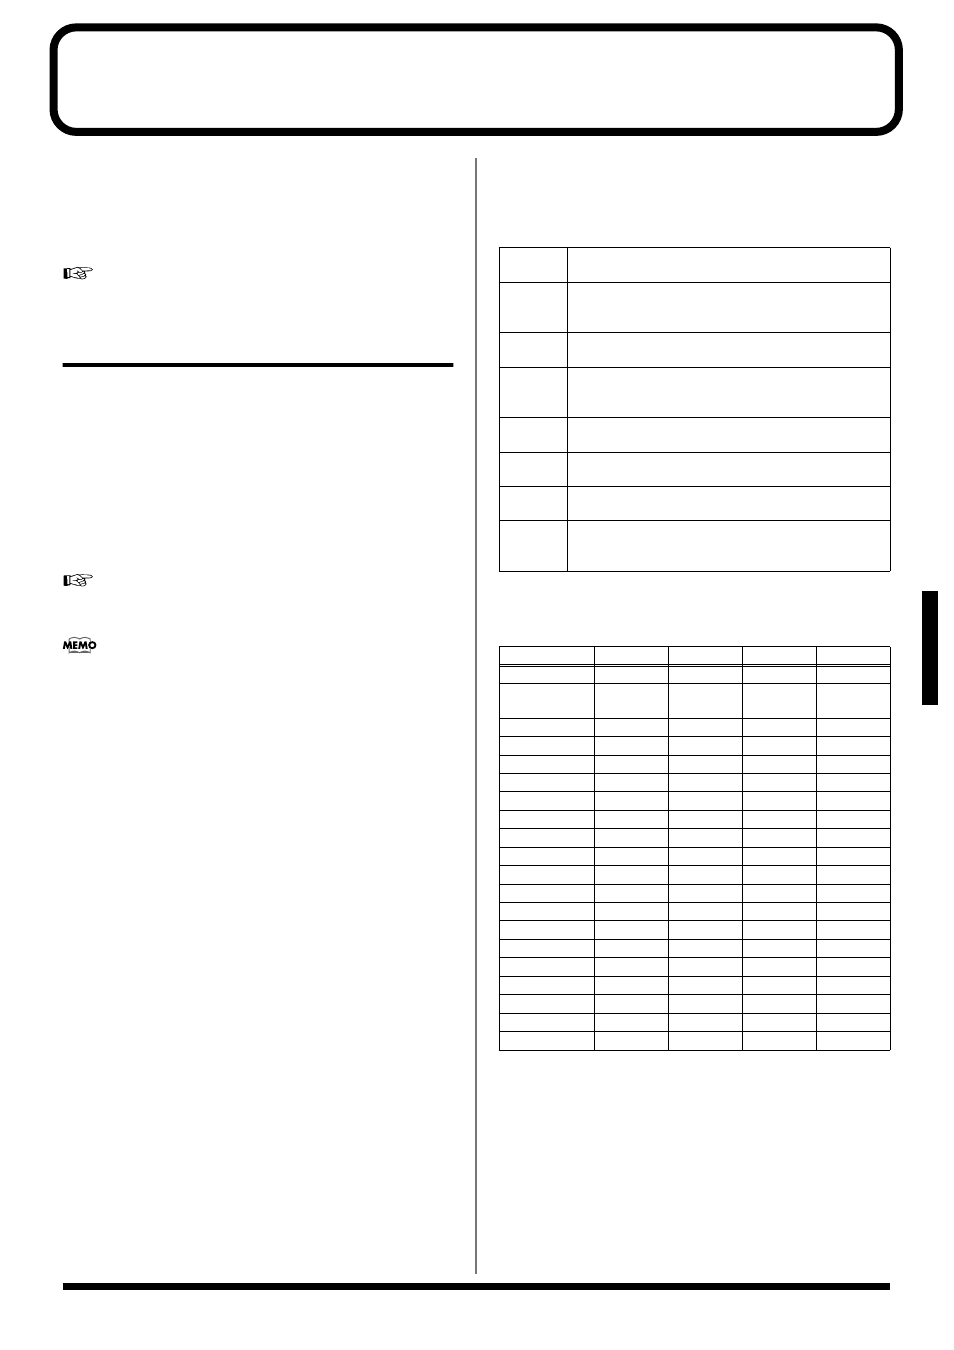
Applications of Each Template
The preset templates cover different input settings and pre-effect
types.
Factory Settings of Each Template
Mic
Sample in mono from a mic. Connect a mic to the rear
panel INPUT jack, and set GAIN switch to “MIC.”
Line
Sample in stereo from a CD. Connect your CD player to
the rear panel INPUT jacks, and set GAIN switch to
“LINE.”
Optical
Sample a digital signal. Connect your audio device to
the rear panel OPTICAL IN connector.
Resampl
Play a sample on the V-Synth and sample the result.
This is called “resampling.” For details on resampling,
refer to p. 60.
Comp
Use the compressor pre-effect. The sample will be re-
corded from the rear panel INPUT jacks.
Limiter
Use the limiter pre-effect. The sample will be recorded
from the rear panel INPUT jacks.
Noise-
Sup
Use the noise suppressor pre-effect. The sample will be
recorded from the rear panel INPUT jacks.
MIDI
Start sampling when a sequencer start (system realtime
message: FA) is received. The sample will be recorded
from the rear panel INPUT jacks.
Setup
Mic
Line
Optical
Resampl
SamplingType 1 (MIX)
0 (Stereo)
0 (Stereo)
0 (Stereo)
InputSource
0 (Analog)
0 (Analog)
1 (Optical)
3 (Resam-
pling)
TriggerMode
0 (Manual) 2 (Level)
2 (Level)
3 (Note)
TriggerLevel
-12 (dB)
-12 (dB)
-24 (dB)
-12 (dB)
PreTrigger
0 (0msec)
0 (0msec)
0 (0msec)
0 (0msec)
PreGain
0 (0dB)
0 (0dB)
0 (0dB)
0 (0dB)
PreFxType
0 (off)
0 (off)
0 (off)
0 (off)
PreFxCS-Sus
0
0
0
0
PreFxCS-Atk
0
0
0
0
PreFxCS-Tone
0
0
0
0
PreFxCS-Lvl
0
0
0
0
PreFxLM-Thr
-48
-48
-48
-48
PreFxLM-Rel
0
0
0
0
PreFxLM-Rati
0
0
0
0
PreFxLM-Tone 0
0
0
0
PreFxLM-Lvl
0
0
0
0
PreFxNS-Thr
-60
-60
-60
-60
PreFxNS-Rel
0
0
0
0
CountIN
1 (1MES)
0 (0MES)
0 (0MES)
1 (1MES)
MetroType
1 (REC)
1 (REC)
1 (REC)
1 (REC)