Manually adding a subscriber, Public space parameters – Proxim ORiNOCO AP-2500 User Manual
Page 154
154
Public Space Parameters
•
Custom fields for internal use (User Alias 1 or User Alias 2)
•
Upstream and Downstream bandwidth settings
•
Status
— Should be Active at all times.
— Change to Destroy to delete an entry.
— The other options are not applicable when using the Web browser interface.
Authorized Subscribers Table and the Current Subscribers Table
The Authorized Subscribers Table differs from the
, found in the Monitor > Subscribers
screen. The Current Subscribers Table only lists those users who are currently connected to the AP.
Therefore, an active user who purchased access time with a credit card will appear in both the Authorized Subscribers
Table and the Current Subscribers Table. When using internal authentication with RADIUS, an active user
authenticated by a RADIUS server appears only in the Current Subscribers Table (RADIUS-authenticated users never
appear in the Authorized Subscribers Table). When using external authentication with XML, an active user will appear
in both the tables (the USER_ADD command adds the user to the Authorized Subscribers Table and the
UPDATE_CACHE command changes the user’s Current Subscribers State from “Pending” to “Valid”; see
for details).
If a user appears in both tables, deleting the user from one table will automatically remove the user from the second
table.
Also, rebooting the AP will clear the Current Subscribers Table but not the Authorized Subscribers Table. (The
Authorized Subscribers information is retained in non-volatile memory.)
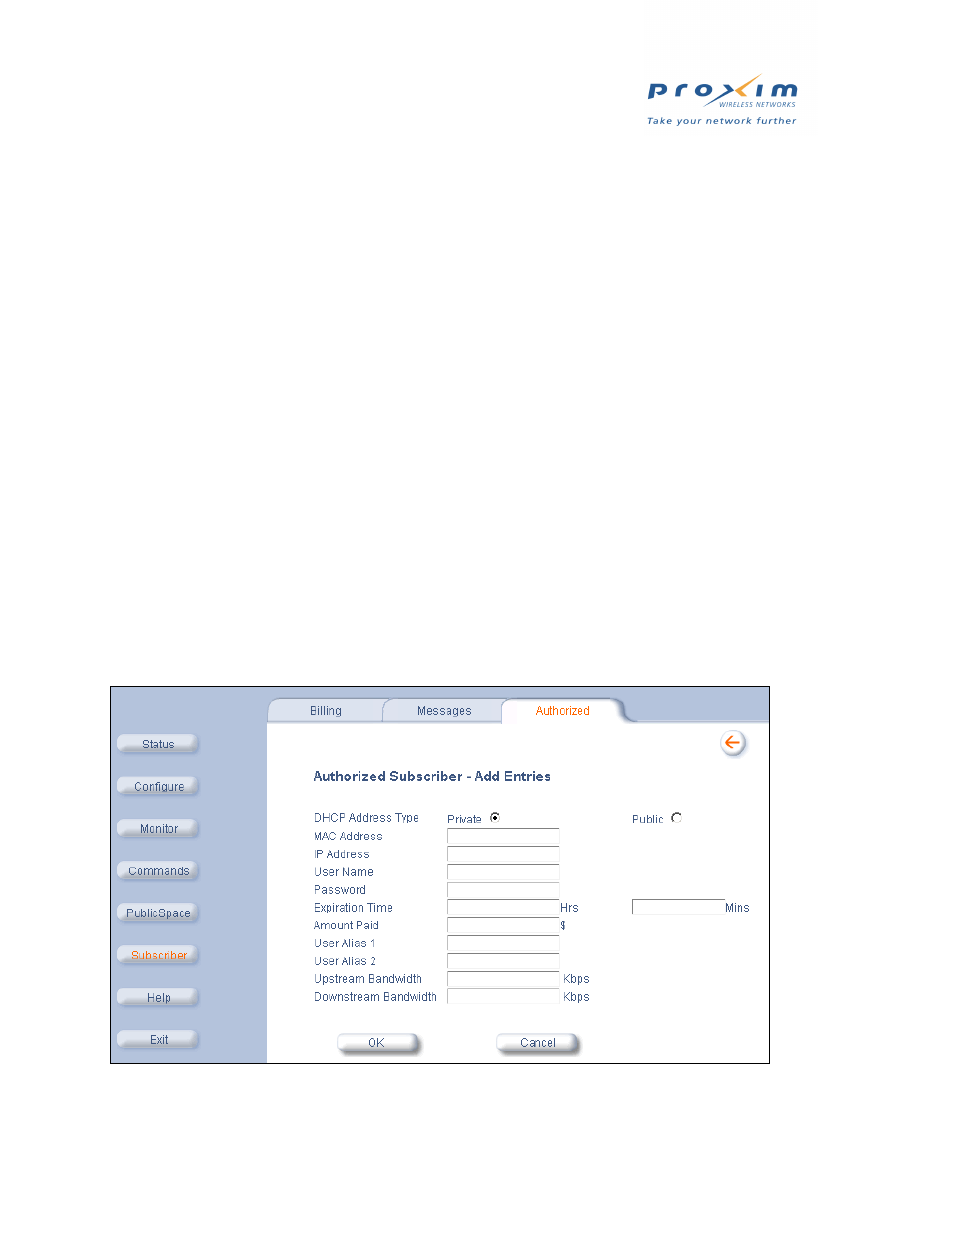
Manually Adding a Subscriber
Follow these steps to manually add a subscriber to the Authorized Subscribers Table:
1. Login to the AP’s Web browser interface.
2. Click Subscriber > Authorized.
3. Click Add.
Figure 5-37 Add a Subscriber Screen
4. Select the DHCP Address Type for the subscriber (public or private). This setting depends upon the
settings you configured for the AP.