7 - replacing the rf pcb, 7 replacing the rf pcb – KVH Industries TracVision G8 User Manual
Page 97
5.7
Replacing the RF PCB
1. Disconnect power from the antenna unit and the receiver.
The RF PCB is protected within a metal enclosure that is
fastened to the antenna frame. This PCB module, which
contains the main and RF PCBs, must be removed to gain
access to the RF PCB.
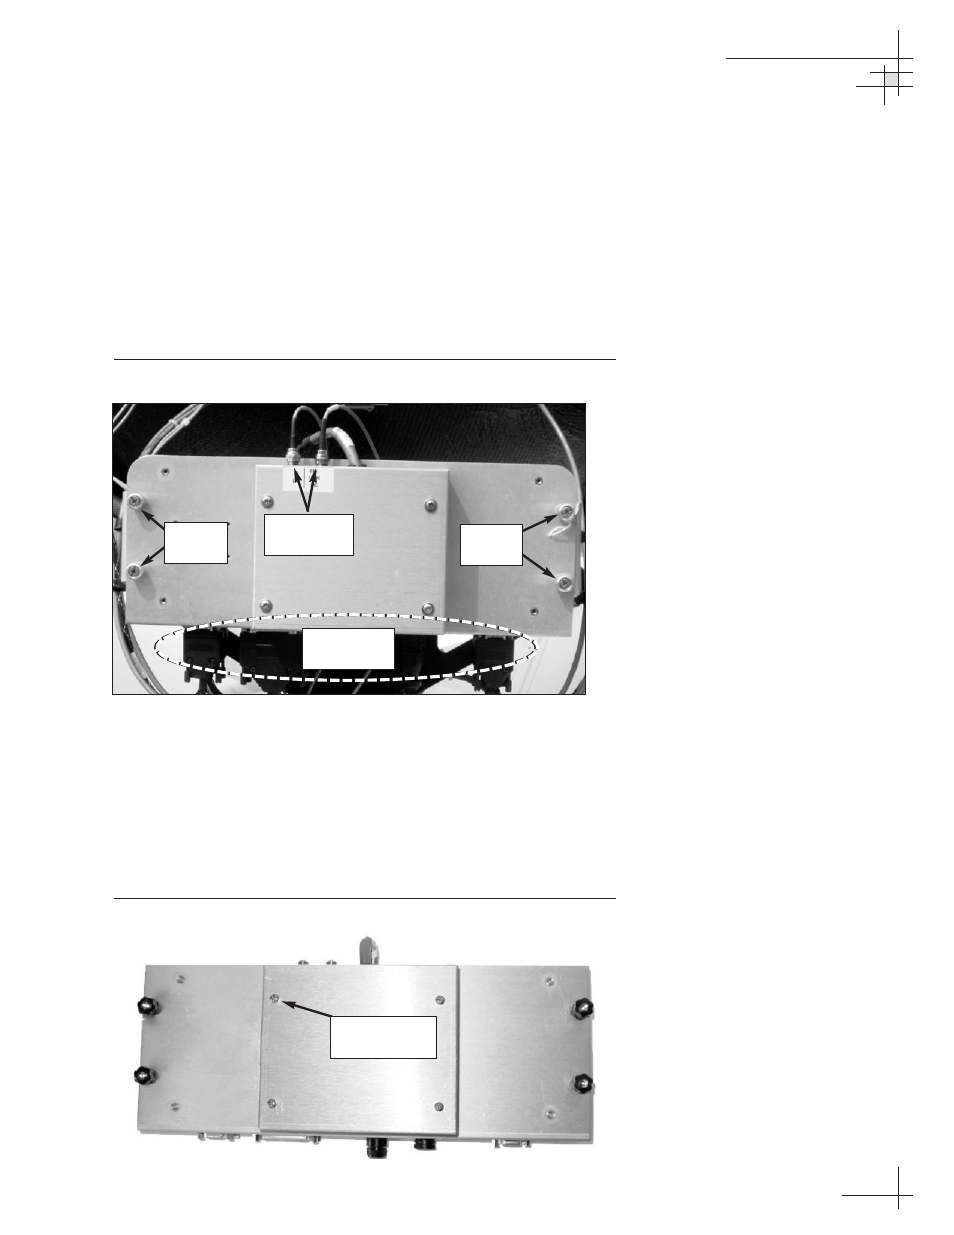
2. Disconnect all cables from the PCB module. Use a
7
⁄
16
"
wrench to carefully disconnect the two RF cables.
Figure 5-7
PCB Module Connetions
3. Loosen the four captive screws securing the PCB module
to the antenna frame. Remove the PCB module and bring
it belowdecks for bench work.
4. Remove the four #6-32 screws and flat washers
securing the RF PCB cover to the PCB module. Set
aside the RF PCB cover.
Figure 5-8
RF PCB Cover
Maintenance
54-0198
101
#6-32 Screws
(x 4)
RF Cable
Connectors
Captive
Screws
Captive
Screws
Other Cable
Connectors