Option 2 - flush-mounting – KVH Industries TracVision G8 User Manual
Page 41
Option 2 - Flush-mounting
1. Choose a location based upon the guidelines in “Choosing
the Best Location for the MCU” on page 25.
2. A template has been provided in Appendix B on page 125 as
a guide to mark and cut the proper hole for the flush
mount bracket. Cut the hole and make certain the bracket
and MCU will fit easily.
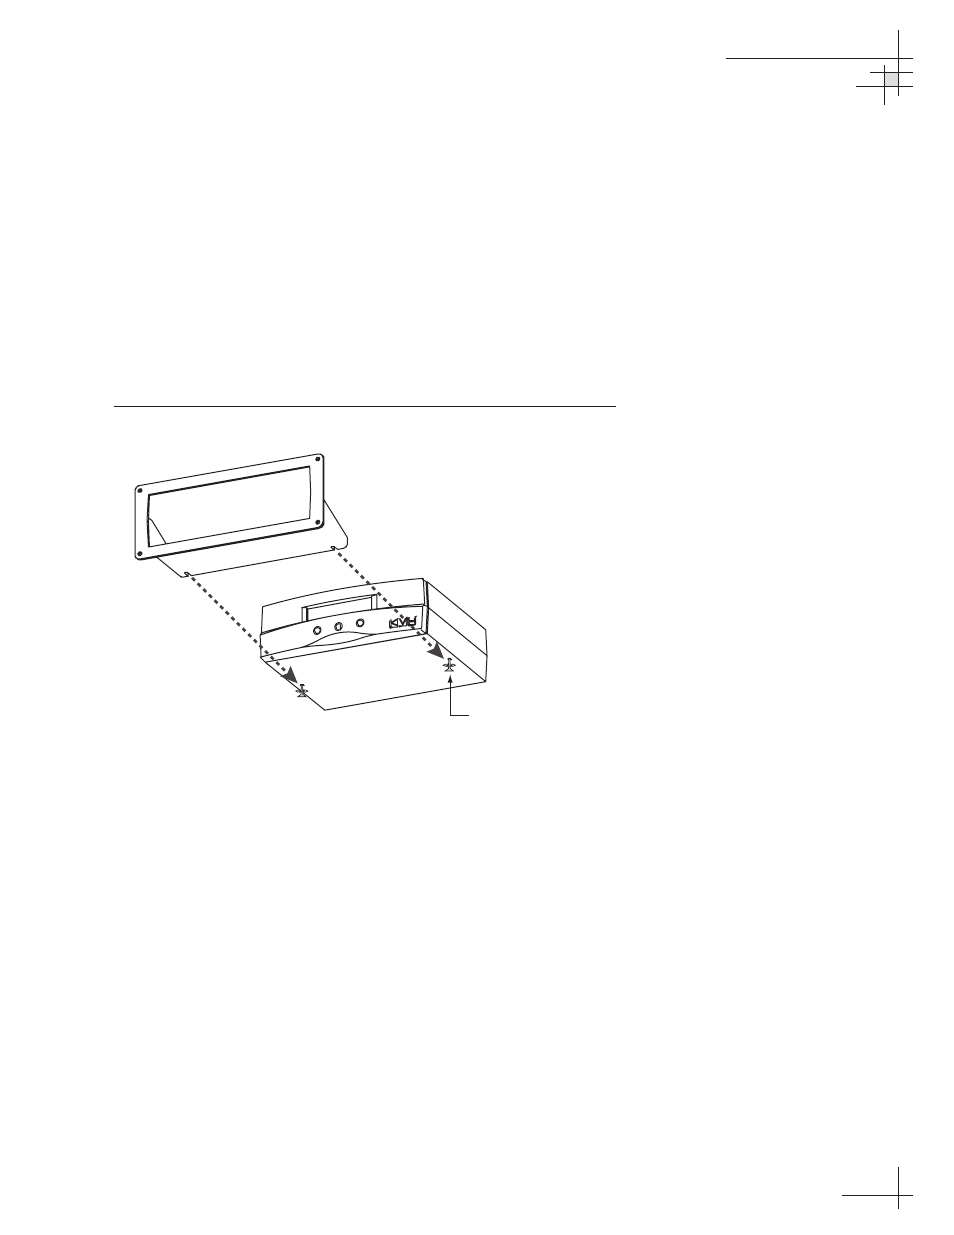
3. At the two holes in the bottom of the MCU, place a #6 flat
washer on a #6-32 screw and insert the screw into the hole
from below, as shown in Figure 2-21. Do not tighten the
screws yet; just a few turns is sufficient.
Figure 2-21
Securing the MCU to the Flush Mount Bracket
4. Slide the flush mount bracket backward onto the MCU
until the two notches meet the screws as shown in
Figure 2-21.
5. Tighten the screws to secure the MCU to the bracket.
6. Insert the MCU and bracket into the mounting hole and
secure the unit to the mounting surface with the #8 (black)
screws and #8 washers supplied in the kitpack.
Installation
54-0198
39
#6-32 x 1/2"
Pan-head Screw
and Flat Washer (x2)