Smart Technologies SMART BOARD 4000I User Manual
Page 43
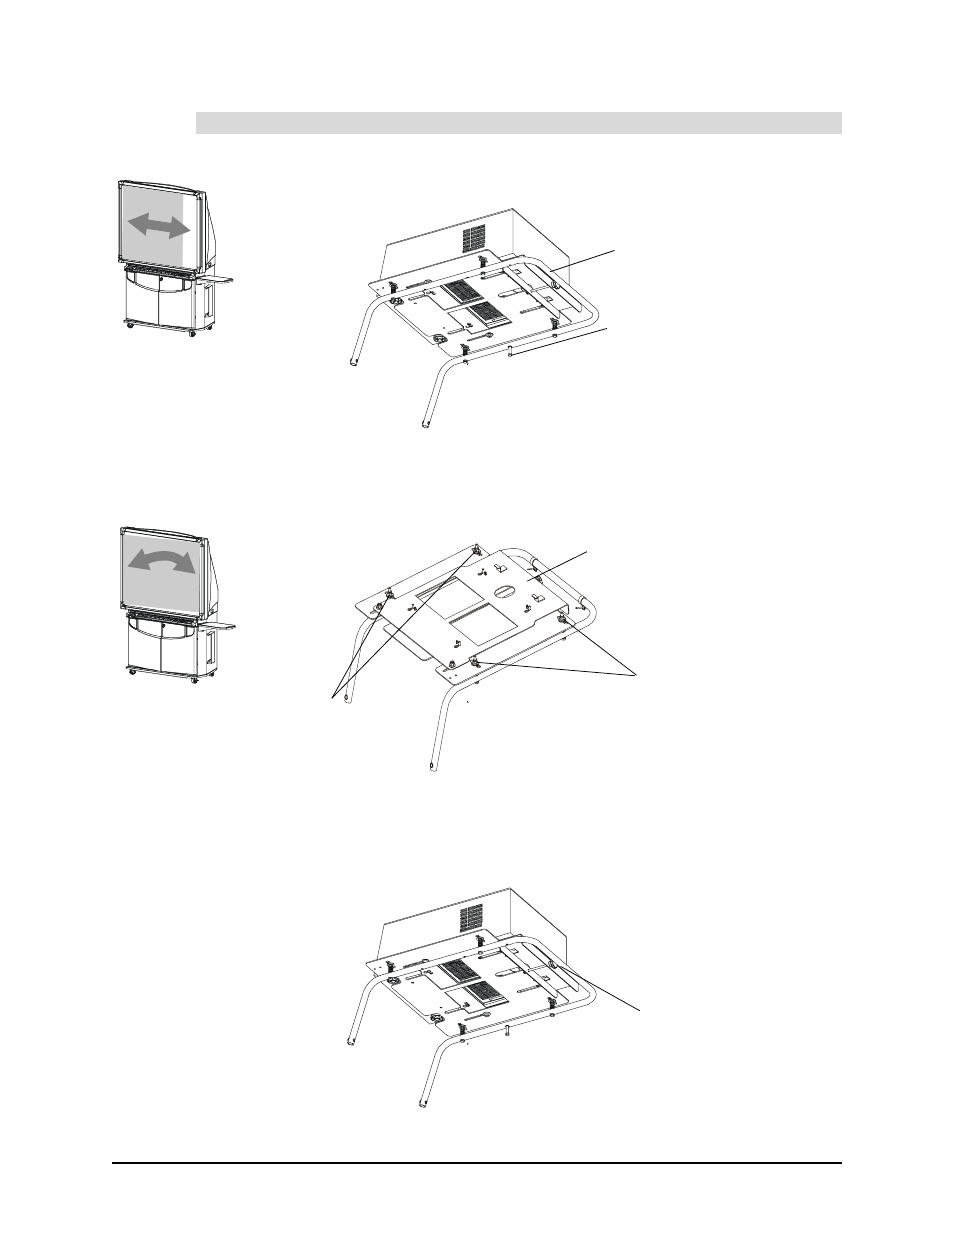
Finalizing the Installation
33
1. Loosen the lockdown bolt on the underside of the projector mounting bracket using a
7/16" wrench (in the accessory kit).
2. With these fasteners loosened, shift the entire projector mounting bracket to the right
or to the left.
3. If you need to slightly adjust the rotation of the projected image (its roll), you can
tighten the spring-loaded screws on one side and then shift the projector.
4. After you’ve made these vertical adjustments, check the image on the interactive
screen. You may need to turn the adjustment knob on the projector mount to make the
image appear larger or smaller.
To adjust the image position
Lockdown Bolt
NOTE: For clarity, this illustration shows the mounting
bracket out of the 4000i. Also, no cables are shown.
Projector Mounting Bracket
Loosen the screws on this
side and rotate the projector
on the mounting bracket to
correct image roll
Projector Mounting Bracket
Loosen the screws on
this side and rotate the
projector on the
mounting bracket to
correct image roll
NOTE: For clarity, this illustration shows the mounting
bracket out of the 4000i. Also, no cables are shown.
Adjustment Knob
NOTE: For clarity, this illustration shows the mounting
bracket out of the 4000i. Also, no cables are shown.