Installing the laptop shelf, The location of the guest laptop shelf and j-hook – Smart Technologies SMART BOARD 4000I User Manual
Page 19
Setting Up the 4000i
9
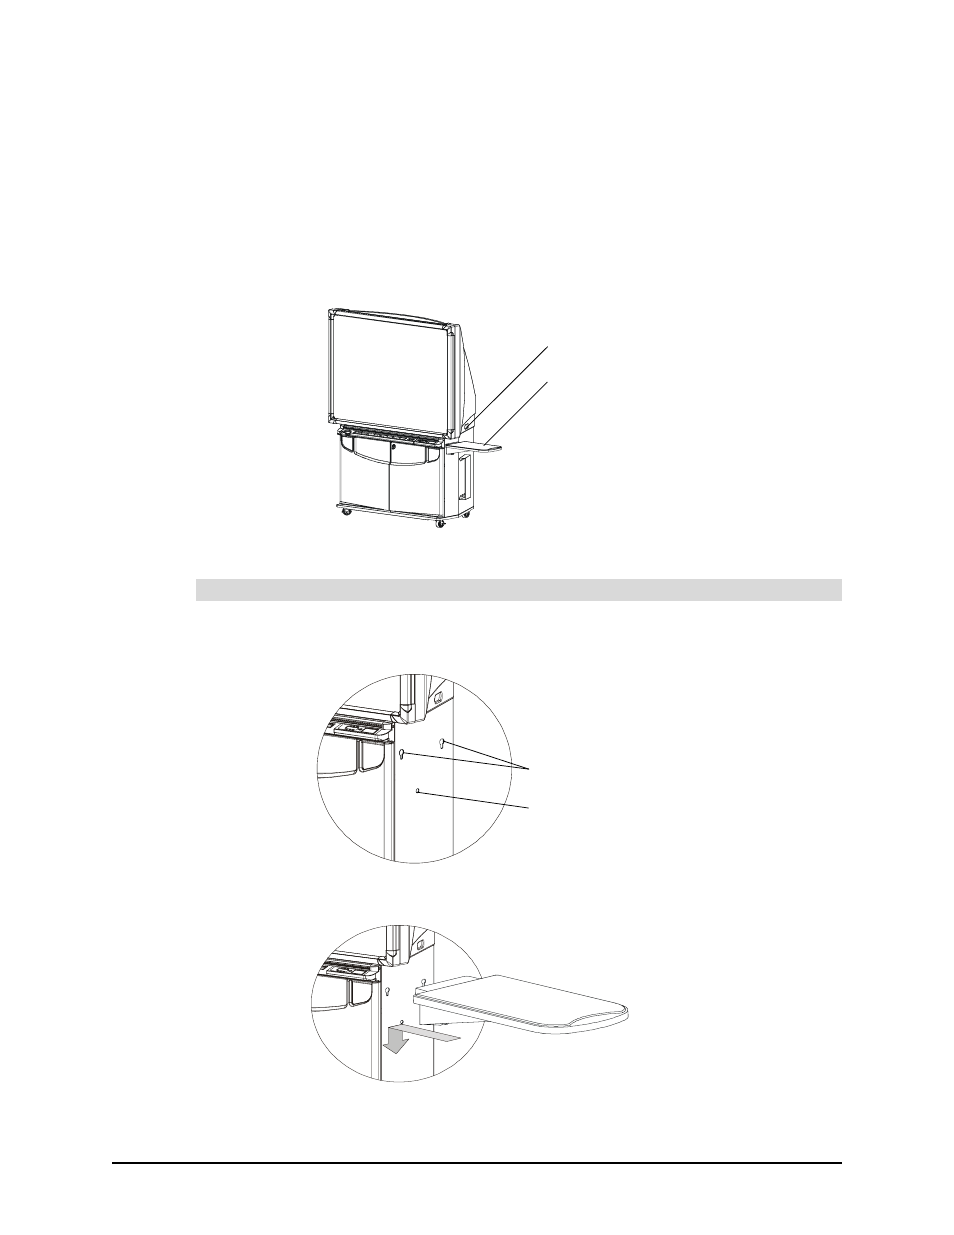
Installing the Laptop Shelf
You can install the laptop shelf on either side of the cabinet. You should install the shelf before
you install the computer, because it’s easier to remove the plastic hole covers when the
computer is not inside the cabinet. If you install the shelf on the right-hand side (when you face
the interactive whiteboard), take care not to knock the infrared (IR) receiver that’s installed on
the lower corner of the screen.
You can also attach the J-hook to the handle recess so you can route the umbilical cables
through this hook to the guest laptop shelf. You’ll find this hook in the accessory kit.
Figure 6: The Location of the Guest Laptop Shelf and J-Hook
1. Locate the two laptop shelf keyholes and the single thumbscrew hole on the side of
the cabinet. Remove the plastic hole covers.
2. Push the two protruding bolts on the edge of the shelf into the two keyholes, and then
push the shelf firmly down.
3. Push the captive thumbscrew at the bottom of the shelf into the thumbscrew hole and
tighten.
To install the guest laptop shelf
One Location for the Guest Laptop Shelf
One Location for the J-hook
NOTE: The IR receiver isn’t
shown in this illustration.
Two Keyholes
Thumbscrew Hole
NOTE: The IR receiver isn’t
shown in this illustration.
NOTE: The IR receiver isn’t
shown in this illustration.