FUJITSU DESKPOWER 5000 User Manual
Page 47
37
3
6
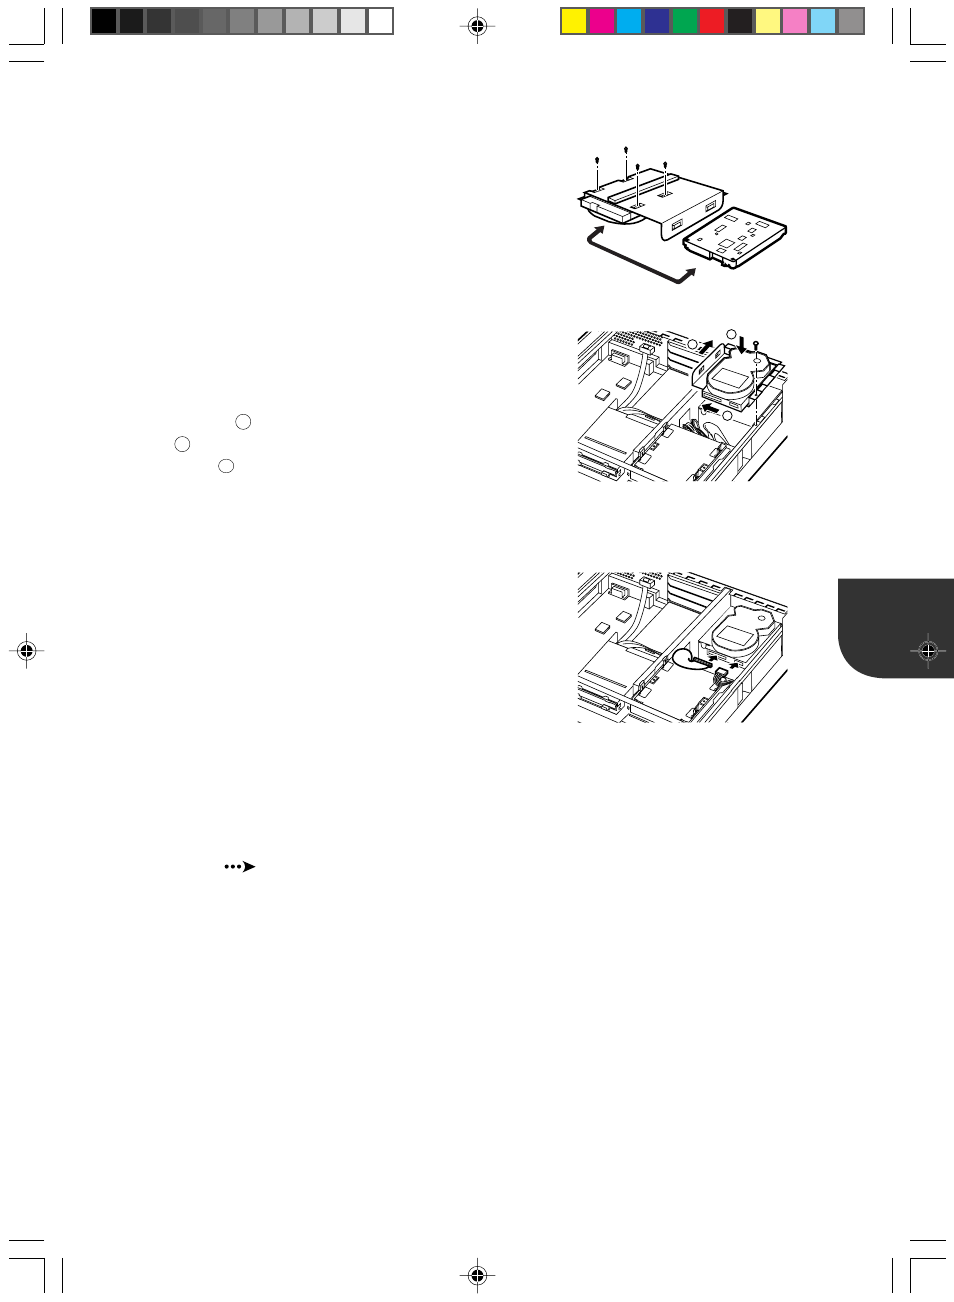
Replace the internal hard disk.
Remove the four blue screws on the back of
the retaining metal bracket, and then remove
the standard-equipped hard disk. Then, use
the blue screws to install the new hard disk.
7
Install the internal hard disk in the PC main
unit.
Install the retaining metal bracket in the
original position by lowering it in the direction
of arrow
1
, sliding it in the direction of arrow
2
, and then sliding it again in the direction of
arrow
3
. Then, secure the retaining metal
bracket with the screw that was removed in
step 5.
8
Connect the cables to the hard disk.
Reconnect the power cord and flat cables that
were disconnected in step 4.
Be sure to connect the flat cables to the
connector with the MASTER marking.
To prevent malfunction, be sure to place the
cables back in their original positions.
9
Attach the upper cover.
10
Use BIOS setup to set the hard disk.
Set the type of the installed hard disk by BIOS
setup (
see "Primary master/slave" in
Section 2, "Main Menu," in Chapter 4, "BIOS
Setup").
2
3
1
08-Chap3(34-44)
25/4/00, 10:36 am
37
- T2000 (30 pages)
- SPARC ENTERPRISE M3000 (212 pages)
- PRIMERGY RX600 S6 (134 pages)
- BS2000 (37 pages)
- BX900 S1 (144 pages)
- BX900 S1 (142 pages)
- PRIMEQUEST 1000 Series C122-E119EN (109 pages)
- T5120 (26 pages)
- SPARC ENTERPRISE M9000 (560 pages)
- DESKPOWER 2000 (50 pages)
- SPARC M4000 (376 pages)
- ServerView Respurce Orchestrator Virtual Edition V3.1.0 (247 pages)
- PRIMERGY MX130 S2 (256 pages)
- SPARC ENTERPRISE T5120 (58 pages)
- T5240 (28 pages)
- M4000 (310 pages)
- SPARC M4000/M5000 (76 pages)
- TX150 S3 (95 pages)
- SPARC T5220 (240 pages)
- M9000 (518 pages)
- ServerView Resource Orchestrator Cloud Edition V3.1.0 (180 pages)
- PRIMERGY BX600 S2 (173 pages)
- FR family 32-bit microcontroller instruction manuel CM71-00101-5E (314 pages)
- M Server M4000 (30 pages)
- Primergy RX200 S2 (307 pages)
- DESKPOWER P301 (56 pages)
- SPARC Enterprise Server M4000 (62 pages)
- SPARC M8000 (4 pages)
- PRIMERGY B120 (68 pages)
- C120-E361-04EN (36 pages)
- R630 (76 pages)
- 2000 (66 pages)
- T1000 (84 pages)
- Server TX200 S6 (126 pages)
- PRIMERGY BX600 S3 (164 pages)
- SPARC ENTERPRISE T5220 (34 pages)
- SPARC M3000 (56 pages)
- TX300 (122 pages)
- PRIMERGY BX600 (288 pages)
- DESKPOWER 6000 (105 pages)
- SPARC Enterprise Server M3000 (8 pages)
- SPARC Enterprise Server M3000 (202 pages)
- T850 (18 pages)
- T5440 (212 pages)
- Service View Resource Orchestrator Cloud Edition V3.0.0 (102 pages)