Turn on the power to the recorder, Press the [execute/yes] key, Ide1 ” flashes – Fostex D2424 User Manual
Page 33: The recorder starts formatting the disk
33
Model D2424 Reference Manual (Formatting and Optimizing Disks)
Re-Formatting the Current Drive or Newly Formatting the Backup Drive
Follow procedures below to re-format the current drive or newly format the E-IDE hard disk for backup.
1.Turn on the power to the recorder.
The recorder starts with an indication of the beginning
(Timebase: ABS 0) of the program that was selected
before the power was turned off.
Even if a back-up E-IDE hard disk is installed, the
current drive starts up when the power is turned on.
2.Press the [SETUP] key to put the recorder into
Setup mode.
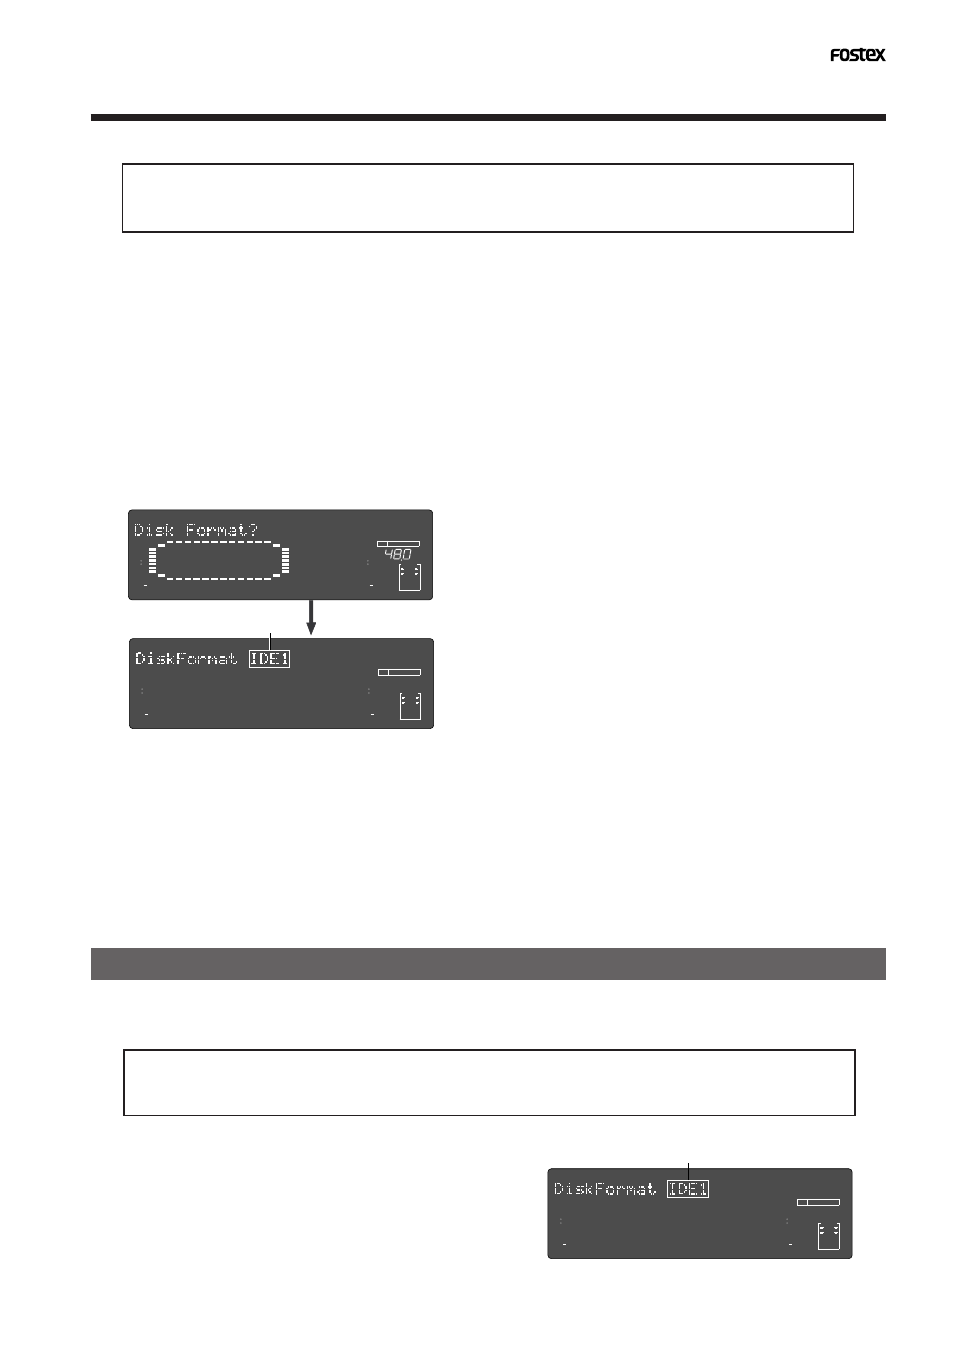
3.Use the [JOG] dial to select “Disk Format ?” and
press the [EXECUTE/YES] key.
“
IDE1
” flashes in the same way mentioned in
“
Formatting a new disk
.”
Formatting a backup disk (SCSI disk or optional DVD-RAM disk)
In the following, the disk for backup (SCSI disk or optional DVD-RAM disk) will be formatted.
The disk for backup will be formatted in "24 bit Backup" or "16 bit Backup" to match the current drive
quantization.
You cannot use the recorder to format a SCSI disk (or optional DVD-RAM disk) for saving and loading WAV
files. First, format the disk for WAV files using a computer (PC/AT).
1.Press the [SETUP] key to put the recorder into
Setup mode.
2.Turn the [JOG] dial to select the “Disk Format?”
menu and press the [EXECUTE/YES] key.
“
IDE1
” flashes.
5.Press the [EXECUTE/YES] key.
The recorder displays the screen that enables you to set
the sampling frequency and bit resolution.
The FS/quantization display when "
IDE2
" is selected, will
show the same figure for the current drive and any other
cannot be selected.
Press the [
EXECUTE/YES
] key while the present screen is
shown in the display.
6.Select the desired sampling frequency and bit
resolution using the [JOG] dial, and press the
[EXECUTE/YES] key.
The recorder displays the screen which enables you to
set the Multiple Undo function on or off.
7.Set the Multiple Undo function on or off using the
[JOG] dial, and press the [EXECUTE/YES] key.
The recorder displays the screen which enables you to
select the format type. If you have formatted the disk
with Standard Format, you can select either Standard
Format or Erase Format.
If you have formatted the disk with Quick Format, you
can select either Standard Format or Quick Format.
Be sure to select “
Standard Format?
” to format a back-up
E-IDE hard disk.
8.Use the [JOG] dial to select the desired format type,
then press and hold down the [RECORD] button
and press the [EXECUTE/YES] key.
The recorder starts formatting the disk.
You cannot use the recorder to format a back-up E-IDE hard disk for saving and loading WAV files. First,
format the disk for WAV files using a computer (PC/AT).
To format the current drive, select “
IDE1.
” To format a
back-up E-IDE hard disk, select “
IDE2.
”
∞
42
OL
0
30
24
18
12
9
6
3
kHz
24
FS
BIT
SETUP
24
∞
42
OL
0
30
24
18
12
9
6
3
23
22
21
20
19
18
17
16
15
14
13
12
11
10
9
8
7
6
5
4
3
2
1
CLOCK
INT
Flashing
Flashing
∞
42
OL
0
30
24
18
12
9
6
3
kHz
24
FS
BIT
SETUP
∞
42
OL
0
30
24
18
12
9
6
3
23
22
21
20
19
18
17
16
15
14
13
12
11
10
9
8
7
6
5
4
3
2
1
CLOCK
∞
42
OL
0
30
24
18
12
9
6
3
kHz
24
FS
BIT
SETUP
∞
42
OL
0
30
24
18
12
9
6
3
23
22
21
20
19
18
17
16
15
14
13
12
11
10
9
8
7
6
5
4
3
2
1
CLOCK
4.Press the [EXECUTE/YES] key while “IDE1” or
“IDE2” is flashing.
The model name of the current drive’s hard disk appears
and “
SURE ?
” flashes.