Drive setting, Drive setting (“drive sel?” menu), Setting of the drive – Fostex D2424 User Manual
Page 129: Flashing
129
Model D2424 Reference Manual (Changing the Initial Settings
Flashing
Drive Setting (“Drive Sel?” menu)
In D2424, in addition to the current drive (E-IDE hard disk) for recording/playback/editing, by installing the
optional Model 9044 (BAY+CADDY), an E-IDE hard disk (or optional Model 9046 DVD-RAM drive), and
furthermore, a SCSI drive for backup use can be connected and used.
In the "Drive setup" menu, these drives can be selected in accordance to the use. This is especially convenient
to check the song data saved in the backup drive. Even though a multiple number of drives are used, the
D2424 will normally start up from the current drive by re-switching on the power.
By switching the drive setting to "SCSI" or "IDE2," the saved song data can be confirmed by playing it back.
Since this playback is only to the extent of confirming the saved data, it could create drop outs if 24 channels
are played back, and in some SCSI equipment, channels that can be played back could be changed.
The following operations cannot be executed when the drive is switched to “backup drive.”
* Save/load of song data
* Setup of rhythm
* Recording
* Creating a new program
* Deleting a program
* Copy & paste and Move & paste
* Erase
* Track exchange
* Multiple undo
* Setup of tempo
* ON/OFF of metronome function
* Setup of permission or denial of recording
If power to this recorder is switched again, the drive will automatically switch to current drive (E-IDE).
In order to take out the removable disk when set to backup drive, press the [EXIT/NO] key while holding down the
[SHIFT] key.
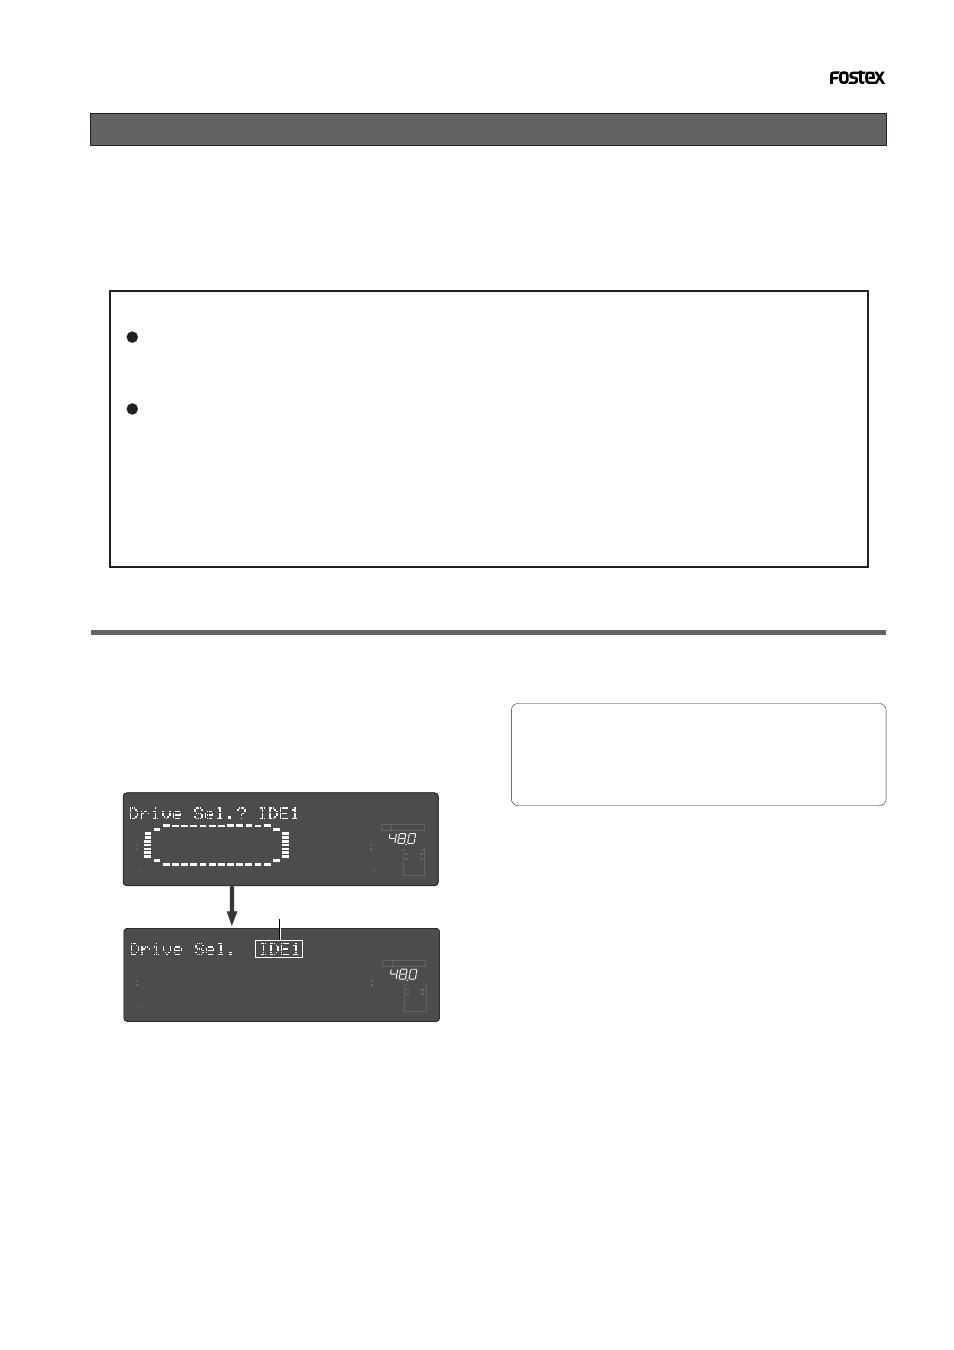
1.While the recorder is stopped, press the [SETUP]
key to enter SETUP mode.
2.Turn the [JOG] dial to select “Drive Sel. ?” (“?”
flashes), and then press the [EXECUTE/YES] key.
The current setting will start flashing which indicates it
is ready to change setting.
In the case of initial setting it will show “
IDE1
.”
3.With the [JOG] dial, choose either “IDE1”, “IDE2”
or “SCSI” you want.
4.Press the [EXECUTE/YES] key after choosing the
setting you want.
To cancel the operation, or to restore the setting
obtained prior to the [EXECUTE/YES] key press, press
the [STOP] button or the [EXIT/NO] key. Each time
you press one of these keys, the recorder returns to
the previous hierarchy level of the menu, and finally
exits SETUP mode and displays the previous Time Base.
Setting of the drive
∞
42
OL
0
30
24
18
12
9
6
3
kHz
24
FS
BIT
SETUP
24
∞
42
OL
0
30
24
18
12
9
6
3
23
22
21
20
19
18
17
16
15
14
13
12
11
10
9
8
7
6
5
4
3
2
1
CLOCK
INT
∞
42
OL
0
30
24
18
12
9
6
3
kHz
24
FS
BIT
SETUP
24
∞
42
OL
0
30
24
18
12
9
6
3
23
22
21
20
19
18
17
16
15
14
13
12
11
10
9
8
7
6
5
4
3
2
1
CLOCK
INT