Figure 7: internet protocol properties dialog, Configuring an, Alternate ip address on the installer laptop – Hughes SATELLITE HN9000 User Manual
Page 31: Laptop
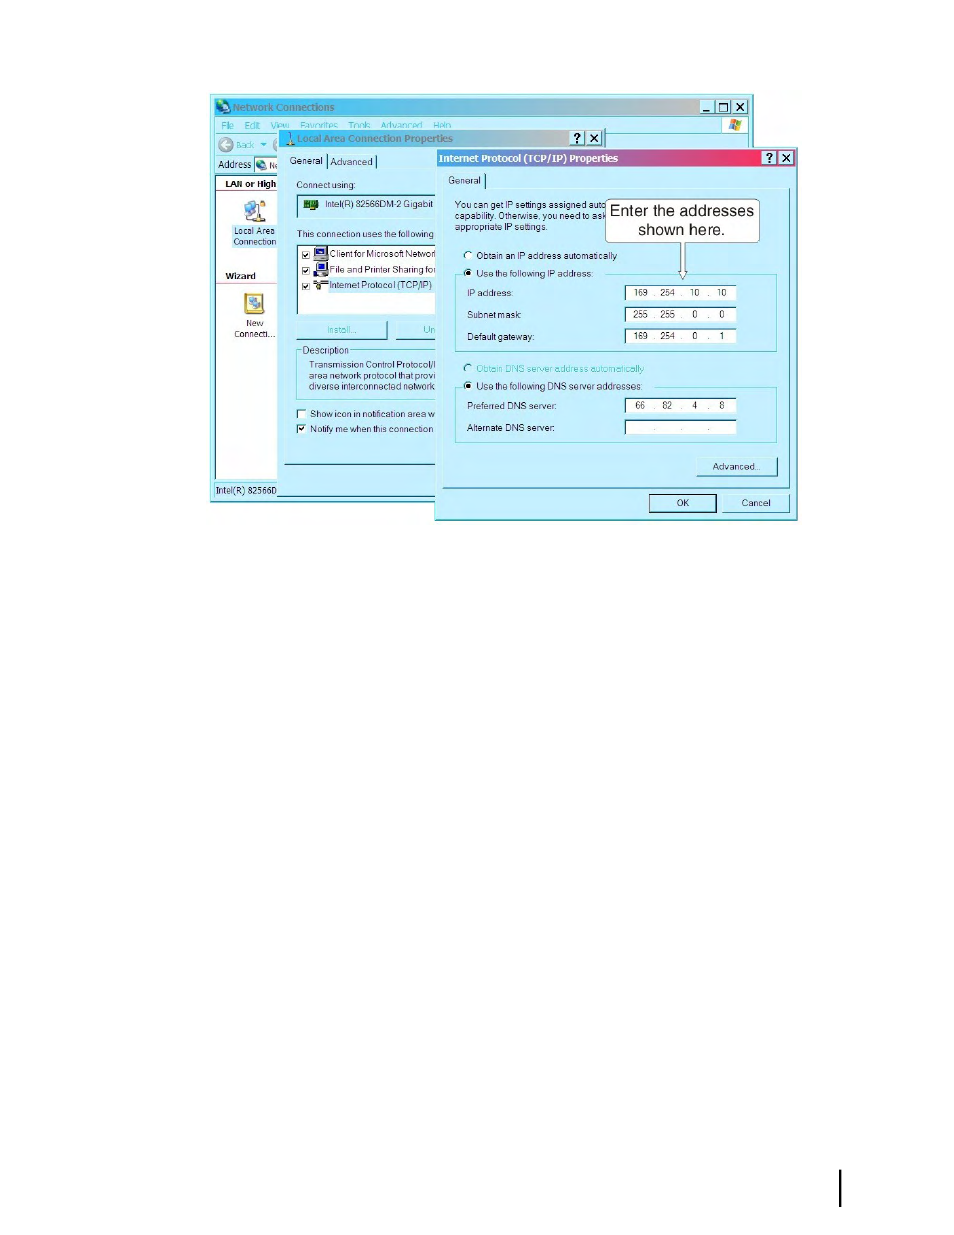
Figure 7: Internet Protocol Properties dialog
2.
In the Internet Protocol Properties dialog, click Use the following IP address.
3.
Enter the following:
a) In the IP address field, type
169.254.10.10
.
This will be the laptop IP address.
b) Typically the Subnet mask field auto-populates to
255.255.0.0
. If it does not, enter this
value manually.
c) In the Default gateway field, type
169.254.0.1
.
This is the address you will use to access the modem’s installation screens.
d) In the Preferred DNS server field, type
66.82.4.8
.
e) Click OK twice to close the Internet Protocol Properties dialog and the Network
Connections dialog.
The laptop computer is now configured to communicate with the satellite modem so you can
enter installation parameters and monitor commissioning progress.
Configuring an alternate IP address on the installer laptop
If you do not want to make address changes on the laptop computer during modem installation,
you can configure a link-local IP address and a second (alternate) private IP address. Then you
can access the satellite modem and browse the Internet without changing the IP address settings
on the laptop. The instructions here assume you have already set up an address on the laptop
as explained in
Configuring a link-local IP address on the installer laptop
on page 14.
Configure the second (alternate) IP address as follows:
1.
Use the Windows Control Panel to open the Local Area Connection Properties dialog and
then the Internet Protocol (TCP/IP) Properties dialog.
2.
Click Advanced to open the Advanced TCP/IP Settings dialog.
3.
In the IP addresses box, click Add to open the TCP/IP Address dialog.
15
HN9000 Satellite Modem Installation Guide
1037576-0001 Revision E
Chapter 2
Preparing for installation