Assignment using auto ip setup >setup ip – Sony WI-1000XM2 Noise-Canceling Wireless In-Ear Headphones (Black) User Manual
Page 17
17
• The IP address of the unit is set to 192.168.0.10,
and the IP address of a camera and BRBK-IP10
IP control card is set to 192.168.0.100 by factory
default.
• Connecting stackable switching hubs in up to 2-
tier configuration is recommended to avoid
network delay.
Notes
• Do not connect more than 100 cameras, five
remote controllers, and one setup PC across all
networks, even if controlling a camera that is on
a network of a different segment via a router. If
you connect more devices than this, problems
may occur, such as control delays or cameras are
operated incorrectly due to IP address
duplication.
• If you perform the setup from multiple PCs, the
settings may not be made correctly. Perform the
setup from one PC.
• Set the setup PC so that only the network that you
use is enabled.
• Do not connect cameras and remote controllers to
a public network.
3
Connect the cameras and remote
controllers to AC outlets using AC adapters
and AC power cords.
Assigning cameras
Link the camera numbers, used for operating cameras
from the unit, with the cameras on the network. This is
called camera assignment.
A list of the assigned cameras is saved in the unit as a
camera table.
Camera numbers are sequential in each group, and are
selected using the GROUP buttons and CAMERA
number buttons of the camera selection block.
Camera assignments are performed using AUTO IP
SETUP >SETUP IP or AUTO IP SETUP >ASSIGN
CAM in the RM menu.
Note
Only cameras that are on the same segment as the
remote controller can be assigned using AUTO IP
SETUP.
Use the setup software to assign cameras on different
segments.
1
Check that the assigned camera is
connected to the network, and that the
camera power is turned on.
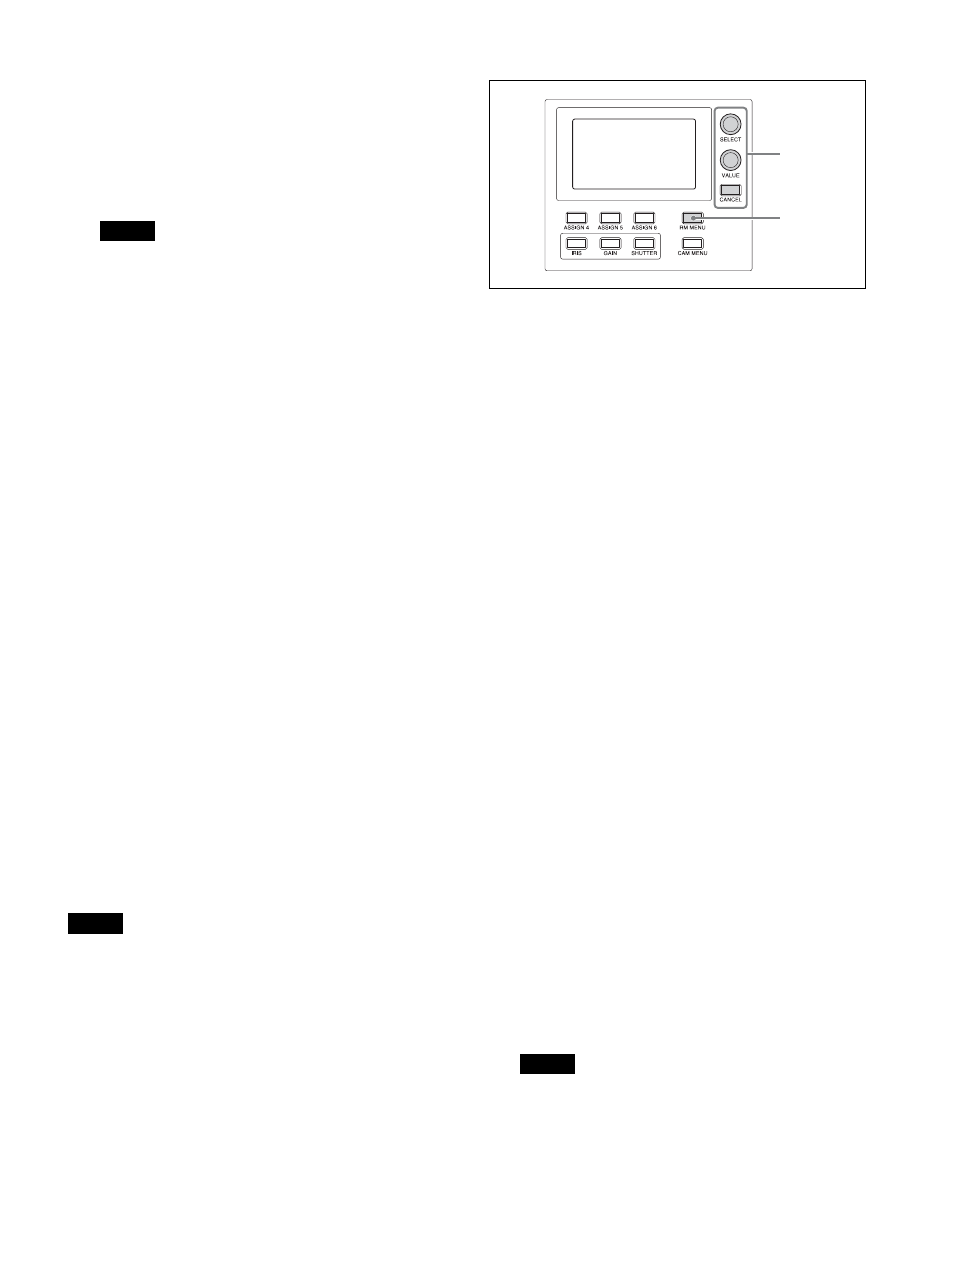
2
Press the RM MENU button, turning it on
(button is lit yellow).
The RM menu top menu appears.
3
Turn the SELECT knob to move the cursor
to AUTO IP SETUP.
4
Press the SELECT button.
The AUTO IP SETUP menu appears.
5
Turn the SELECT knob to select SETUP IP
or ASSIGN CAM, and press the SELECT
button.
Select one of the following methods, depending on
the type of camera assignment.
• For connections on a new network: “Assignment
using AUTO IP SETUP >SETUP IP” (page 17)
• For adding an assignment to an existing network:
“Assignment using AUTO IP SETUP >ASSIGN
CAM” (page 18)
Assignment using AUTO IP SETUP >SETUP
IP
This method detects cameras on the network, and
automatically assigns the IP address setting and
camera number for unregistered cameras.
Use this method when constructing a new network.
With this method, you specify the range of IP
addresses assigned to cameras by entering the start
address in [FROM] and the end address in [TO].
Set the range of IP addresses for assignment so that
they are in the same segment as the remote
controller.
Note
The same IP address as a remote controller cannot
be set.
The subnet mask (SM) and gateway address (GW)
of the camera are assigned the same settings as the
remote controller.
3
~
2