Side / front – Sony WI-1000XM2 Noise-Canceling Wireless In-Ear Headphones (Black) User Manual
Page 11
11
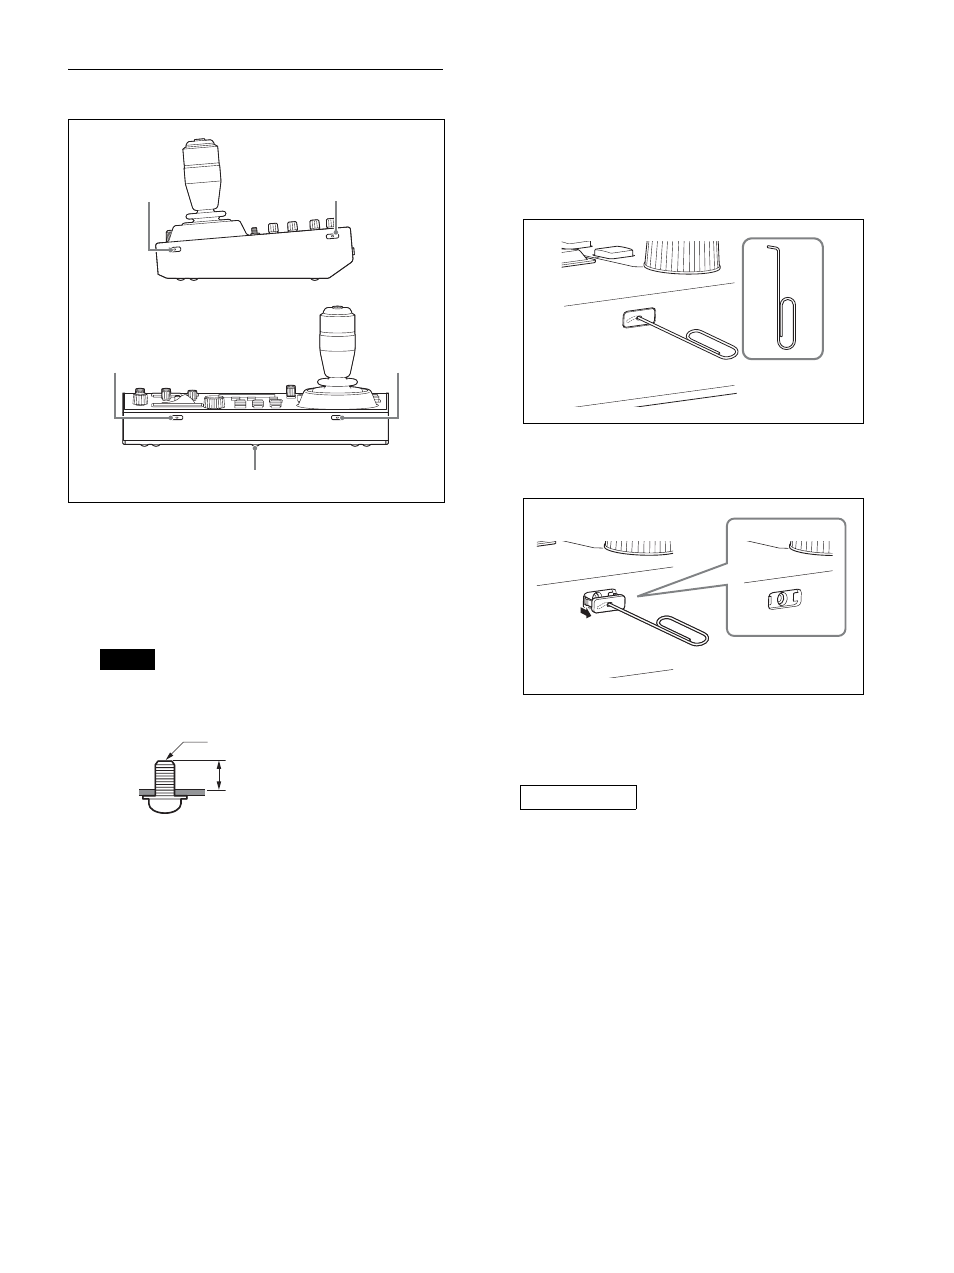
Side / Front
A
Screw hole protective covers
When mounting the unit on other than a flat surface,
remove the screw hole protective covers and secure
the unit in place with screws.
There are a total of six covers on the front, left, and
right sides.
Notes
• Use standard size screws with the following
dimensions.
• Do not overtighten the screws. Overtightening
the screws may damage the unit.
• Store the removed screw hole protective covers in
a safe location.
• Using screws with length other than 6 mm to 10
mm may result in faulty installation or damage to
the interior of the machine, resulting in
malfunction.
Removing the screw hole protective covers
1
Bend the tip of a thin rod about 2 mm, and
insert it into the hole of the screw hole
protective cover.
Use a paper clip or other object with a diameter of
about 1 mm.
2
Pull the screw hole protective covers
straight out.
A
Ratings label (bottom)
Displays the model name and electrical ratings
information.
The nameplate is located on the bottom.
1
1
2
1
1
4
(contact surface to end of thread) = 6 mm to 10 mm
M3 screw
4
IMPORTANT