Setting the streaming delay time, Using the safety delay function, Live streaming – Roland VR-6HD Direct Streaming AV Mixer User Manual
Page 64

64
Live Streaming
Avoiding Sporadic Issues When Livestreaming (Safety Delay)
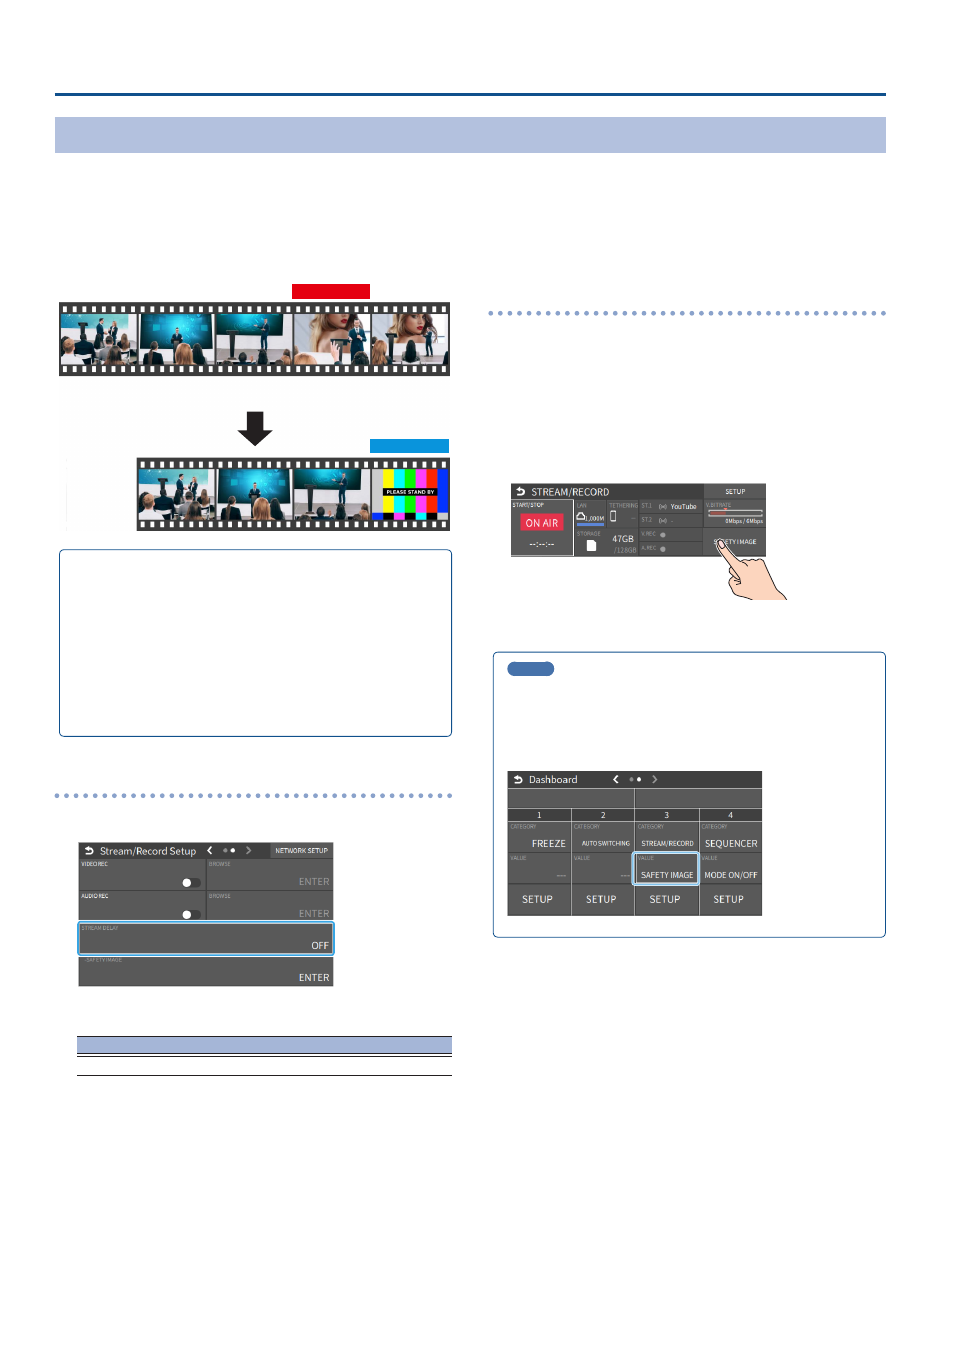
The VR-6HD comes with a built-in “safety delay” function that helps you to avoid unexpected troubles during livestreaming.
You can set the video and audio buffer (streaming delay time: “Stream Delay”) for the safety delay function.
If an accidental issue occurs within the streaming delay time, you can control the “switch to still image” and “mute audio” functions with the press of a
button, which prevents undesirable content from being streamed.
The safety delay function thus helps you to feel more at ease when livestreaming content, especially in situations like live events where there is no script or
guide.
Stream Delay
Safety Image
Accident
¹
The streaming delay time can be set in five-second intervals, to a
maximum of 60 seconds.
¹
This unit switches to the still image you imported as the “safety
image”.
¹
The unit switches to the safety image only during livestreaming.
You can only check the switch to the safety image by looking at
the livestreamed video. The image shown on this unit’s display or
the video outputted via the VIDEO OUT connector doesn’t switch
to the safety image.
¹
Use this function by assigning the USER buttons on the
dashboard to switch to the still image and to mute the audio.
Setting the Streaming Delay Time
1 .
Select page 2 on the streaming/recording setup screen.
2 .
Touch
Value
OFF, 5 sec–60 sec (five-second intervals)
3 .
Press the [MENU] button to close the menu.
Using the safety delay function
1 .
Select the streaming/recording setup screen.
2 .
Touch
3 .
Touch
Livestreaming starts.
4 .
Touch
screen.
The streaming video switches to a still image, and the streaming audio
is muted.
MEMO
You can also assign safety delay for streaming to the USER buttons
on the dashboard.
From “LCD ASSIGN A” or “LCD ASSIGN B” on the dashboard screen
Ó
“USER BUTTON 1/2 or 3/4”, select “STREAM/RECORD” for CATEGORY
and “SAFETY IMAGE” for VALUE.
