Measuring angles, 4 measur ing p a rt f eat ur es – HEIDENHAIN ND 100 User Manual User Manual
Page 42
42
1 Operation
1
.4 Measur
ing P
a
rt
F
eat
ur
es
Measuring angles
A minimum of 4 points evenly divided on two legs of an angle are
required to measure an angle. A maximum of 100 points can be
probed on the two angle legs. Once the minimum two points are
probed on each angle leg, additional points can be distributed between
the two legs in any proportion. For example, the first leg could be
defined by 4 points, and the second by 8.
Press the Angle Measurement key. The Probe Angle
screen will be displayed. Press the key twice to
measure a series of angles using auto repeat.
Move the stage to position the crosshairs over a
minimum of two points evenly distributed on one
angle leg, pressing the ENTER key to collect each
point.
Press the FINISH key to complete the measurement
of the first leg.
Move the stage to position the crosshairs over a
minimum of two points evenly distributed on the
second angle leg, pressing the ENTER key to collect
each point.
Press the FINISH key to complete the angle
measurement. The angle and angle vertex position
will be shown. The angle feature and two angle leg
features will be added to the feature list.
Press the Change soft key to change the angle type if
desired.
Angle types include:
INCLD: Included angle (A1).
360-A1: 360 degrees - included angle.
180+A1: 180 degrees + included angle.
180-A1: 180 degrees - included angle
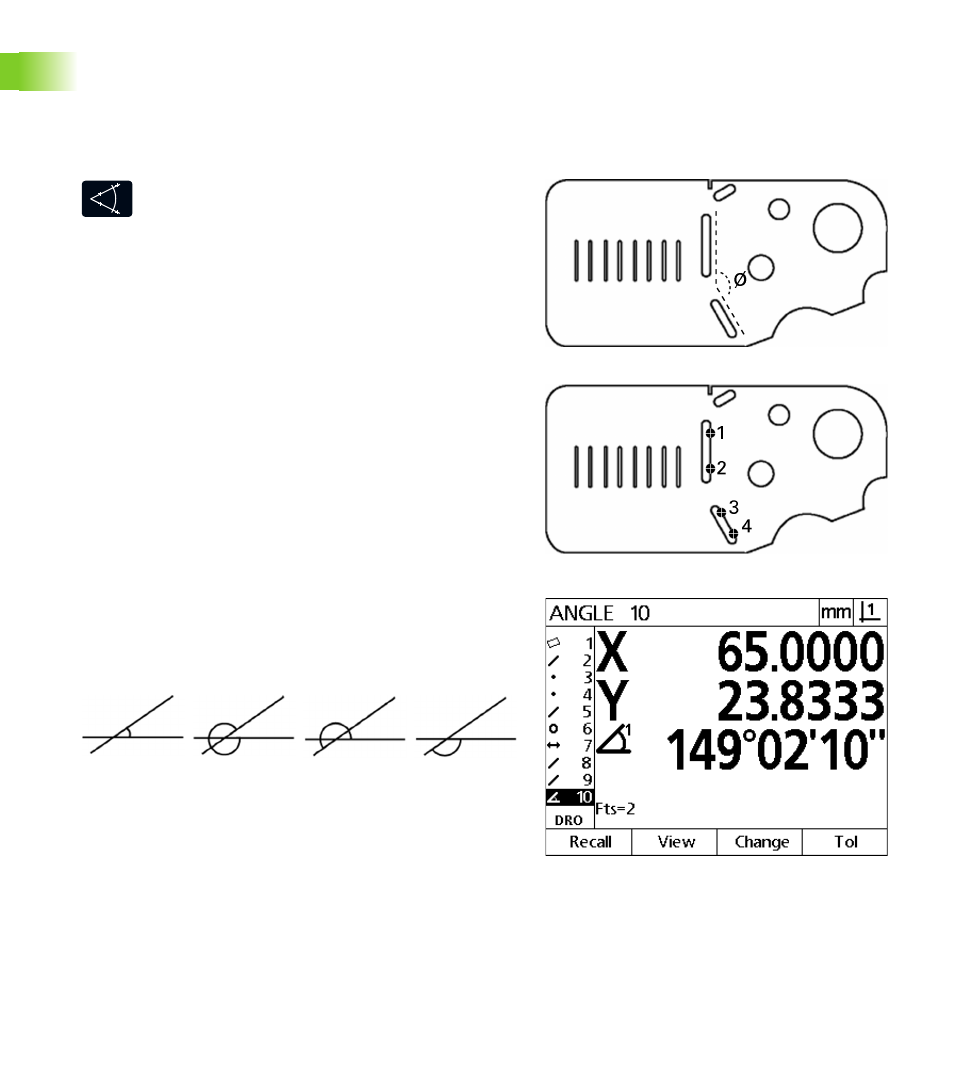
Slot features form an angle (
ø
)
on the part
The two legs of an angle are probed on the part
The angle and angle vertex position are shown. The
angle and angle legs are added to the feature list
INCLD (A1)
360 - A1
180 + A1
180 - A1