Multi-destination mode - take, Multi-destination mode – take, Ns. see – Grass Valley NV9601 v.2.0 User Manual
Page 61: Operation
NV9601 Control Panel • User’s Guide
51
6. Operation
Take
Using the keypad, enter the device’s index number (see
page 13). The Index number appears in Column 1.
The ‘Preset’ column lists source devices that are in valid levels for routing.
4 Press
Take
. The source(s) in the ‘Preset’ column are routed to the destination(s) listed in Col-
umn 1. The ‘Preset’ and ‘Status’ columns update to reflect the route, as shown in Figure 6-1 on
page 48.
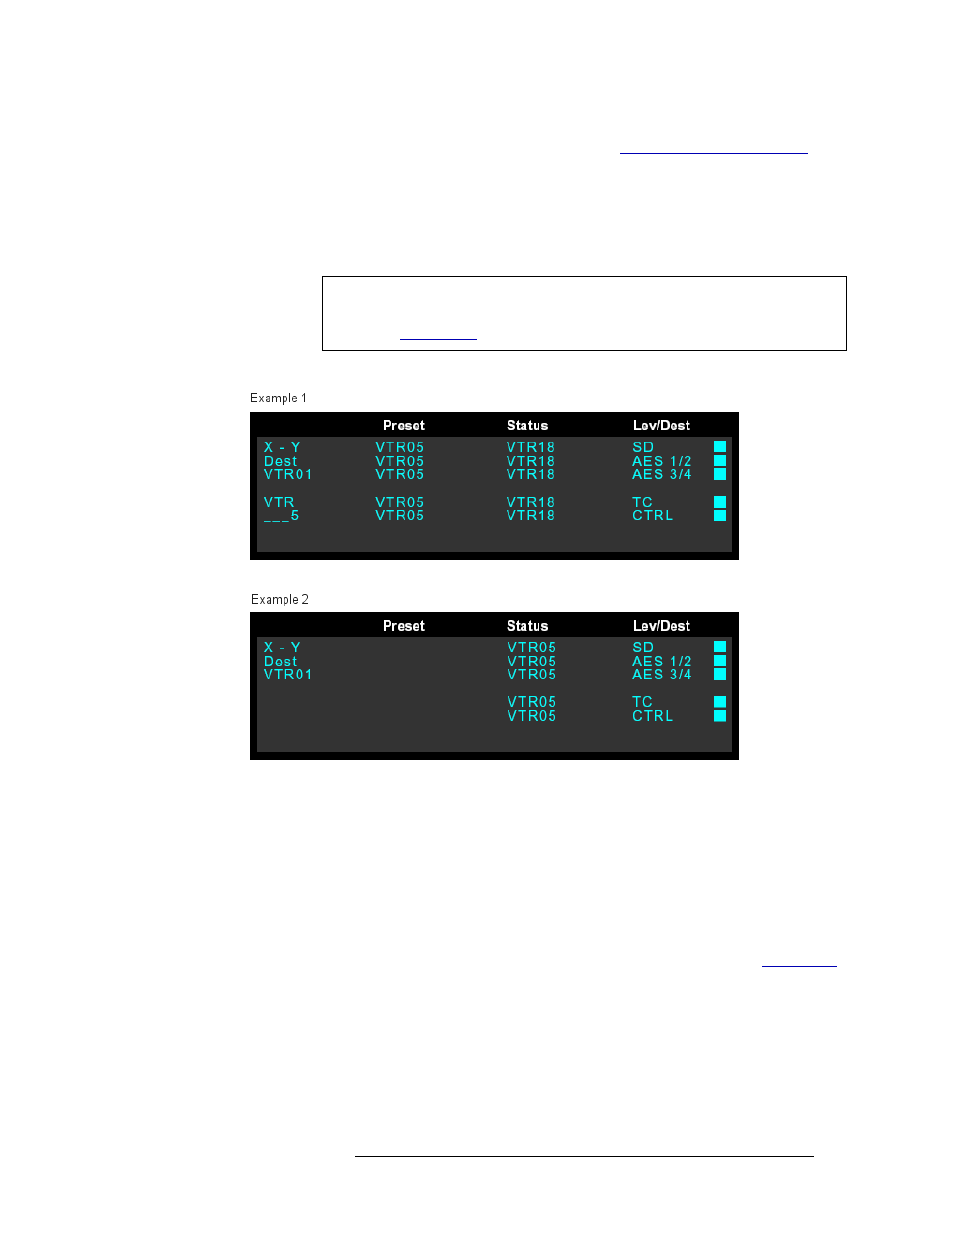
Example 1 is prior to “take” and Example 2 is immediately after the “take”.
Figure 6-2. Example of display changes when a “take” occurs
Multi-Destination Mode – Take
In MD mode you can route one or more sources to one or more destinations. Unlike X-Y mode that
allows you to select a source and destination is any order, in MD mode you must select the destina-
tion prior to selecting the source.
At any time while selecting a destination or source, you can press
Clear
to clear the last entry. Press
Clear
again to clear the entry prior to that, and so on until all the entries you want to clear have been
cleared. Or, press
Clear Pst
to clear the sources that display in the ‘Preset’ column (see
How to perform a “take” in MD mode – Single Source
1 Press
XY/MD
to place the panel in MD mode. The panel buttons turn amber.
2 Select the first destination device:
a Press
Dst Mode
. If needed, press
Page Up
or
Page Down
to view all available destination
devices.
Note
The “take” occurs for all valid levels, whether or not flagged in the ‘Lev/Dest’
column. To route only to specific levels and not all valid levels, perform a break-
away. See