Panel, Installation – Grass Valley NV9601 v.2.0 User Manual
Page 34
24
Rev 2.0 • 29 Mar 09
4. Installation
Setting Up the Control Panel for Use
It is not necessary to have a router connected and/or running for installation of a virtual panel or
setup of a hardware panel. However, once the virtual panel is installed a router must be connected
to apply settings to the virtual panel so that it can communicate with the router.
How to set up the hardware version of the control panel
1 Mount and secure the panel in the rack or on a flat, stable surface. If mounting the control panel
in a rack, attach the panel to the rack frame using screws appropriate for your rack.
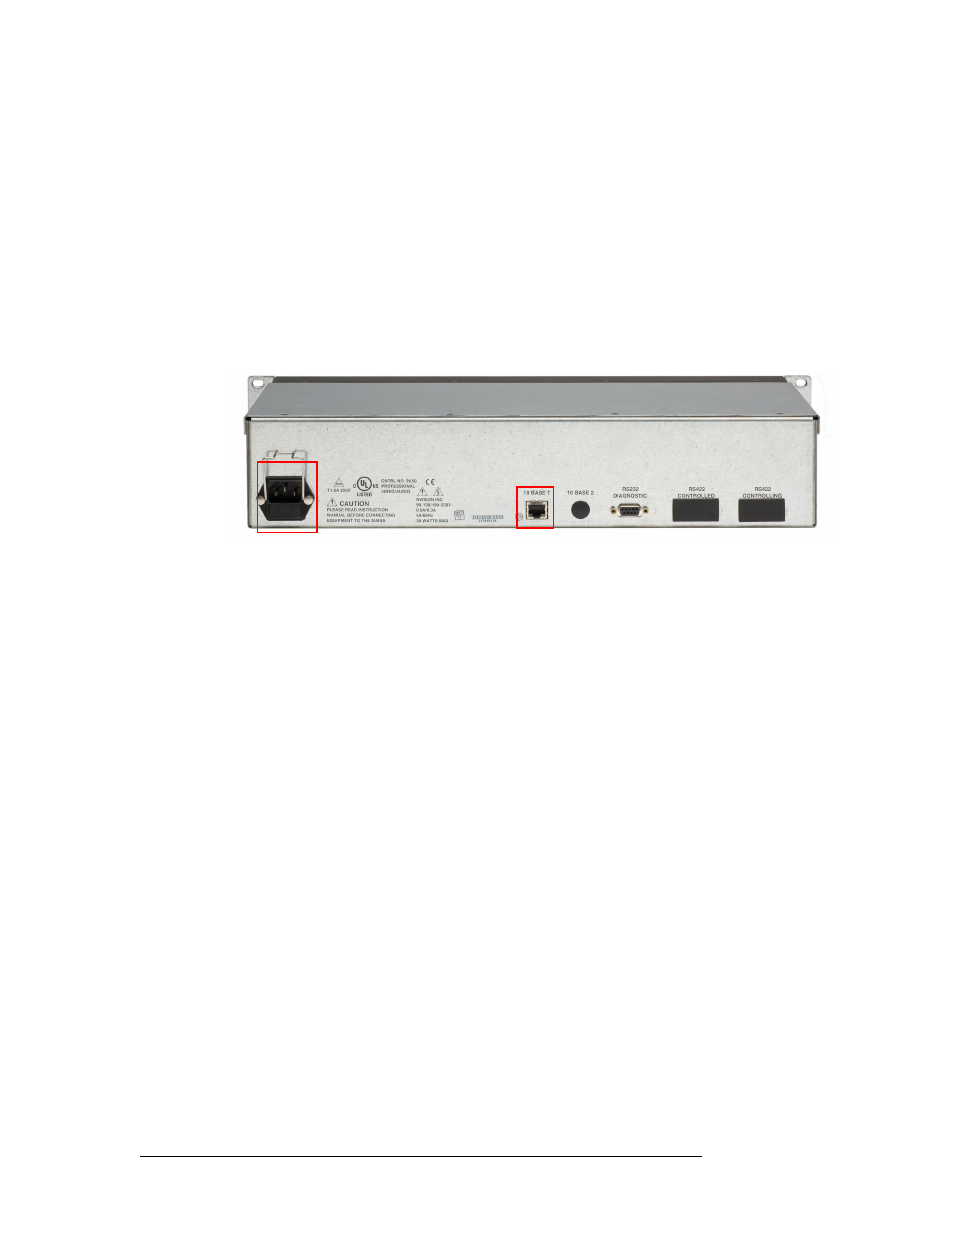
2 This installation procedure assumes that you have an Ethernet switch connected to the ‘Panel
and Router Network’ port on your system controller. Facing the rear of the control panel, con-
nect an Ethernet cable from the Ethernet switch to the RJ-45 port at the rear of the NV9601
panel:
Figure 4-1. NV9601 Rear View
3 Connect the other end of the cable to the Ethernet switch to which the system controller is con-
nected.
4 Facing the rear of the control panel, connect one end of an AC power cable to the power con-
nection on the control panel, as shown in Figure 4-1.
5 Connect the other end of the power cable to a stable source of AC power (90-130/180-250
VAC,
50/60
Hz).
How to install and setup the virtual version of the control panel
Part One
—
Install the Application
1 Locate the virtual panel installation CD (SB0217-01-A1) and load it into the CD drive of the
computer.
2 Open the appropriate directory for your computer: ‘Mac Installers’ or ‘PC Installers’.
3 From the list of control panels, select and open the one you are installing.
4 The ‘Introduction’ screen appears, as shown in Figure 4-2. As directed, quit all software appli-
cations before continuing and then click
Next
.
Power Connection
Ethernet Connection