5 assembly, 1 room installation of the smart-control, Remko smart wp manager – REMKO WPM-Smart-Control-Manual for specialists-WKF-120 User Manual
Page 86: Assembly, Room installation of the smart-control

5
Assembly
5.1
Room installation of the
Smart-Control
NOTICE!
Only use the unit in dry areas and protect it
from electromagnetic radiation.
The Smart-Control remote can be mounted to a
wall, e.g. in the living room.
To wall mount the Smart-Control remote, proceed
as follows:
1.
Fasten the wall bracket directly to the wall
using screws and rawl plugs.
2.
Connect the bus connection (maximum 50
m) with shielded cable (4 x 0.5mm²) to the
terminal strip in the cable duct of the
hydraulic module.
3.
Plug the connectors into the sockets on the
Smart-Control.
+12V = Yellow / B = Green /
A = Brown / GND = White
4.
Slide the Smart-Control into the wall bracket.
1
92
50.75
60
Ø 57
7
122.5
73
10.85
2
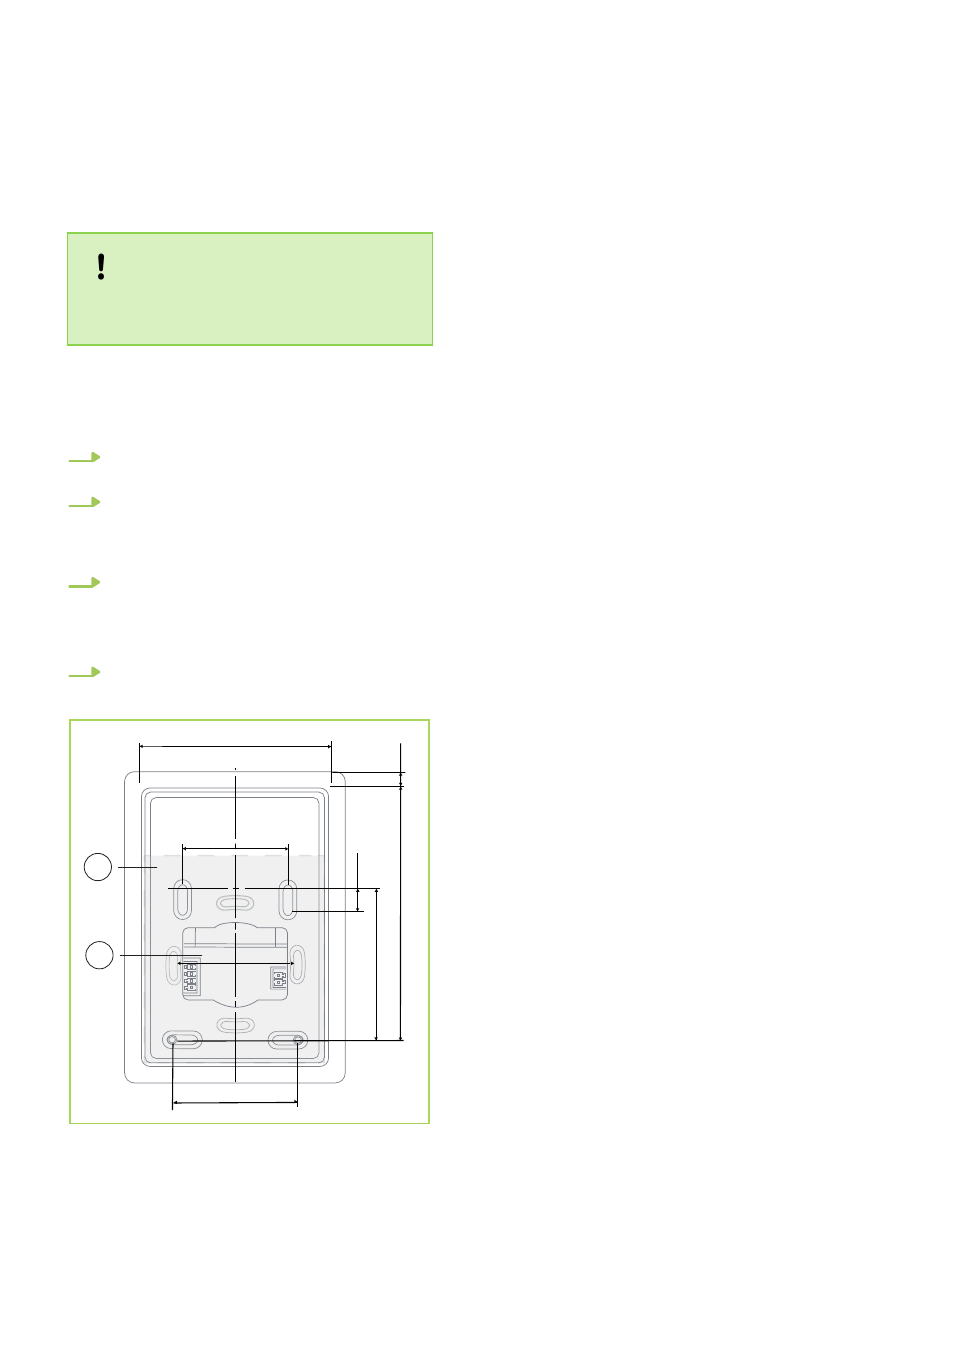
Fig. 104: Layout and dimensions of the back plate
of the wall bracket
1: Wall bracket / back plate
2: Cable feedthrough for wall installation
You have the option of connecting two Smart-Con-
trol remotes at the same time. In this case, one
heating cycle is assigned to each remote. This
assignment is performed by allocating a Control
Panel Number. The Smart-Control for the heat
pump is "always" given the number 1. The heater
heating cycle and floor heating cycle can then be
assigned under number two or three. When the
remote is installed, the Control Panel Number
assigned to the remote must be stored in the con-
troller of the heat pump for the selected heating
cycle.
For programming, follow the installation wizard, as
described in the chapter on commissioning the
heat pump controller.
REMKO Smart WP MANAGER
86
