Front panel programming and control, Modes – Adtec digital DTA-3050 (version 6.02.14) Manual User Manual
Page 19
Front Panel Programming and Control
The front panel control group (function buttons, arrow keys, and LCD display) can be used to program and control virtually all
aspects of the DTA3050's operations. In fact, there are several commands that can only be carried out through the front panel
Modes
The mode button is used to access menus which control the major settings and configurations of the unit.
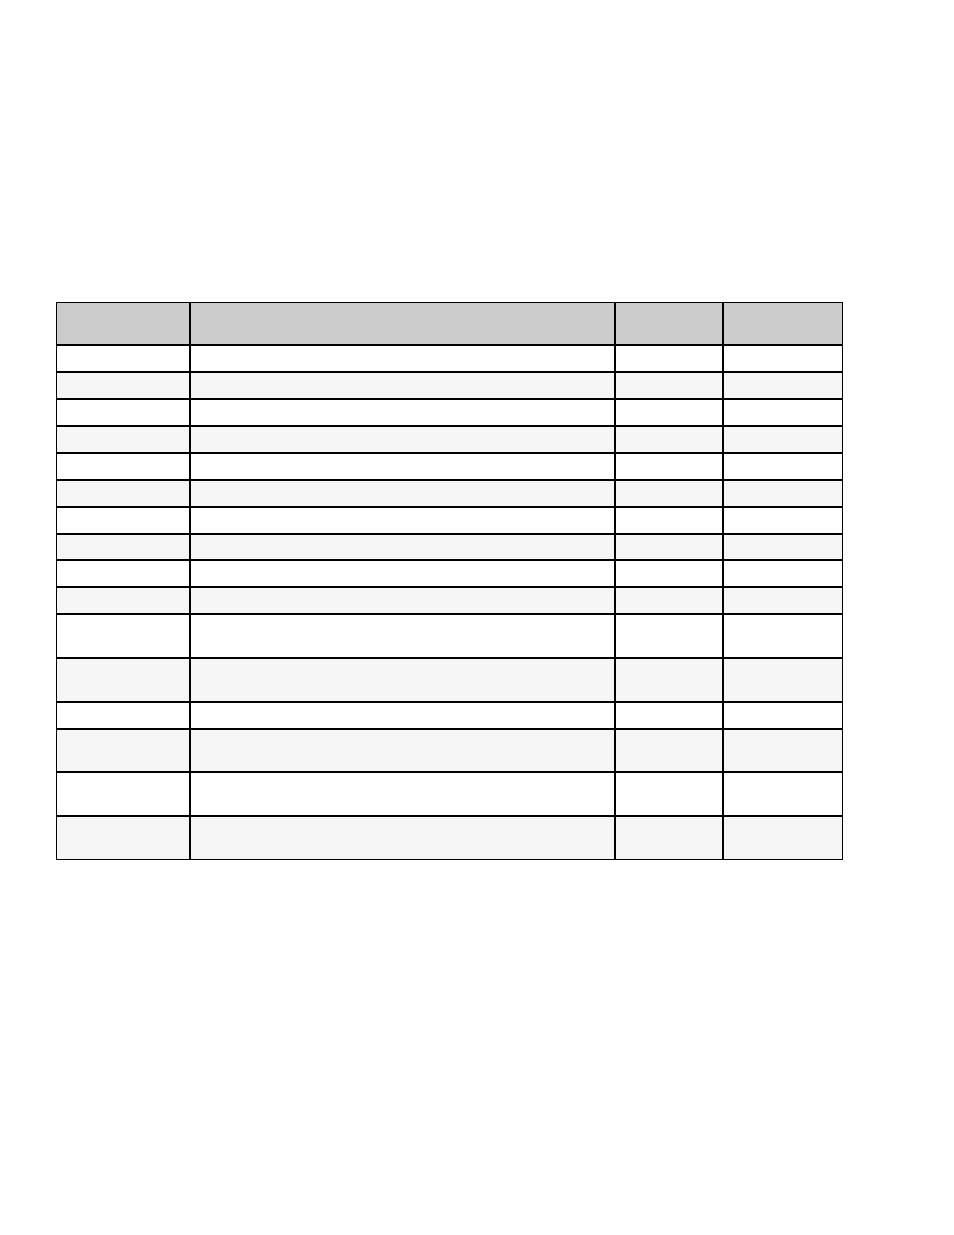
Mode List
Mode
Purpose
# of
Sub-menus
User
Configurable
Main Menu/Login
log into unit and control access
7
Yes
IP Address
allows entry of IP addresses for various components
10
Yes
Port State 1-10
configures the operation of each of the 10 input ports
8 (per port)
Yes
Output
cycles output of aggregate signal into SMPTE or ASI
2
Yes
Tables
cycles through table formats
3
Yes
IPTV
input of Global Settings and Mapped Programs
2
Yes
Audio Format
DVB audio settings
1
Yes
MPE 1-30
configure settings for Multiprotocol Encapsulation
12
Yes
DECAP 1-5
specifies decapsulization
4
Yes
CA1 1-5
conditional access configuration
16
Yes
ENC RED
SWITCH
Encoder Redundancy Switch; used to select PESA LNS8 for
redundancy (only supported option)
1
Yes
MUX Redundancy
Mode
Defines whether the unit is designated a Primary or Back-up
Muxer in a dual-redundancy Mux configuration.
2
Yes
Logs
none-not supported
n/a
n/a
H/W Version
informational only; gives the version number of the installed
hardware
No
S/W Version
informational only; gives the version number of the
installed on-board GUI
No
O/S Version
informational only; gives the version number of the
installed operating system
No
Status Mode
The front panel can be used to completely configure, operate, and maintain the DTA3050.
When first powered up, the unit will activate in Status Mode.
Status Mode shows the following operating parameters:
operating bit rate.
♦
quantity of data ('D' value).
♦
quantity of IP data ('V' value).
If there is no IP data, an 'F' value will appear, signifying the quantity of fill data.
◊
♦
•
By pressing the "Mode" button, each mode menu can be accessed in turn.
•
If there is no user activity from the front panel or GUI, the unit automatically shifts to status mode.
The default setting for the for this feature is five minutes; however, it can be user-configured for periods
between one and nine minutes.
♦
•
Getting Started
16