Inserting a drive carrier (with drive installed), Removing a drive carrier (with drive installed) – StorCase Technology InfoStation 10-Bay 1U Ultra320/SATA User Manual
Page 25
12
Controller Module
StorCase Technology, Inc.
InfoStation 10-Bay RAID User's Guide - Rev. E00
Inserting a Drive Carrier (with Drive Installed)
NOTE:
A new drive can be inserted into an empty bay at anytime. However, the drive
will not be ready for access until the following procedure is followed.
1.
Simply insert the drive carrier into the empty bay. Push handle in to lock carrier into
place.
2.
Drive is ready to be accessed when the Drive Ready LED glows BLUE.
Removing a Drive Carrier (with Drive Installed)
CAUTION:
Proper procedure must be followed when removing a disk drive from the drive
bay. It is the responsibility of the operator to ensure that the host does not
access the drive while attempting to remove the disk drive, and to follow the
procedure outlined below. Failure to do so may result in loss of data and/or
damage to the drive itself!
NOTE:
Refer to the InfoStation Installation Guide for detailed information on inserting/
removing drives from the InfoStation chassis.
1.
Verify that the Drive Activity LED is OFF before removing drive.
2.
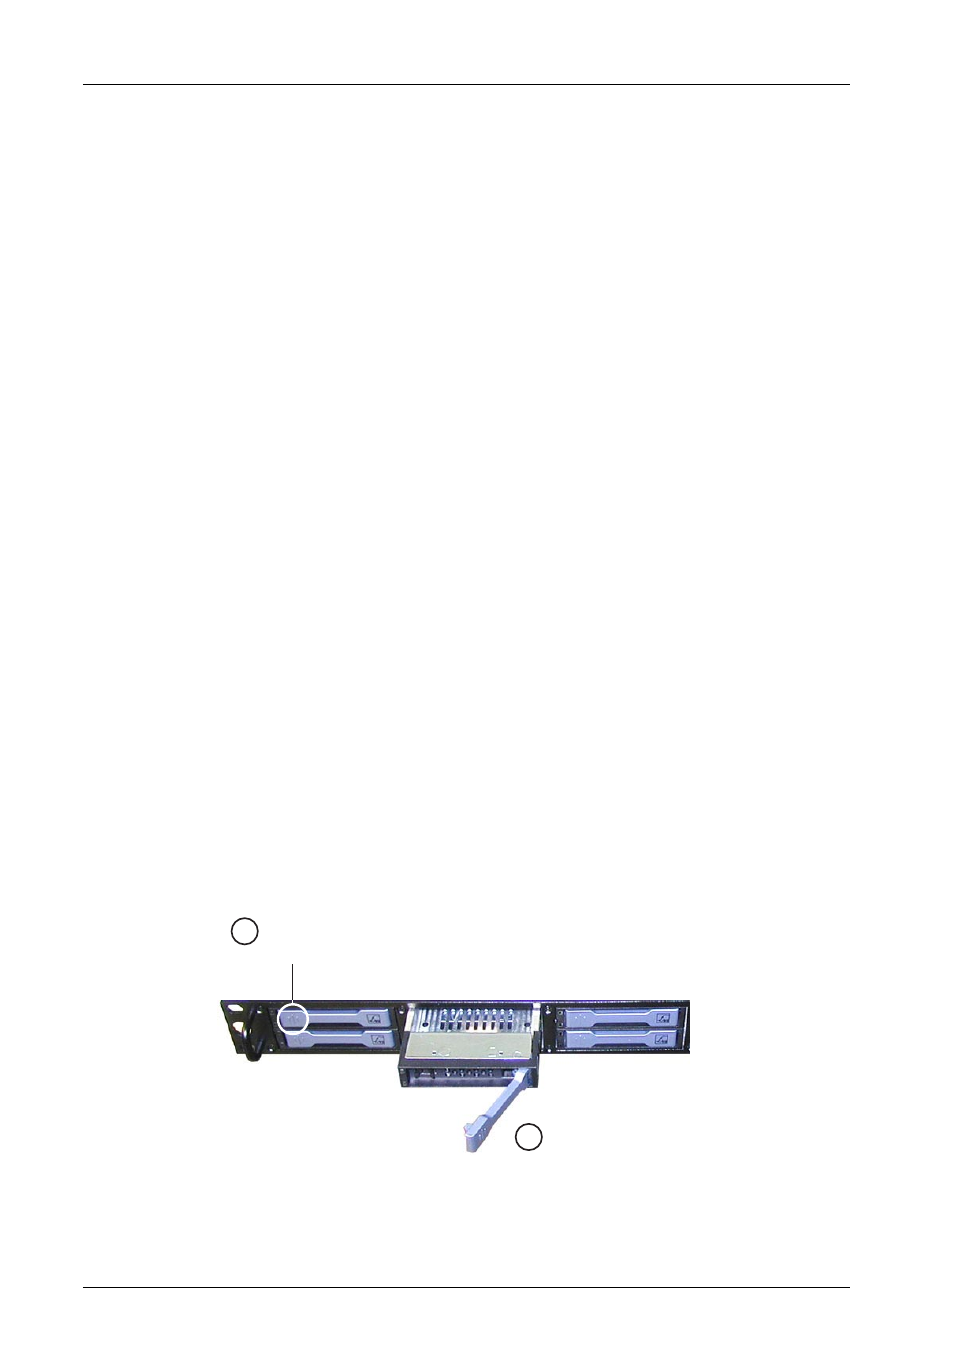
Eject the drive carrier by pushing on carrier handle (Step 1 of Figure 5). Once handle
pivots outward, pull handle to remove carrier (Step 2 of Figure 5).
Figure 5: Removing the Drive Carrier
Pull Handle to
Remove Carrier
2
Push Handle
to Eject Carrier
1