Hanna Instruments HI 9829 User Manual
Page 38
38
7.2 pH CALIBRATION
To optimize the pH measurement follow the general guidelines mentioned in the
Chapter 7 introduction.
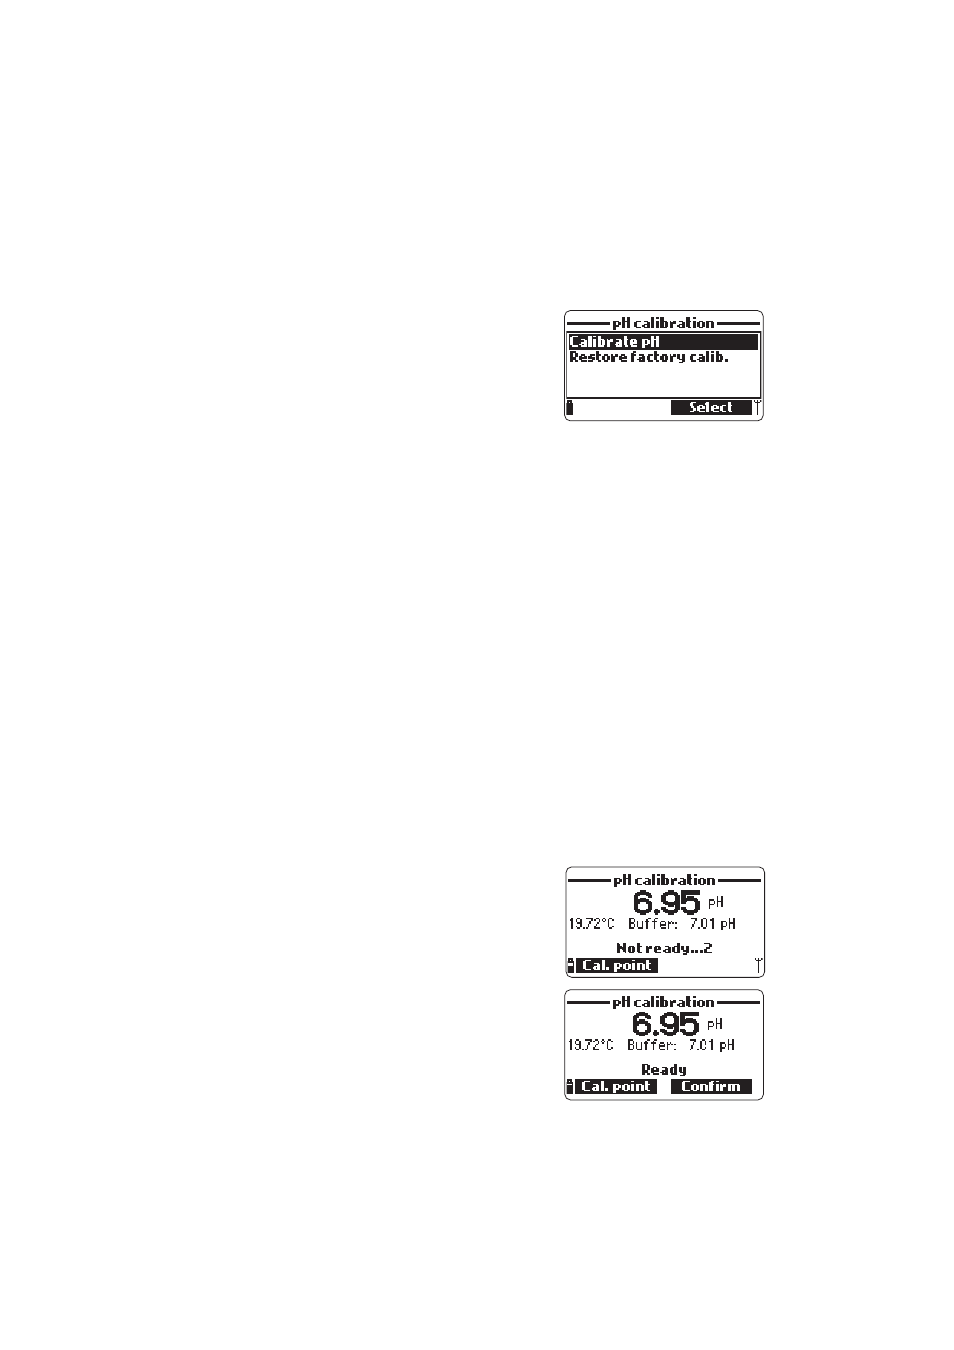
From the “Calibration” menu select “Single
param. calibration” and then “pH calibration”. The
display shows two options: “Calibrate pH” and
“Restore factory calib.”.
If a new pH sensor has been installed use “Restore
factory calib.” before performing a user calibration
as some warning messages are based on changes from previous calibrations.
If “Restore Factory Calib” is selected, all user calibration data will be deleted and
the factory default calibration is restored. A user calibration should follow
immediately.
If “Calibrate pH” is selected, the user can perform a new calibration using up to
3 buffers (pH 4.01, 6.86, 7.01, 9.18, 10.01 or one custom buffer).
When a 3-point calibration is performed, all old data are overwritten, while with
a single or 2-point calibration the meter will also use information from the previous
calibration.
7.2.1 Preparation
Pour small quantities of the selected buffer solutions into clean beakers. To
minimize cross contamination, use two beakers for each buffer solution: the
first one for rinsing the sensor and the second one for calibration.
7.2.2 Procedure
The measured pH value is displayed, along with the temperature and the buffer
value on the second level.
If necessary, press the
correct buffer.
• Immerse the pH sensor in the first buffer rinse
solution and stir gently.
• Immerse the pH sensor and temperature probe
into the selected buffer and stir gently. The
temperature, pH buffer value and the “Not
ready” message are displayed.
• Once the reading has stabilized the countdown
timer will count down until the display shows
the “Ready” message.
• Press
point.