Echelon Mini EVK User Manual
Page 20
Mini EVK Hardware Guide. For more information on installing and
configuring the U10 or U20 USB Network Interface, and on using it to
attach your computer to a network channel, see the L
ON
W
ORKS
USB
Network Interface User’s Guide.
WARNING: Only one application can use a network interface at a time,
so if you connect the Mini Application to a network interface, you cannot
use that network interface with other applications. You must exit the
Mini Application to make a connected network interface available to
other applications. Multiple LNS applications can share a network
interface, but they cannot share a network interface with applications
that are not based on the LNS network operating system such as the
Mini Application.
WARNING: If you want to use a PCC-10, PCLTA-20, or PCLTA-21
network interface, you must configure it as a layer 5 interface. See the
Mini EVK Hardware Guide for more information on this.
3. Select a target device in the Device box. Click the arrow to view any
devices that you have recently added or that have been automatically
discovered through the ISI protocol. You can select one of these devices,
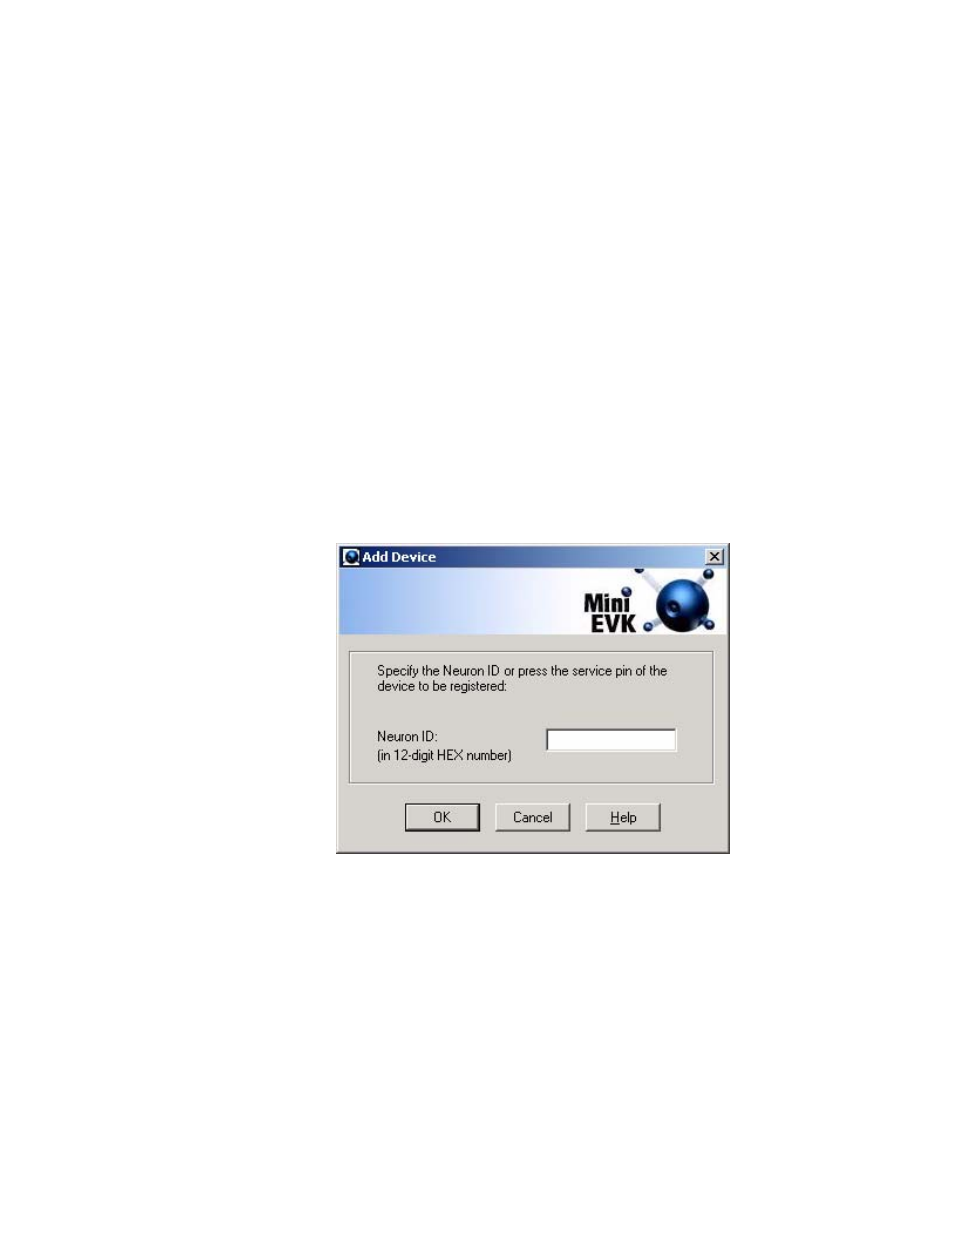
or you can click the Add button to add a new device. If you add a new
device, the Add Device dialog shown in Figure 2.4 opens.
Figure 2.4 Add Device Dialog
Enter the Neuron ID of the target device in the Neuron ID box and then
click OK. The Neuron ID is a unique 48-bit (12-hex digit) identifier
contained in every L
ON
W
ORKS
device. The Mini Application uses the
Neuron ID to communicate with your selected device. For more
information on Neuron IDs, see the Introduction to the L
ON
W
ORKS
System document in the Echelon Mini EVK program folder.
If you do not know the target device’s Neuron ID, you can acquire it by
pressing the device’s Service button. The Service button is typically a
push button included on most L
ON
W
ORKS
devices that causes the device
to broadcast its Neuron ID on the L
ON
W
ORKS
network.
14
Mini EVK User’s Guide