Connecting machine to power supply, For your safety, Operating instructions – Sears 385.12912 User Manual
Page 14: Controlling sewing speed
Attention! The text in this document has been recognized automatically. To view the original document, you can use the "Original mode".
SECTION II. GETTING READY TO SEW
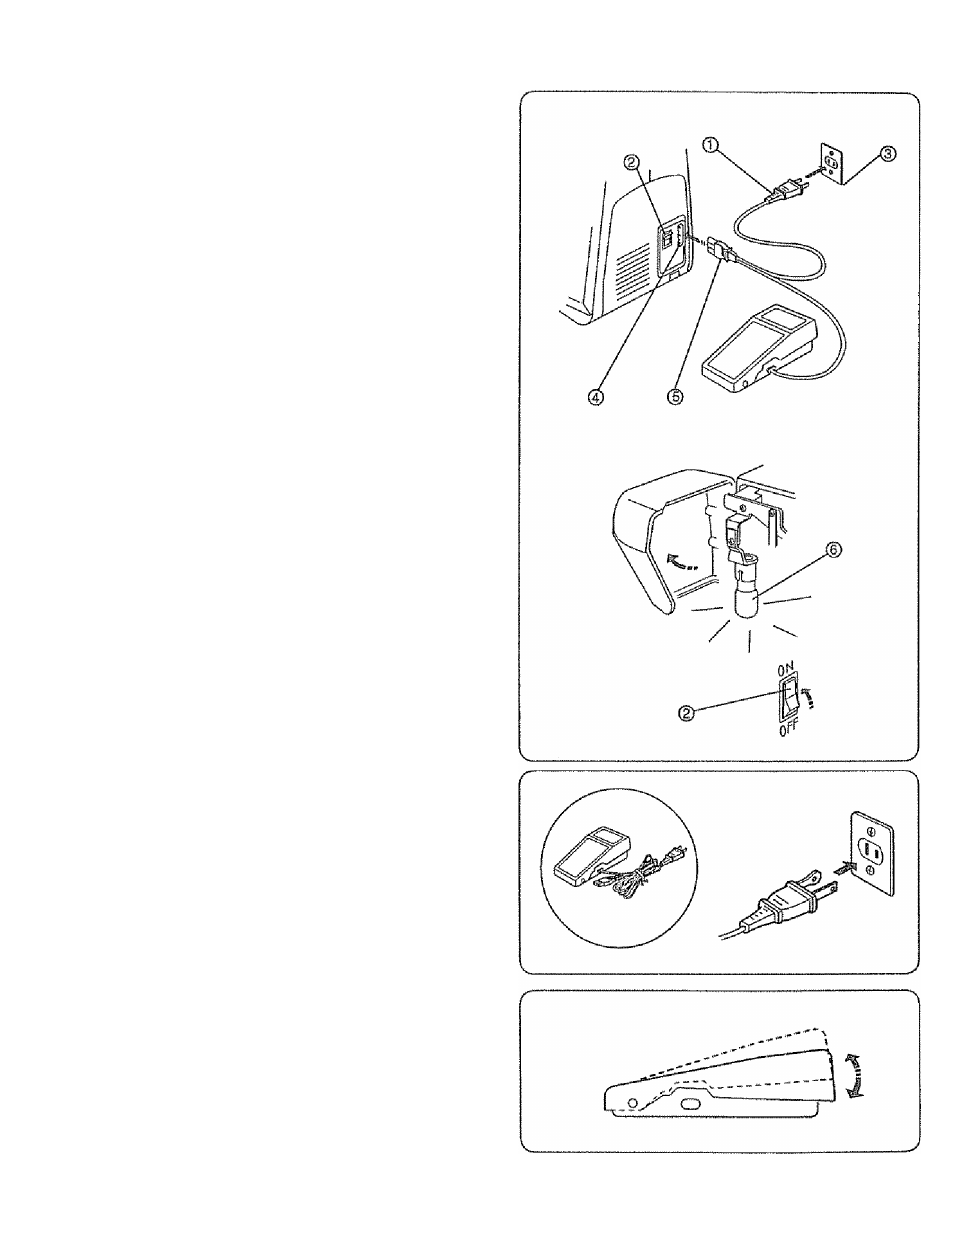
Connecting Machine to Power Supply
(T) Power supply plug
(D Outlet © Machine socket © Machine plug ©Light bulb Before connecting the power cord, make sure the voltage and frequency shown on the machine conform to your electrical power 1. Turn off the power switch© 2. Insert the machine plug© into the machine socket© sewing light©. For Your Safety * While in operation, always keep your eyes on the sewing area. Do not touch any moving parts such as the thread take-up fever, handwheel or needle, * Always turn off the power switch and unplug from the power supply: - When leaving the machine unattended. * Do not place anything on the foot control, when not sewing . Operating instructions: "For appliances with a polarized plug (one blade If it does not fit fully in the oirtlet, reverse the plug. If it still does not fit, contact a qualified electrician to install the “Foot Controller Model YG-482J orTJC-150 is used with Controlling Sewing Speed Sewing speed can be varied by the foot control. The harder you press on the foot control, the faster the machine runs
3. insert the power supply plug© into the outlet ©
4. Turn the power switch{|)lo turn on the power and
- When attaching or removing any parts.
' When cleaning the machine.
wider than the other). To reduce the risk of electric shock,
this plug is Intended to fit in a polarized outlet only one way.
power outlet. Do not modify the plug in any way.”
Sewing Machine Models 385.12912 XXX and 385.12916
XXX.”
XXX ~ represents numbers 000 through 999.