Top Flite TOPA0110 User Manual
Page 9
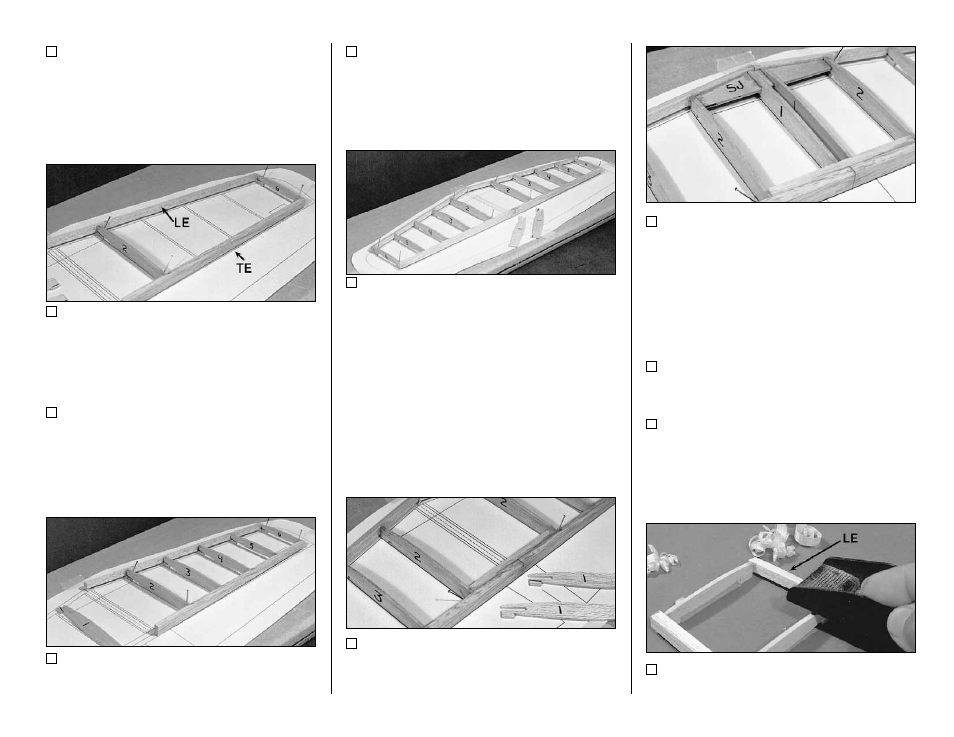
5. Starting with the right half of the stab, pin
ribs S-2 and S-6 to the building board over their
locations on the plans.
6. Center the LE vertically on the front edge
of ribs S-2 and S-6. Glue it in place with CA.
7. Center the TE vertically on the back edge
of ribs S-2 and S-6. Glue it in place with CA.
8. Glue ribs S-3, S-4, and S-5 in their places.
All the jig tabs should rest on the work surface.
9. Trim the LE and TE so they end exactly
over the stab centerline.
10. Repeat steps 5 through 8 to build the left
half of the stab. The left half of the stab is built
next to the right half with the two halves butt
glued together for now.
11. Trim the 1/4" x 7/16" x 4-1/4" hard balsa
stab TE joiner, if necessary, to fit between the
S-2’s. Securely glue it to the TE’s and the S-2’s.
1 2 . T r i m t h e l e n g t h o f t h e d i e - c u t 1 / 8 "
plywood Stab Joiner (SJ), if required, for a good
fit between the S-2’s. Place the stab joiner into
t h e s l o t s i n t h e S - 1 ’ s a n d w o r k t h e w h o l e
assembly into position. Make sure all parts are
properly aligned and the S-1 jig tabs contact the
work surface. Glue in the stab joiner and the S-1’s.
13. Using medium CA, reinforce any glue
joints that do not look strong.
14. Carefully remove the stab from the
building board but try not to damage the jig tabs,
as they will be useful until after the top of the stab
is sheeted.
15. Use a razor plane and a sanding block to
- 9 -