Top Flite TOPA0110 User Manual
Page 33
2. Round the ends of the 2-1/2" long 1/4"
Dowels. Insert the Dowels into the wing (do not
glue yet).
3. Test fit the wing onto the fuselage. The
fuse dowel holes may have to be loosened up a
little more to allow the wing to go on smoothly.
4. Adjust the parts until the wing fits well on
the saddle. The CLE (Center Leading Edge) and
the wing saddle may require slight adjustments.
5. Tape some scrap 1/32" plywood (from the
wing fillet base die-cut sheet) to the wing skin
near the trailing edge and over the spar to
simulate the die-cut plywood Fillet Base being in
place. Again test fit the wing to the fuselage. If
there is much interference preventing the wing
from comfortably fitting down on the saddle,
shape the wing dowel holes oblong and adjust the
d o w e l s l o t i n t h e w i n g s t r u c t u r e u n t i l t h e
interference is gone.
6. Draw a centerline on the CLE to give you a
reference when aligning the wing.
7. Tape a piece of scrap balsa between the
fuselage sides at the aft end of the fuselage.
Stick a T-pin in the scrap balsa on the fuselage
centerline. Tie a five foot length of string to the
pin, which will aid in checking the wing alignment.
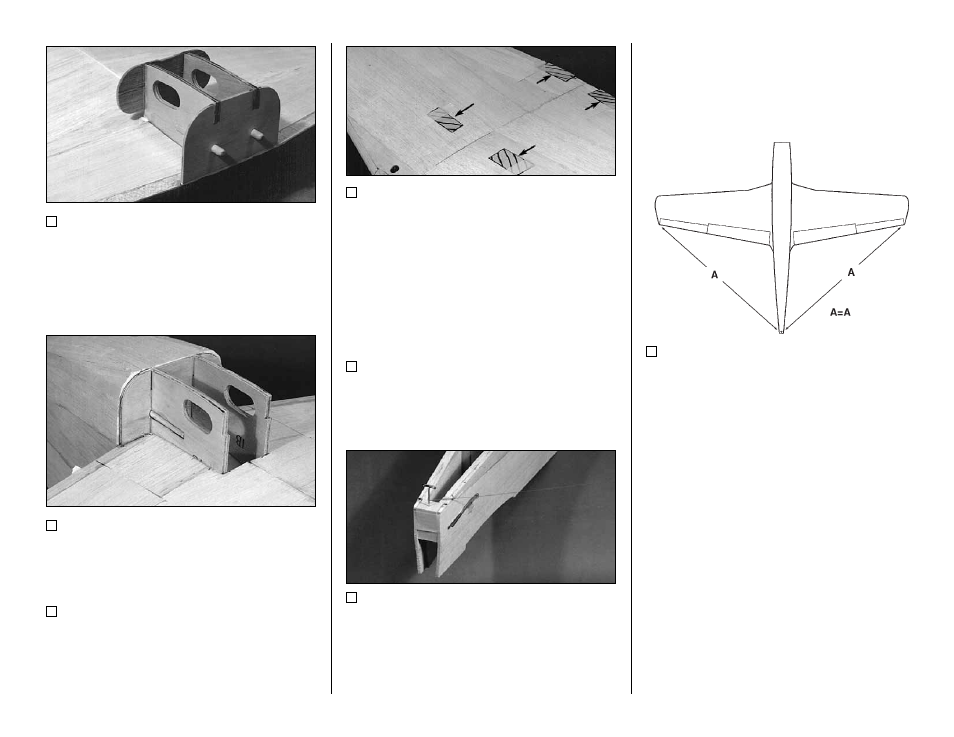
8. Put the wing in position on the fuselage.
Hold the string (with one end attached to the pin
at the tail) up to a wing tip. Put a piece of tape on
the string to mark the intersection of the string
and the wing tip. Swing the string over to the
other wing tip and check to see if the distances
are the same (see diagram). Adjust the position
of the leading edge of the wing until the wing is
properly aligned.
NOTE: Make sure the wing is held
securely and cannot shift while you
are drilling the mounting holes.
- 33 -