Top Flite TOPA0110 User Manual
Page 32
54. Roughly shape the Radiator Corners with
a knife and a razor plane. Save the final shaping
until after the aft bottom sheeting has been
applied.
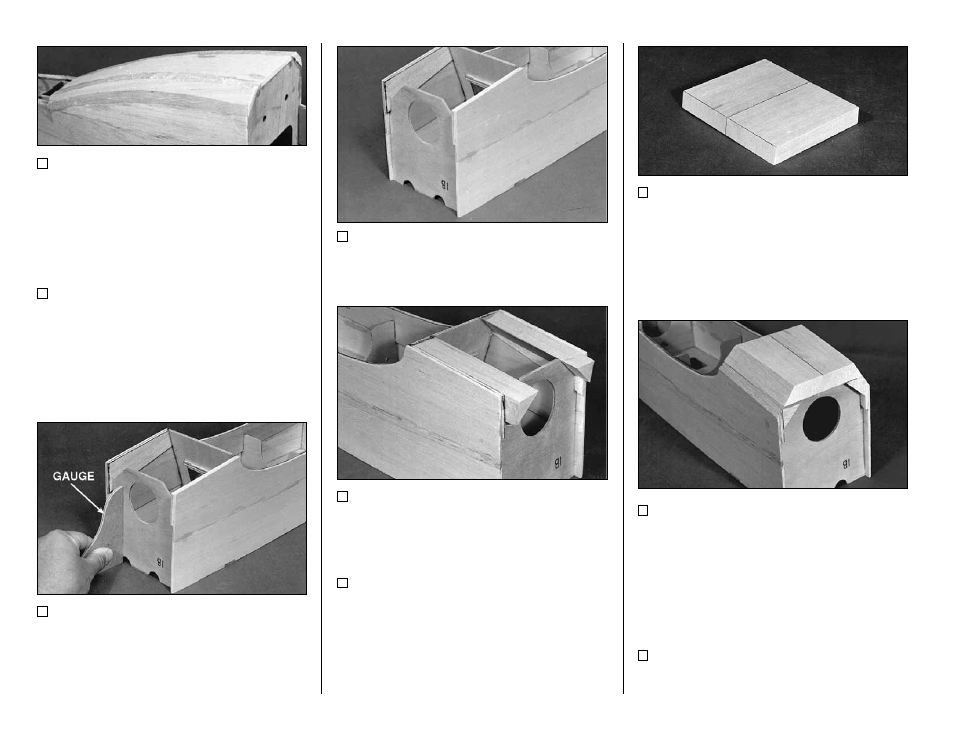
55. A pattern for the gauge to set the firewall
angle is provided on the plan, since the Plywood
Fuse Doublers alone cannot be counted on to set
the correct 1.75 deg. of down thrust. Glue the
pattern to a piece of plywood or cardboard and
cut it out.
56. Test fit the die-cut 1/8" plywood Aft
Firewall (F-1B) into the front of the fuselage and
c h e c k t h e a n g l e w i t h t h e f i r e w a l l g a u g e .
Remember, the Crutch and Doublers also set
right thrust. Make any necessary adjustments.
57. Glue in F-1B starting at the crutch. Use
the firewall jig to make sure the angle is correct.
58. Bevel the aft edges of the two 5" long
balsa 1" triangle pieces so they match up to F-3.
Glue in the triangles.
59. Apply a fillet of 30-minute epoxy to the
inside corner of the firewall and the fuse sides.
You also may want to use epoxy to fuelproof the
corners that will be difficult to get to after the Chin
Block is put on. Also apply a fillet of epoxy
around the Fuselage Bolt Plate.
60. Glue the two 3/4" x 2-5/8" x 4-3/8"
shaped balsa Chin Block pieces together as
shown. The angled end of the block aligns as a
projection of F-3. Glue the block to the fuselage.
61. Roughly shape the Chin Block. Final
shaping of the block will be done later.
MOUNT THE WING TO THE
FUSELAGE
1. Run a 1/4" drill bit through F-8 and F-8D to
clean out the holes so the dowels will fit through.
- 32 -