Top Flite TOPA0110 User Manual
Page 51
4. Repeat these divisions on the fuselage’s
left and right sides as well as the bottom.
5. Draw rings around the nose of the plane
with the marker (and a pencil on the cowling).
The rings should be even all the way around.
The rings may be drawn by applying strips of
p l a s t i c f i n e - l i n e m a s k i n g t a p e a r o u n d t h e
f u s e l a g e , t h e n r u n n i n g t h e p e n a r o u n d t h e
fuselage using the tape as a guide.
6. Divide the fuselage up radially using the
box and other photos as a reference. Use a
s t r a i g h t e d g e o r t a p e t o d r a w t h e r a d i a l
(lengthwise) lines on the fuselage and cowl.
7. Mark the section at the front of the cowl
that is red. Remove the cowling.
8. Custom cut individual pieces of black
M o n o k o t e t o f i t e a c h b l a c k p a n e l o f t h e
checkerboard. Iron these down as you cut them.
9. To complete the checkerboard, you will
need to bolt the wing onto the fuselage and
continue the checks onto the fuselage fairing on
the forward portion of the wing.
10. Use isopropyl alcohol to remove any
exposed marks.
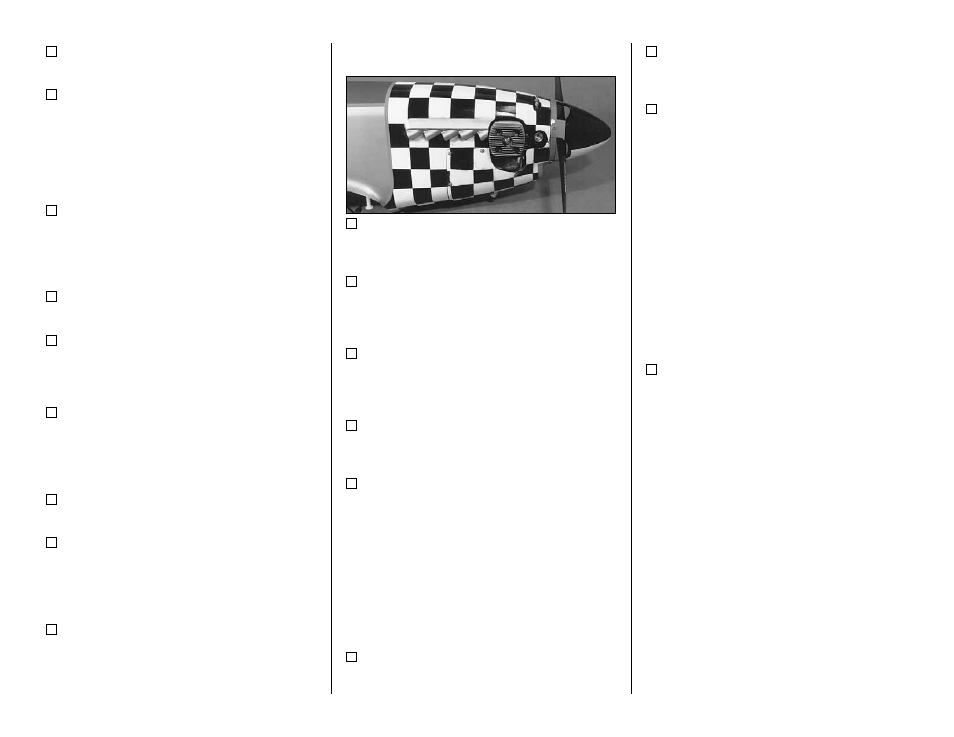
11. Cut a 1/4" strip of red Monokote and iron it
along the aft edge of the checks as shown in the
photos. Also apply a 1/4" wide red strip along the
edge of the olive drab panel.
12. For best results, the white parts of the
cowling should be masked and the remainder
painted black to complete the checkerboard. The
chin of the cowl is painted red.
EXHAUST STACKS
1. Trim the Exhaust Stacks as closely as
you can.
2. Paint the exhaust stacks. Aluminum
C h e v r o n P e r f e c t p a i n t w a s u s e d o n t h e
prototypes.
3. Mark the perimeter of the stacks on the
fuselage. Use a pin to perforate the covering
underneath the stacks.
4. Roughen the underside of the plastic
stacks with sandpaper.
5. Glue on the stacks. CA glue was used on
the prototypes.
APPLY DECALS
NOTE: The decal sheet does not give
you everything you need to completely
trim your model, but it does provide all
the intricate detailing and difficult
items.
1. Study the plans and the photos on the box
to decide where to place the decals.
2. Thoroughly clean your airplane before
applying decals.
3. Cut out the individual decals and apply
them in the locations shown on the plan.
NOTE: Certain decals are provided
that you may use at your discretion.
H I N T :
T o a p p l y d e c a l s a c c u r a t e l y , u s e a
permanent marker to put small reference marks
on the aircraft outside the extents of the decal.
Peel the decal backing off. For large decals,
spray the aircraft and the glue side of the decal
with a 50-50 mixture of water and Windex.
Carefully “float” the decal into position. Use a
damp paper towel to squeegee the liquid out from
u n d e r t h e d e c a l f r o m t h e m i d d l e , o u t w a r d .
Remove the marks with isopropyl alcohol.
4. The “Col. J. D. Landers” decal should be
applied after the canopy has been glued on.
HINGING
NOTE: Hinging is usually done after
covering, but before final trimming.
Hinges are not included in this kit since there
are a wide variety of hinges available and most
modelers have their own preference. “CA hinges”
were used with good results on the primary
surfaces of the prototypes (with Robart Hinge
Points used on the flaps).
The recommended locations for the hinges
are shown on the plans. The cross-sections on
the plans also show typical hinge installations.
- 51 -