Top Flite TOPA0110 User Manual
Page 48
- 48 -
hinges. Drill 3/16" holes at the hinge locations.
Use a sharp #11 knife to open a V-notch in the
flap as shown in the photos and on the plans.
This will allow the hinge point pivot to be in the
center of the radius of the flap LE.
NOTE: The hinges are not glued in
until after the finish has been applied.
8. Plug the flap into the wing. Check its fit
and run it through its range of motion. Make any
required adjustments until the flap swings freely
through its range of motion (remember the flap is
not required to raise above neutral).
9. Use the plans as a reference to mark the
approximate location of the die-cut 1/16" plywood
Flap Servo Bay Cover onto the bottom wing
skin.
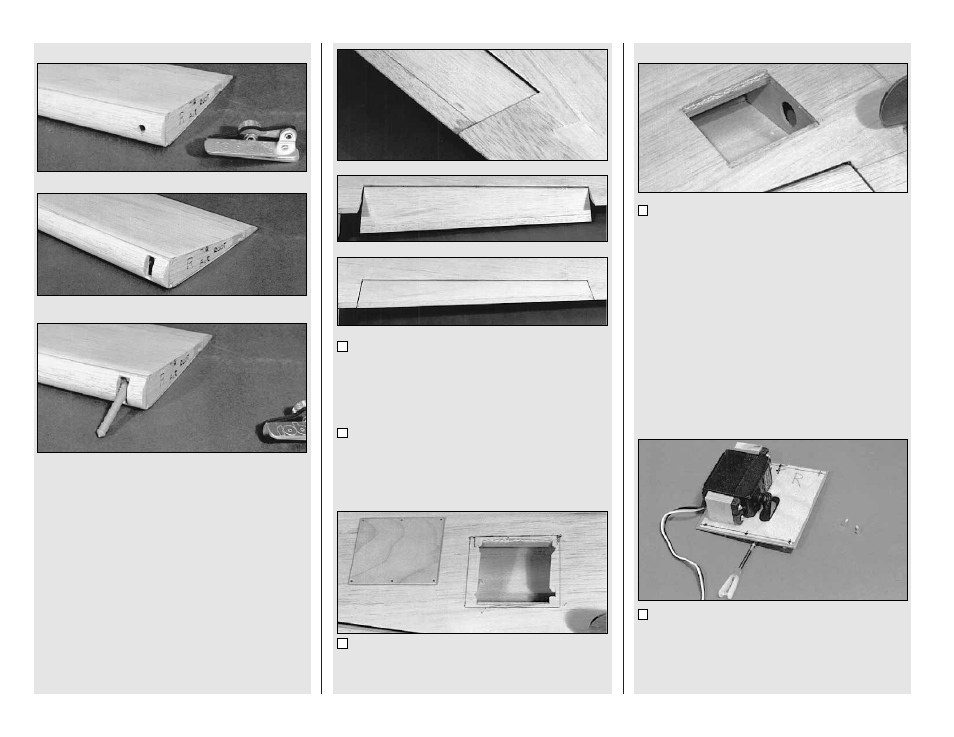
10. Cut an undersized hole into the bottom
wing skin. This will allow you to locate the built in
structure.
11. Trace the outline of the Flap Servo Bay
Cover accurately onto the wing skin. Carefully
cut out the rest of the bay and fit the cover into
place.
NOTE: Unless you have a reverse
throw servo, you will need to mount
the flap servos in an asymmetrical
manner as shown in the plans to have
them both move in the same direction.
12. Mount the servos to the inside of the
covers using the 5/16" x 3/4" x 7/8" basswood
Flap Servo Mounting Blocks.