Top Flite TOPA0110 User Manual
Page 22
NOTE: This is a somewhat unique way
of joining the sheeting in the center of
the wing that eliminates the need for
glassing the center section. Do not try
to sand the center sheeting so the
wing skin will have 100% contact with
it. If the skin is left a little high on the
top surface of the wing, it is fine, since
this part of the wing is hidden under
the saddle.
4. Block sand the center sheeting slightly,
particularly on the bottom, to blend it with the
shape of the other wing ribs.
NOTE: The wing sheeting process
described here involves making a skin
that covers most of the wing first, then
gluing it to the structure. This
skinning process requires fairly quick
and accurate work when you apply the
skin to the wing. An alternative is
sheeting the wing with individual
sheets, which requires less
preparation and does not require you
to work as fast. It does not allow you
to pre-sand the seams. We
recommend you read through the
entire sheeting section before
proceeding. Then use whichever
process you are comfortable with.
NOTE: All balsa sheeting will usually
bend when it is cut from the log
because stresses are relieved. For
best results, trim the edges of the wing
sheeting with a long metal straight
edge and a sharp knife before joining
them.
5. Lay waxed paper over a flat smooth work
surface. You will join the wing skins on this
surface.
6. Edge glue four 1/16" x 3" x 36" balsa wing
sheets together with thin CA for each of the four
wing surfaces. Hint: A quick wipe of a paper
towel while gluing the sheets will soak up most of
the excess CA and make sanding the seams
easier.
7. LIGHTLY sand both sides of the skin over
the work surface with a sanding block and sharp
220-sandpaper.
NOTE: The steps below show sheeting the flap
with a separate piece of wood. This orients the
grain more parallel with the flap span and makes
it easier to fit.
NOTE: If you are building functioning
flaps, you may choose to cut the flaps
loose from the structure before
sheeting them. If there are any slight
warps in your flap trailing edges, this
will allow you to straighten them
during sheeting. If your structure
appears straight, we think you will find
it best to sheet the flaps while they are
still attached as shown in the
construction sequence.
8. Tape a skin to the bottom of the wing
structure, aligning it with the leading edge. Mark
the outer extents of the wing from the other side
of the structure. We usually leave about 3/8"
overhang where possible.
9. Cut the skin to the shape you marked.
Check the fit of the skin to the structure and make
adjustments until it fits well (see photo at step
15).
10. Trace the shape of the skin onto the other
bottom skin. Trace the shape of the skin onto the
two top wing skins. It is not an exact match, but
this will offer an excellent starting point.
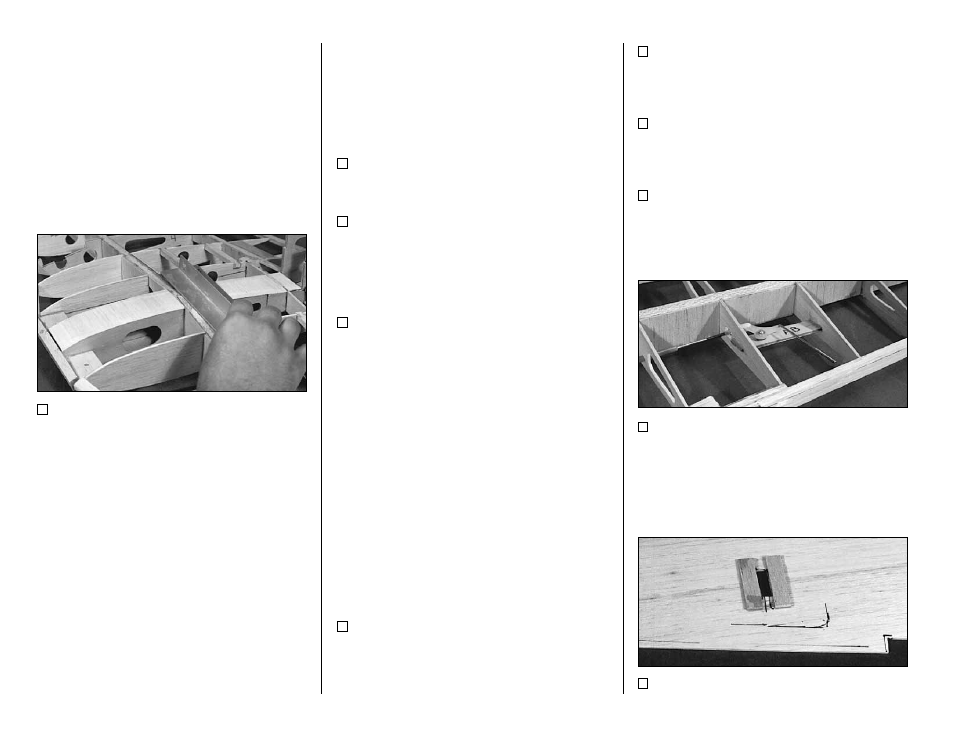
11. Make the outer aileron pushrods by
p u t t i n g a Z - b e n d i n t w o o f t h e . 0 7 4 x 1 2 "
Threaded End Pushrod Wires to match the
length shown on the wing plan.
12. Enlarge the outer hole in the aileron
bellcrank with a 5/64" drill bit. Hook the pushrod
up to the bellcrank. Make certain the Z-bend
can’t bind against the bellcrank plates.
1 3 . M a k e c u t - o u t s t o a l l o w t h e a i l e r o n
- 22 -