Top Flite TOPA0110 User Manual
Page 31
1/8" plywood former F-11, making it a notch. Test
fit F-11 into the fuselage. Make adjustments to
the notch if necessary. Glue in F-11.
45. Lightly sand a 22" length of outer pushrod
tube and feed it through the elevator pushrod
holes in the formers. Glue it to formers F-7
through F-10. NOTE: Refer to the plans for the
location of the aft end of the tube. It protrudes
past F-11 about 1/4".
46. Cut two 2" lengths of 1/4" balsa triangle
stock and use them to reinforce the joints of TW
and the fuselage sides (see photo below).
47. Cut two 11-1/4" lengths from the supplied
1/4" x 36" triangle stock. Test fit these in the aft
f u s e l a g e a s s h o w n . N o t i c e o n t h e p l a n s
(sideview) that they stop 1/2" short of the aft end
of the fuselage sides. Glue them in place.
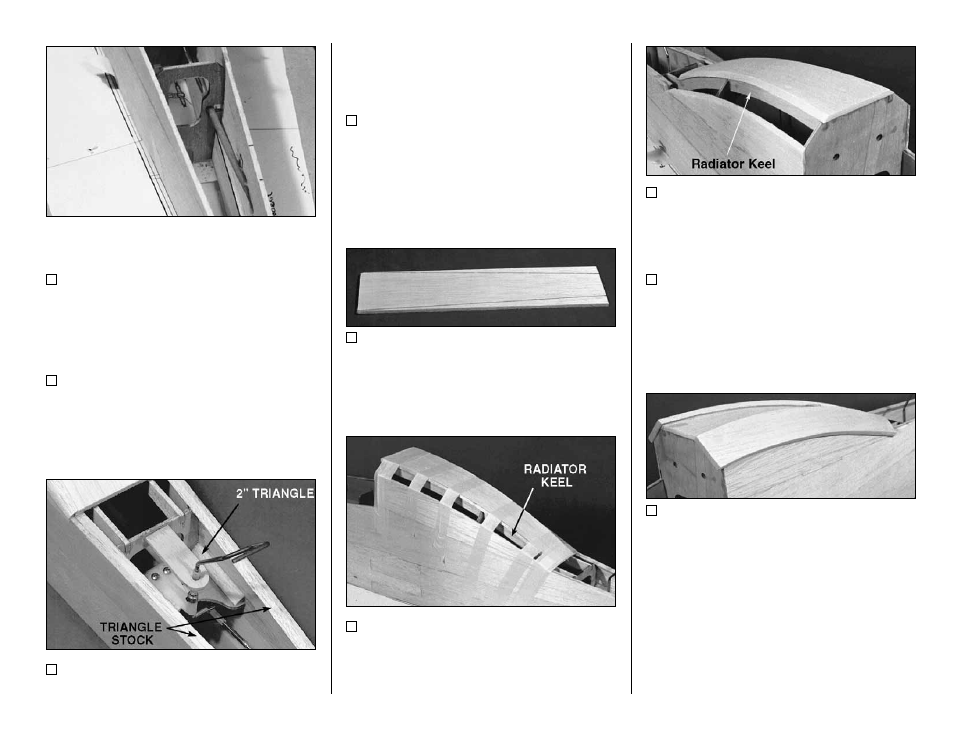
48. Test fit the die-cut 1/8" balsa Radiator
Keels into the slots in F-8, F-9, and F-10. You
may be required to shorten them slightly. Glue
them in place (see the photos at steps 50 and
51).
49. Cut an 11-3/4" length from the 3/16" x 3"
x 24" soft balsa Aft Fuse Bottom Sheet. Cut it
down until it is just wider than the two Keels.
50. Wet the sheet with water. Apply medium
CA glue to the keels, F-8, and F-9. Pull the sheet
into place with multiple pieces of masking tape.
Allow the wet wood to dry thoroughly.
51. Use a knife, a razor plane, and a coarse
sanding block to bevel the radiator sides and
bottom as shown. Look at the cross-sections on
the fuselage plans for reference.
52. Use the pattern provided on the plan to
cut two Radiator Corners from the 1/4" x 2" x 24"
soft balsa sheet.
5 3 . G l u e t h e R a d i a t o r C o r n e r s t o t h e
fuselage. Wetting these parts may be required,
depending on the wood. You may wish to use
tape to hold these parts down while the glue sets.
NOTE: At this point, you should
remove the fuselage from the building
board and reinforce difficult to reach
glue joints from the inside.
- 31 -