Top Flite TOPA0110 User Manual
Page 39
13. Mark the locations of the mounting bolts
f o r y o u r e n g i n e m o u n t . Y o u m a y f i n d i t
convenient to also mark locations for the fuel
lines and the throttle pushrod at this time. Drill
pilot holes for the bolts.
14. Check the fit of F-1A to the fuselage in
front of F-1B. Slide F-1C into place behind F-1A.
The tops of F-1A and F-1C should be even.
Make any needed adjustments to F-1A until it fits
well.
15. Spread a film of 30-minute epoxy over
the back of F-1A and the front of F-1B and F-1C.
Assemble all the parts into position. Make sure
there is a fillet of epoxy gluing the firewall
assembly to the Crutch and the fuselage sides.
Clamp all the parts in position until the glue has
set.
16. This is a good time to do additional fuel
proofing inside the nose section.
17. Finish drilling through the pilot holes in
F-1A for the engine mount bolts.
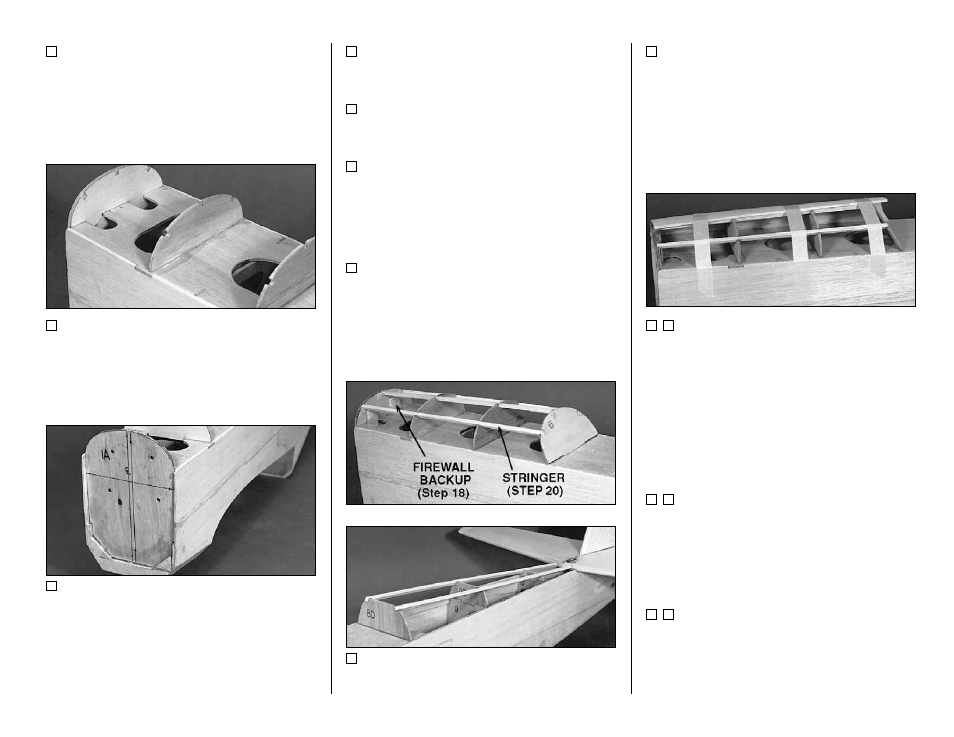
18. Locate the two 1/8" x 3/4" x 3" plywood
Firewall Backup pieces. Position these so they
will backup the engine blind nuts or soft mounts
on the backside of the firewall. Glue them in with
epoxy (see the photo at step 20).
19. If you have all your engine/mount parts
available, install them temporarily now and pull
any blind nuts, etc. into place.
20. Install the 3/16" square balsa stringers
into the slots on top of the fuselage.
21. Cut the two Forward Deck pieces out of
t h e 1 / 8 " x 3 - 1 / 2 " x 3 0 " b a l s a s h e e t . A n
approximate pattern is provided on the fuselage
plan sheet.
22. Glue a forward deck sheet to the
fuselage along the top edge of the fuselage side.
Wet the deck using a damp paper towel. Apply
glue to the formers and stringers. Bend the wood
around and attach it to formers F-2 and F-4 first.
You may hold it in place with masking tape.
23. Hold the deck so it conforms with F-6.
Apply some additional thin CA to the joint. Then
hit it with threadlocker.
24. Holding the deck so it conforms with
F-1, apply some additional thin CA to the joint.
Then hit it with threadlocker. Trim the sheeting
along the centerline of the top stringer (see the
photos on the next page).
- 39 -