Top Flite TOPA0110 User Manual
Page 34
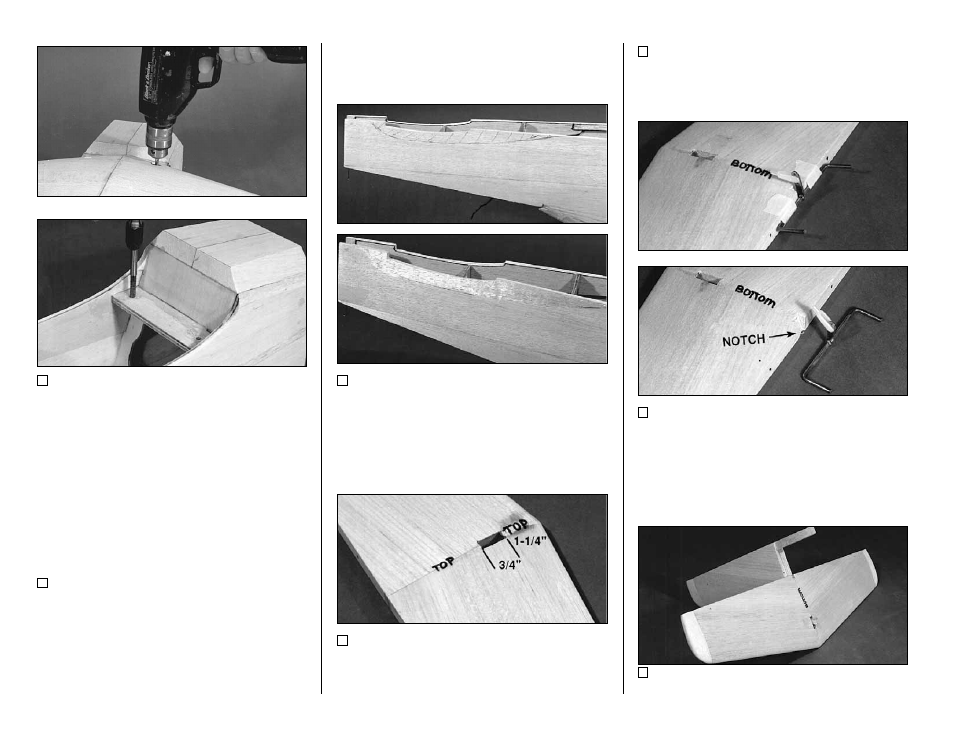
9. Drill through the two holes in the Wing Bolt
Plate and through the Fuselage Bolt Plate with a
#10 drill (or 13/64"). Remove the wing and tap
the holes in the Fuselage Bolt Plate with a
1/4-20 tap. Wick some thin CA into the threads to
harden them. Allow the CA to cure fully. Run the
tap through the threads again to clean up the
threads. Drill out the holes in the Wing Bolt
Plate with a 17/64" bit.
10. Bolt the wing to the fuselage. Check to
be sure the dowels at the TE of the wing are
centered in the slots. Apply medium CA to the
dowels at the slots and allow to cure. Remove
t h e w i n g a n d m a k e s u r e t h e d o w e l s a r e
thoroughly glued in.
ATTACH THE STAB AND FIN
1. For scale accuracy, the fuselage sides in
the area of the stab saddle need to be contoured.
Study the cross sections on the plans as well as
the photos. Razor plane and block sand the
fuselage to obtain the proper shape.
2. Mark one side of the stab to be the top (it
doesn’t really matter which). Put a mark 1-1/4"
behind the leading edge at the center of the stab.
Put another mark 3/4" behind that one.
3. Use a sharp knife to cut a slot in the stab
skin between the two S-1 stab ribs and between
the marks. Cut the same slot in the bottom skin.
4. Make a notch favoring the bottom of the
stab to allow the horn on the bent wire elevator
joiner to protrude into the stab and rotate for up
and down elevator control (see the photo and
fuse side view plan).
5. Make sure the fin LE will fit through the slot
- 34 -