Top Flite TOPA0110 User Manual
Page 27
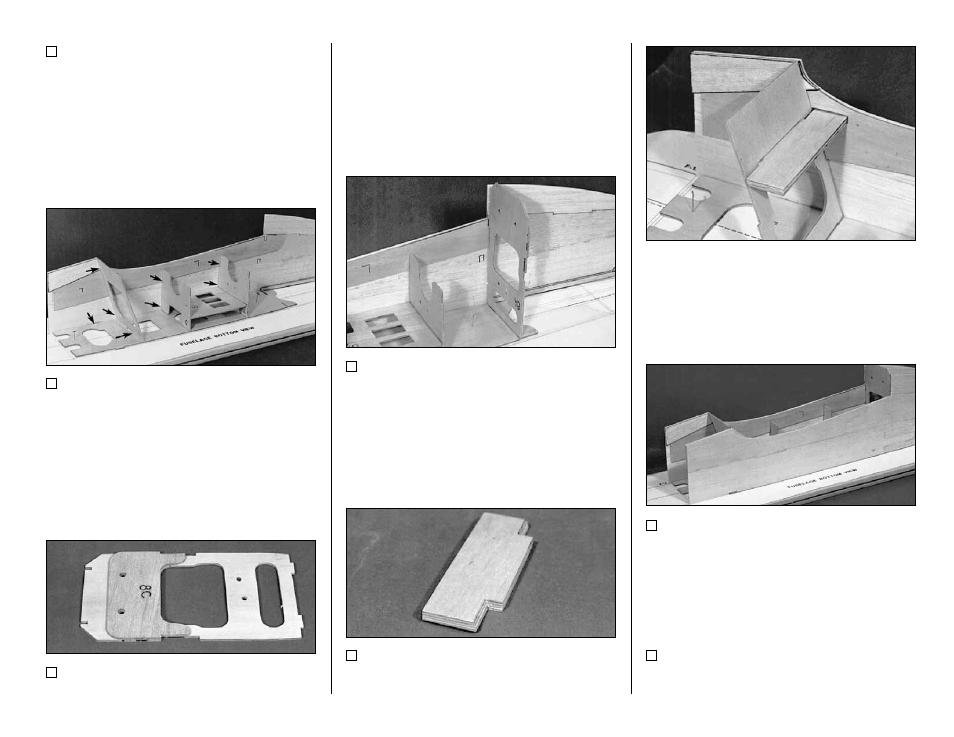
14. Place the die-cut 1/8" plywood former F-3
in its slot but do not glue it yet since its forward
slant is set by the fuselage sides.
NOTE: It is helpful to keep some
weights on the crutch while building
the fuselage to keep it flat on the table.
15. Place the left fuselage side in position.
Make sure its edge is down on the building board
and tack glue it at the following places: at the lock
notch near the front of the crutch; at the “bottom”
edge of F-3 near the front edge of the wing
saddle; at the top and bottom of F-7; and at the
top and bottom of F-5. Also glue F-3 to the
Crutch.
16. Glue the die-cut 1/8" plywood sub-former
F-8C to the Aft face of the former F-8A. The 1/4"
holes should line up. This assembly is now called
F-8.
17. Glue former F-8 to the Crutch. Tack glue
F-8 to the plywood doubler near the notch.
18. Test fit the 1/4" Fuselage Bolt Plate into
the fuselage structure. It may be necessary to
bevel the forward outboard edges slightly for an
interference-free fit. When it fits well, tack glue it
into the structure with CA.
19. Work the right fuselage side into place.
Check to see that all the notches are properly
engaged and if need be, make adjustments.
Apply thin and/or medium CA to all the joints
between F-3 and F-7.
20. Glue F-8 to both fuselage sides from the
wing saddle area to the middle of F-8, but do not
worry about gluing it near the crutch yet.
- 27 -