Top Flite TOPA0110 User Manual
Page 30
36. Make sure the fuse is centered over the
plans and use a couple of pins to hold it there.
When it is aligned, apply a generous bead of
medium CA to the joints of the fuselage sides,
F-10, and TW.
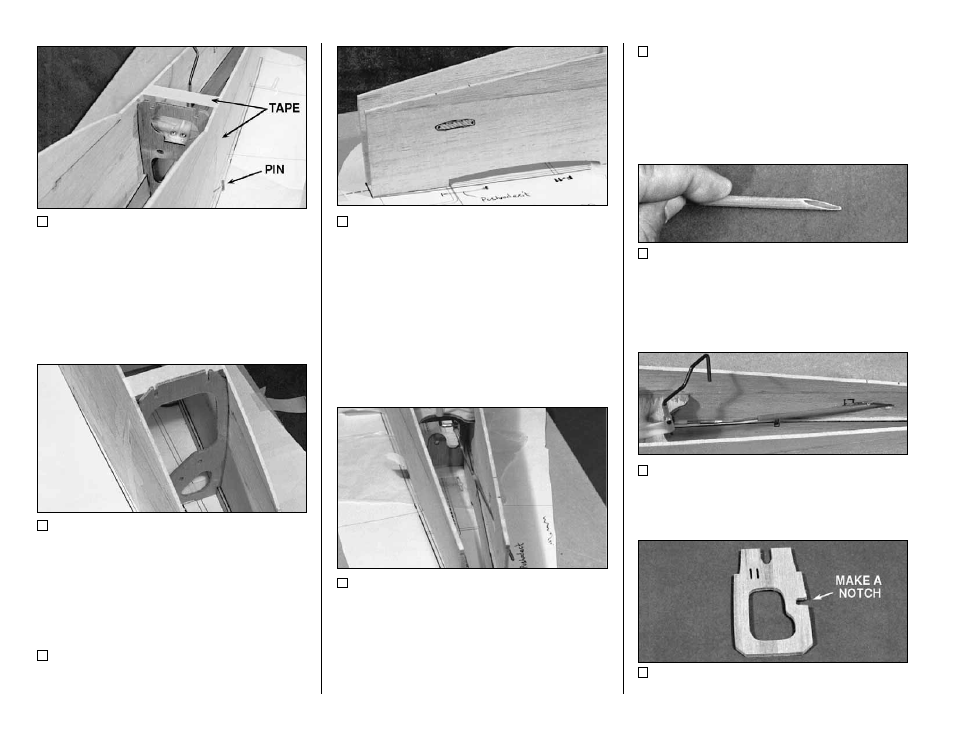
37. Fit F-9 into position over its location on
the plans and hold it with tape using the same
technique you used with F-10. Make sure it is
vertical with its number facing forward. Glue it in
with medium CA.
38. Glue the unglued portion of F-8 and the
aft end of the crutch to the fuselage sides.
39. Mark and cut-out the rudder pushrod exit
where shown on the fuselage plans. Bevel the
exit with a sharp knife at its front from the inside
and at its back from the outside to allow the outer
pushrod tube to exit at the angle shown on the
plans.
40. Work the wire portion of the rudder
pushrod through the exit, then through the rudder
pushrod holes in all the formers forward through
F-7. Hook up the ball link to the tailgear ball.
You may need to make a slight outward bend in
the pushrod wire just aft of the ball link to allow it
to exit without binding.
41. Work a lightly sanded 17-1/4" long Outer
Pushrod Tube through the formers around the
wire, starting at F-7 and ending at F-10. Glue the
outer pushrod tube to formers F-7, F-8, and F-9,
but not F-10.
42. Cut a 5" long piece of outer pushrod tube
and lightly sand the outside. For best results,
taper one end as shown.
43. Test fit the tube into the pushrod exit and
make sure the balsa wood is adequately cleared.
Glue in the tube.
44. Cut into the pushrod hole in the die-cut
- 30 -