Checkline TI-MVX User Manual
Page 31
3) Press the ENTER key to display the list of stored setups.
4) Press the UP and DOWN arrow keys to scroll through the list of setups until
the appropriate setup is highlighted.
5) Press the ENTER key to display the confirmation screen.
6) Press the OK key to select the setup and return to the menu screen, or ESC
to cancel the selection process.
7) Press the MEAS key to return to the measurement screen.
Alternatively, the measurement mode can be simply selected from the Hot Menu
Items or selected from a sub menu feature as follows:
Hot Menu Selection
1) Press the MEAS key once to activate
measure menu items. Press the MEAS
key multiple times to move right and the
ESC key multiple times to move left, until
the MODE cell is highlighted.
2) Use the UP, DOWN, LEFT, or RIGHT
arrow keys to scroll the modes P-E (pulse-echo flaws and pits), P-E GT (pulse-
echo flaws and pits w/gate), and E-E (echo-echo thru paint w/2 gates) until the
target mode is selected.
Finally, the measurement mode can be selected from the menu items as follows:
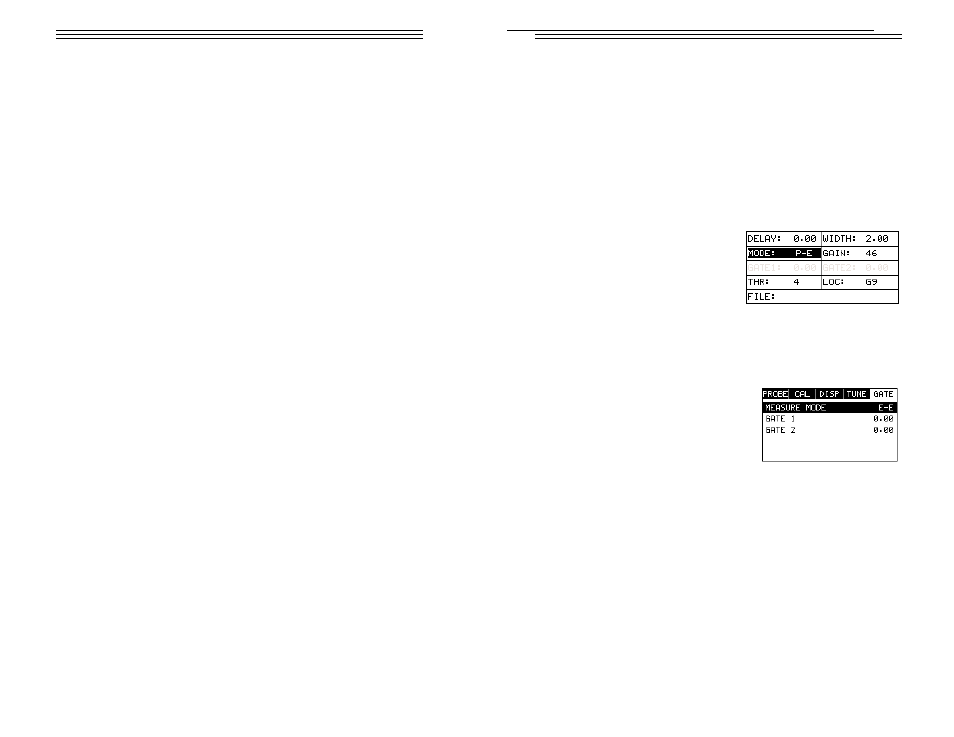
Selected Using The Tabbed Submenu Items
1) Press the MENU key once to activate the
menu items tab. Press the MENU key multi-
ple times to tab right and the ESC key multi-
ple times to tab left until the GATE menu is
highlighted and displaying the submenu
items.
2) Use the UP and DOWN arrow keys to
scroll through the sub menu items until MEASURE MODE is highlighted.
3) Use the LEFT and RIGHT arrow keys to scroll the mode options. Once the
mode is displayed, press the MEAS key to return to the measurement mode
screen.
-31-
7) Repeat steps 5 & 6 until the Threshold number is correctly displayed.
8) Press the OK key to set the Threshold and return to the menu screen, or
ESC to cancel entering the Threshold.
9) Finally, press the MEAS key to return to the measurement screen and begin
taking readings.
7.6 Gates
The TI-MVX is equipped with two gates that can be adjusted by the user to
measure a specific region or area on and between waveforms. In pulse -echo,
only a single gate can be used. The single gate has a threshold and a start
point. In echo -echo mode, two gates are used. The same threshold level is
associated with both gates. The first gate has a starting point and threshold, and
the second gate has a start time that is determined by adding an adjustable
HOLD OFF, or delay, to the return echo measured by the first gate. These
features are described in more detail below:
Note: In order to adjust the gates they must be activated. The gates will only be
active if the measurement mode is set to P-E GT (pulse – echo w/gate1), or E-E
(echo – echo w/ gates 1&2). If the gates are not active, they will be grayed out in
the hot and tabbed menus. The explanations that follow assume that the proper
measurement mode has been selected. Refer to page 26 for additional informa-
tion on selecting the measurement mode.
Gate 1
GATE 1 is used in both pulse-echo and echo-echo modes. It has a threshold and
a start time. The purpose of GATE 1 is to prevent the TI-MVX from measuring
unwanted surface noise. This is accomplished by changing the start time of
GATE 1. It may be advantageous to activate a gate when measuring aluminum,
titanium, and stainless steel using lower frequency transducers. However, if a
high frequency transducer is being used, the gate may not be necessary.
Aluminum sometimes has an inherent surface noise problem that can cause
erroneous readings from the noise just following the initial pulse. By blocking the
surface noise with GATE 1 this error is eliminated. GATE 1 is also used in echo -
echo mode to force the TI-MVX to measure between the first and second back
wall echoes, by moving the start to the first back wall reflection of the test mate-
rial.
The procedures to adjust Gate 1 are outlined below:
-50-