Checkline TI-MVX User Manual
Page 17
Alarm Status: Toggles alarm mode on or off. Refer to page 75 for further info.
Alarm LO Limit: Gives the user the ability to set the LO limit parameter. If the
measurement falls below this value, a red light will illuminate and sound the
internal beeper. Refer to page 61 for further info.
Alarm HI Limit: Gives the user the ability to set the HI limit parameter. If the
measurement exceeds this value, a red light will illuminate and sound the inter-
nal beeper. Refer to page 61 for further info.
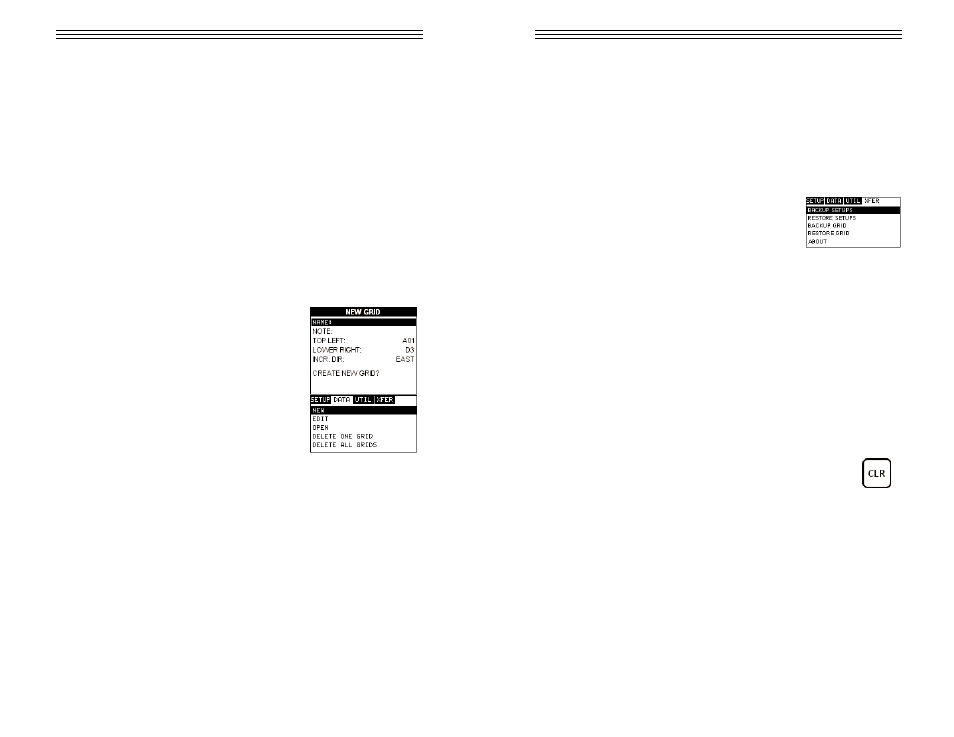
3.10 XFER (transfer) – Menu
Backup Setups: Enables the user the ability to backup
the setups currently stored in the TI-MVX to a PC via
RS232 port. Refer the help section of the MVXview
software for a complete electronic manual.
Restore Setups: Enables the user the ability to restore the setups currently
saved on a PC to an TI-MVX via RS232 port. Refer the help section of the
MVXview software for a complete electronic manual.
Backup Grid: Enables the user the ability to backup grids currently stored in the
TI-MVX to a PC via RS232 port. Refer the help section of the MVXview software
for a complete electronic manual.
Restore Grid: Enables the user the ability to restore grids currently saved on a
PC to an TI-MVX via RS232 port. Refer the help section of theMVXview software
for a complete electronic manual.
About: Provides the user with CHECK-LINE contact information and the TI-MVX
software version. Refer the help section of the MVXview software for a complete
electronic manual.
3.11 CLR (clear) Key
The primary functions of the CLR key, is to clear a measurement from
a grid cell location or set obstruct, and backspace in an Alpha Edit
Box. If a user has already saved a measurement and waveform to a
cell location, use this key to clear the measurement at any time.
-17-
CHAPTER TEN: DATA STORAGE – SETUP, EDIT, & VIEW GRIDS
10.1 Introduction to Grid (spreadsheet) format
Data is stored in the TI-MVX in a spreadsheet like format called a GRID. A GRID
is simply a table of readings. The location in a grid is specified by giving a row
and column coordinate. The rows are numbered from 1 to 99 and the columns
are labeled from A to Z, then AA to ZZ giving a maximum of 52 possible
columns.
The largest grid that can be held in the TI-MVX is limited by the total memory of
the TI-MVX. Multiple grids can be created and stored until the TI-MVX’s memory
is full. If the user attempts to store a grid in the TI-MVX when the memory is full,
the TI-MVX will respond with an error message indicating that the memory is
unable to store the new grid.
The TI-MVX can store a total of 12,000 readings with a corresponding waveform
stored with every reading. The waveform stored with the reading will depend on
what view the TI-MVX was in at the time it was saved. For example, If the view is
RECT, then a rectified waveform will be saved with the reading.
10.2 Creating a new Grid
Important Note: This entire section is a step by
step guide to successfully create a grid. The
instructions must be used in the sequential order
specified, as follows:
Creating a Grid Name
1) Press the MENU key once to activate the menu
items tab. Press the MENU key multiple times to
tab right, and the ESC key multiple times to tab
left, until the DATA menu is highlighted and display-
ing the submenu items.
2) Use the UP and DOWN arrow keys to scroll
through the sub menu items until NEW is highlighted.
3) Press the ENTER key to display the new Grid Edit Box.
4) Use the UP and DOWN arrow keys to scroll through the new Grid List Items
until NAME is highlighted.
-64-