Final setup - test plug procedure, Front of treadmill – Welch Allyn TMX428CP Trackmaster Medical Treadmill - User Manual User Manual
Page 27
TRACKMASTER
Assembly and Setup
July 2014
TMX428 Owner’s Manual
5-5
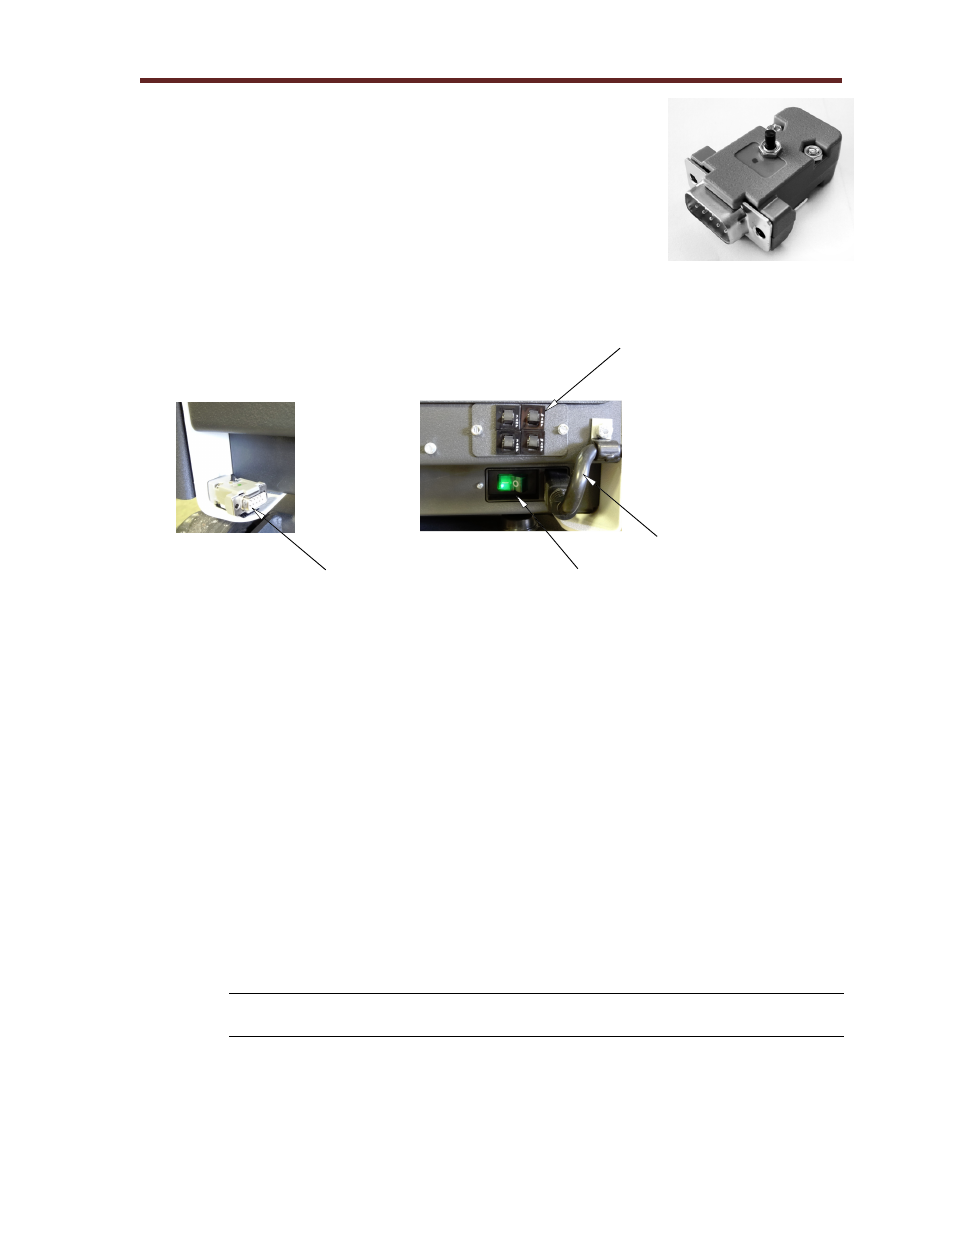
Final Setup - Test Plug Procedure
Each TRACKMASTER
®
TMX428 Series treadmill includes
an RS-232 test plug that enables you to test the operation of
the treadmill without the ECG unit attached. The plug is
located on the left side of the treadmill secured to the frame
by Velcro. The plug is to be used only for testing the
treadmill. Do not stand on or use the treadmill while testing.
To use the test plug, observe the following procedure:
1. Turn the power "OFF" at the treadmill.
2. Disconnect RS232 or USB interface cable from the treadmill and plug in the test
connector.
3. Press and hold the button down on the test connector and turn treadmill power "ON".
Continue holding until treadmill begins to elevate.
4. Once this is initiated, each push of the button should elevate the treadmill by 5%.
5. When the treadmill reaches 20% elevation, the next push of the button will start the
treadmill running belt.
6. Each push of the button the treadmill will increase speed by 2.5 miles per hour.
7. Once the treadmill reaches 10 mph, each push of the button will bring the speed down
2.5 miles per hour and simultaneously lower the elevation by 5% increments.
8. When minimum speed and elevation is reached the next press of the button will cause
the treadmill running belt to stop.
NOTE: Successful completion of the preceding testing procedure ensures that the
treadmill is fully functional and responsive to command signals.
9. Remove the test connector.
10. Reconnect the RS232 or USB interface cable from the host computer. You are ready to
begin the set-up procedure prescribed by your medical test equipment supplier.
Test Plug Located Left Side
Main Power Switch
Incoming Power Cord
Circuit Breaker Array
Front of Treadmill