Step e, X2 x2, Step e-01 q – Losi LOSA0805 User Manual
Page 24
19
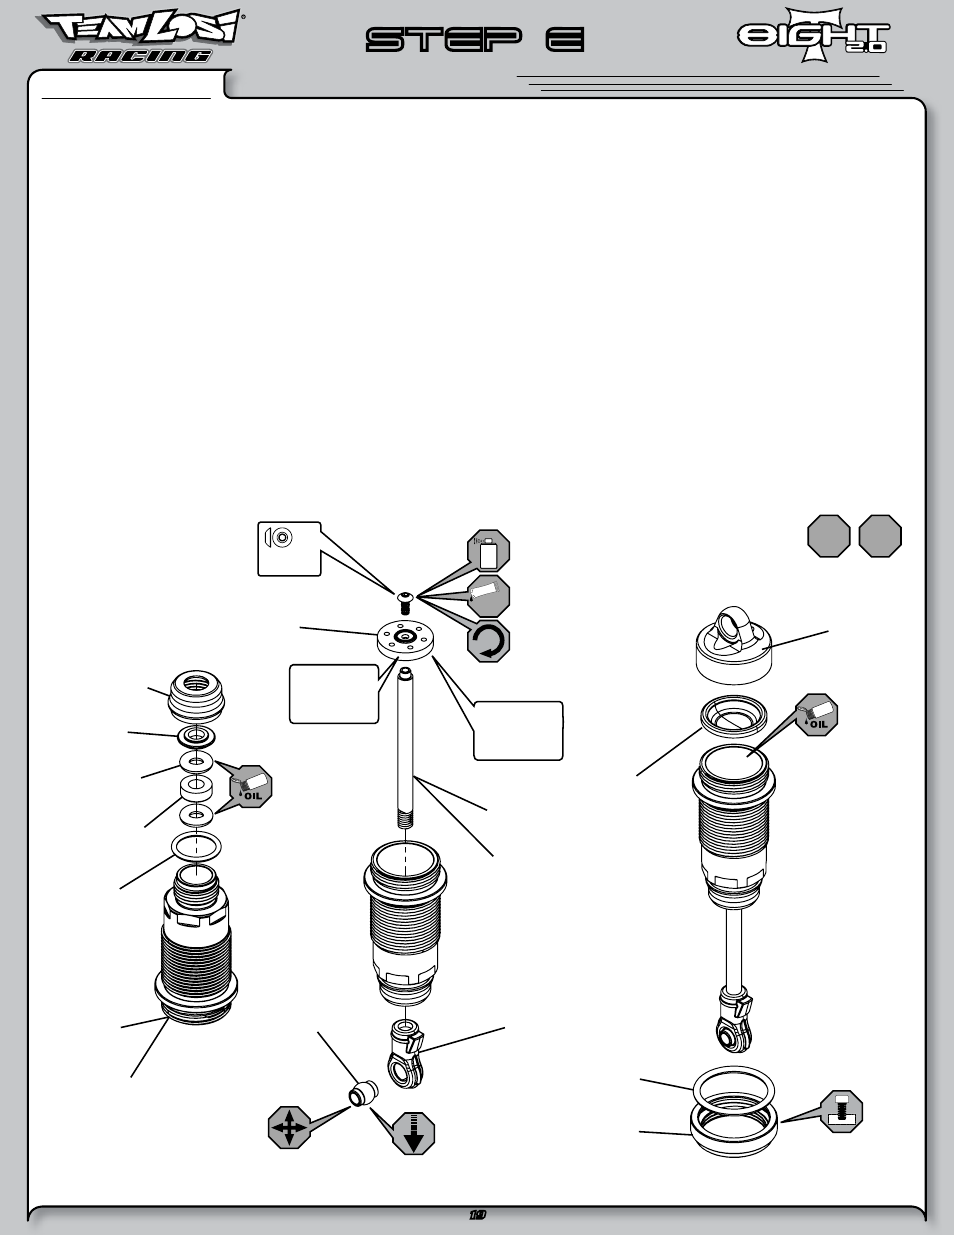
STEP E
Shock Assembly
STEP E-01
q
• Clean the 2-56 x 1/4" Button Head Screw and apply Losi-Lok to the threads.
• Install the #55 Shock Piston on the front shock shaft and a #56 Shock Piston on the rear shock shaft using the 2-56 x 1/4" Button Screw into the
Shock Shaft with a .050" Allen Wrench.
• Place a drop of Shock Oil into the bottom of the Shock Body to lubricate the Shock Seals.
• Thread the Shock Shaft into the Shock End using pliers. Use caution when threading the Shock Ends onto the Shafts. Avoid gouging or scratching
the Shock Shaft while gripping the Shock Shaft with pliers by placing the edge of a towel over the shaft, then gripping the portion of the shaft
covered by the towel. This method will work very well to protect the Shock Shafts from damage.
• Ensure the Shaft is fully extended when filling the shock.
• Fill the Front Shock Body with 35 wt Shock Oil and the Rear Shock Body with 30 wt until the oil is to the top of the body.
• “Work” the Shock Shaft up and down 8 times. This will release the air bubbles trapped beneath the piston. Place the filled shock, in the upright
position, off to the side for a few minutes until the air bubbles escape from the oil.
• Once all the air bubbles are out of the oil, gently place the Shock Bladder onto the shock as shown. Some oil should “bleed” from the shock.
• Screw the Shock Cap onto the Body until some resistance is felt.
• Slowly push the Shock Shaft up. This will bleed excess oil from the shock.
• Tighten the cap all the way down using the shock tools included in your vehicle.
• Move the Shock Shaft up and down. The shaft should be easy to push up into the body of the shock. If increased pressure is felt towards the top,
there is too much oil in the shock. Loosen the Shock Cap and “bleed” the shock as done previously.
• Make sure each pair (front/rear) of shocks has the same rebound and compression. This is checked by holding one shock in each hand horizontally
and pushing them together by the Shock End. Watch carefully to ensure that both compress evenly. Now release both shocks and again watch
carefully as they should rebound the same.
• Install the Shock Adjustment Nut O-ring into the Shock Adjustment Nut before installing the Nut onto the Shock Body.
LOSI-LOK
2-56 x 1/4"
A6255
x 1
x2 x2
Front
Rear
#56
Shock Piston for
the Rear Shocks
#55
Shock Piston for
the Front Shocks
A5421
Shock Cap Bottom
A5440
Shock Piston
A5420
Shock Cap
A5430
Shock Bladder
A5413
Front Shock Shaft
A5415
Rear Shock Shaft
A5435
Shock End
A5435
Shock End Ball
A5424
Shock Adjuster Nut
O-ring
A5424
Shock Adjuster Nut
A5440
O-ring Shield
A5429
Shock Shaft O-ring
A5440
Shock Shaft Bushing
A5429
Shock Bottom Cap
O-ring
A5405
Rear Shock Body
A5403
Front Shock Body