Losi LOSA99059 User Manual
Losi Hardware
8IGHT 2.0/8IGHT-T
2.0 Starter Box
LOSA99059
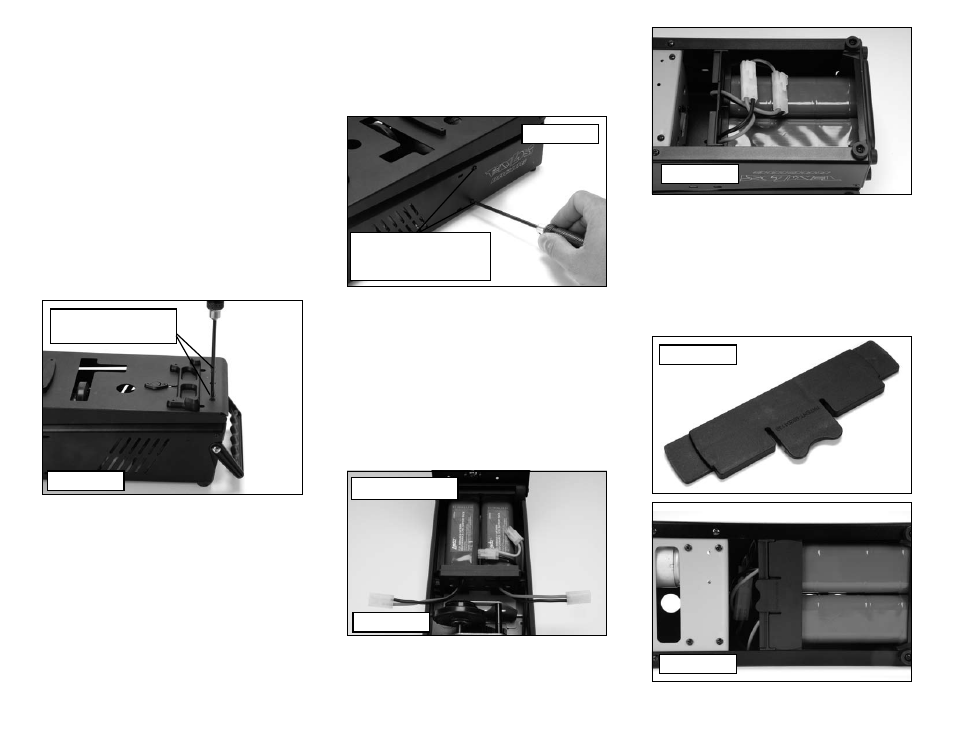
Installing the Battery
You have two battery options to power your
8IGHT
™
2.0 starter box. You can use (2) 7.2 NiMH
battery packs (not included) or you can use
one Losi
®
14.8V 4S LiPo Starter Box Battery (not
included). Preassembled wiring harnesses and
mounting fixtures for both of these power source
options are included. Start by moving the rear
chassis fixture to the forward (buggy) position
and remove the two small Phillips head screws
on the top of the box as shown in Figure 1.
Two 7.2V Battery Packs
It is recommended to use 2 Losi 3600mAh 7.2V
NiMH Performance batteries (LOSB9900) in the
8IGHT 2.0 Starter Box. By using the charger of
your choice follow the manufacturers’ directions
to charge both batteries. On each side of the
box there are two screws that hold the center
battery mount into place. Remove these two
screws on each side of the starter box for a
total of four screws. This will loosen the center
battery mount. The 6-cell stick packs will locate
into the plastic mounts on the rear of the
battery box with a snug fit. Slide wires through
center battery mount and fit center battery
mount over each battery. Now screw all four
screws back into place to secure the batteries.
There are two locations to mount the 6-cell
battery packs, a high and low location. There
is no advantage to either location and it is
personal preference.
High Location Battery Mount
With the batteries mounted in the high location
it will be necessary to plug the batteries into the
leads on the bottom side of the starter box as
shown in Figure 4.
Low Location Battery Mount
In order to use this location you will have to use
the plastic plate that is shown in Figure 5. This
is used between the bottom of the starter box
and the battery packs as seen in Figure 6. The
plate will snap over the center battery mount to
secure its location.
Remove both screws to
open starter box
Remove two screws from each
side of starter box to remove
the center battery plate
High Battery Location
Figure 1
Figure 2
Figure 3
Figure 4
Figure 5
Figure 5