Elecraft PX3 Owner's Manual User Manual
Page 51
51
Replacing the LCD
Remove the front panel board with the LCD display from the PX3 front panel. Place the board on your work
table with the top of the board nearest you. Arrange a book or other object about level with the key matrix
against the bottom of the front panel board to support the LCD when you free it from the key matrix (see
Figure 44).
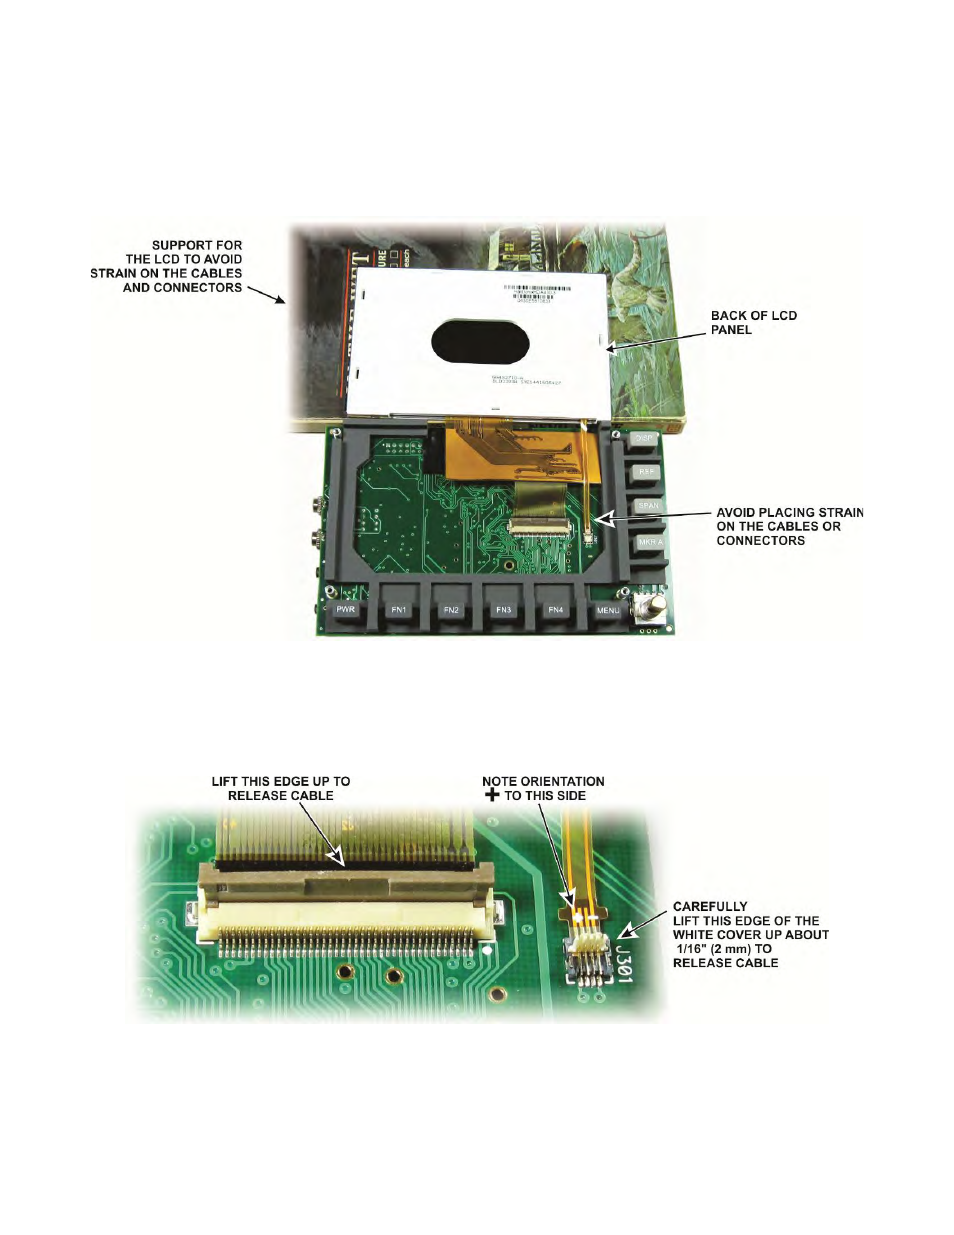
Figure 44. Removing LCD Panel from Rubber Key Matrix.
Gently pry up the top edge of the LCD panel to free it from the switch matrix and fold it over onto the support as
shown. Don’t strain the two delicate ribbon cables or their connectors.
Use a fingernail to open the connectors and free the cables (see Figure 45). Be especially careful with the
smaller connector. Note it opens from the end farthest from the cable. The white latch opens only slightly.
Figure 45. LCD Cable Connectors Opened.
When replacing the cables, be sure the smaller backlight cable is oriented with the
+
as shown.
Gently replace the LCD in the switch matrix. Be sure it is fully seated so the edge of the LCD panel is flush with
the rubber matrix.